
Our work
Roofing projects by ProTech Roofing & Exterior
4.9 stars on Google60+ reviewsFamily-owned12 years of roofing experience
Every photo here was taken on one of our own jobs, many of them by drone. We photograph roofs before, during and after the work so our customers can see exactly what was done.
Before and after
What we found, and how we left it
Each set shows one job before and after the work: a full roof, chimneys, skylights and trim. Click or tap any set to see it full size.
 View this photo set full size (opens in a new tab)
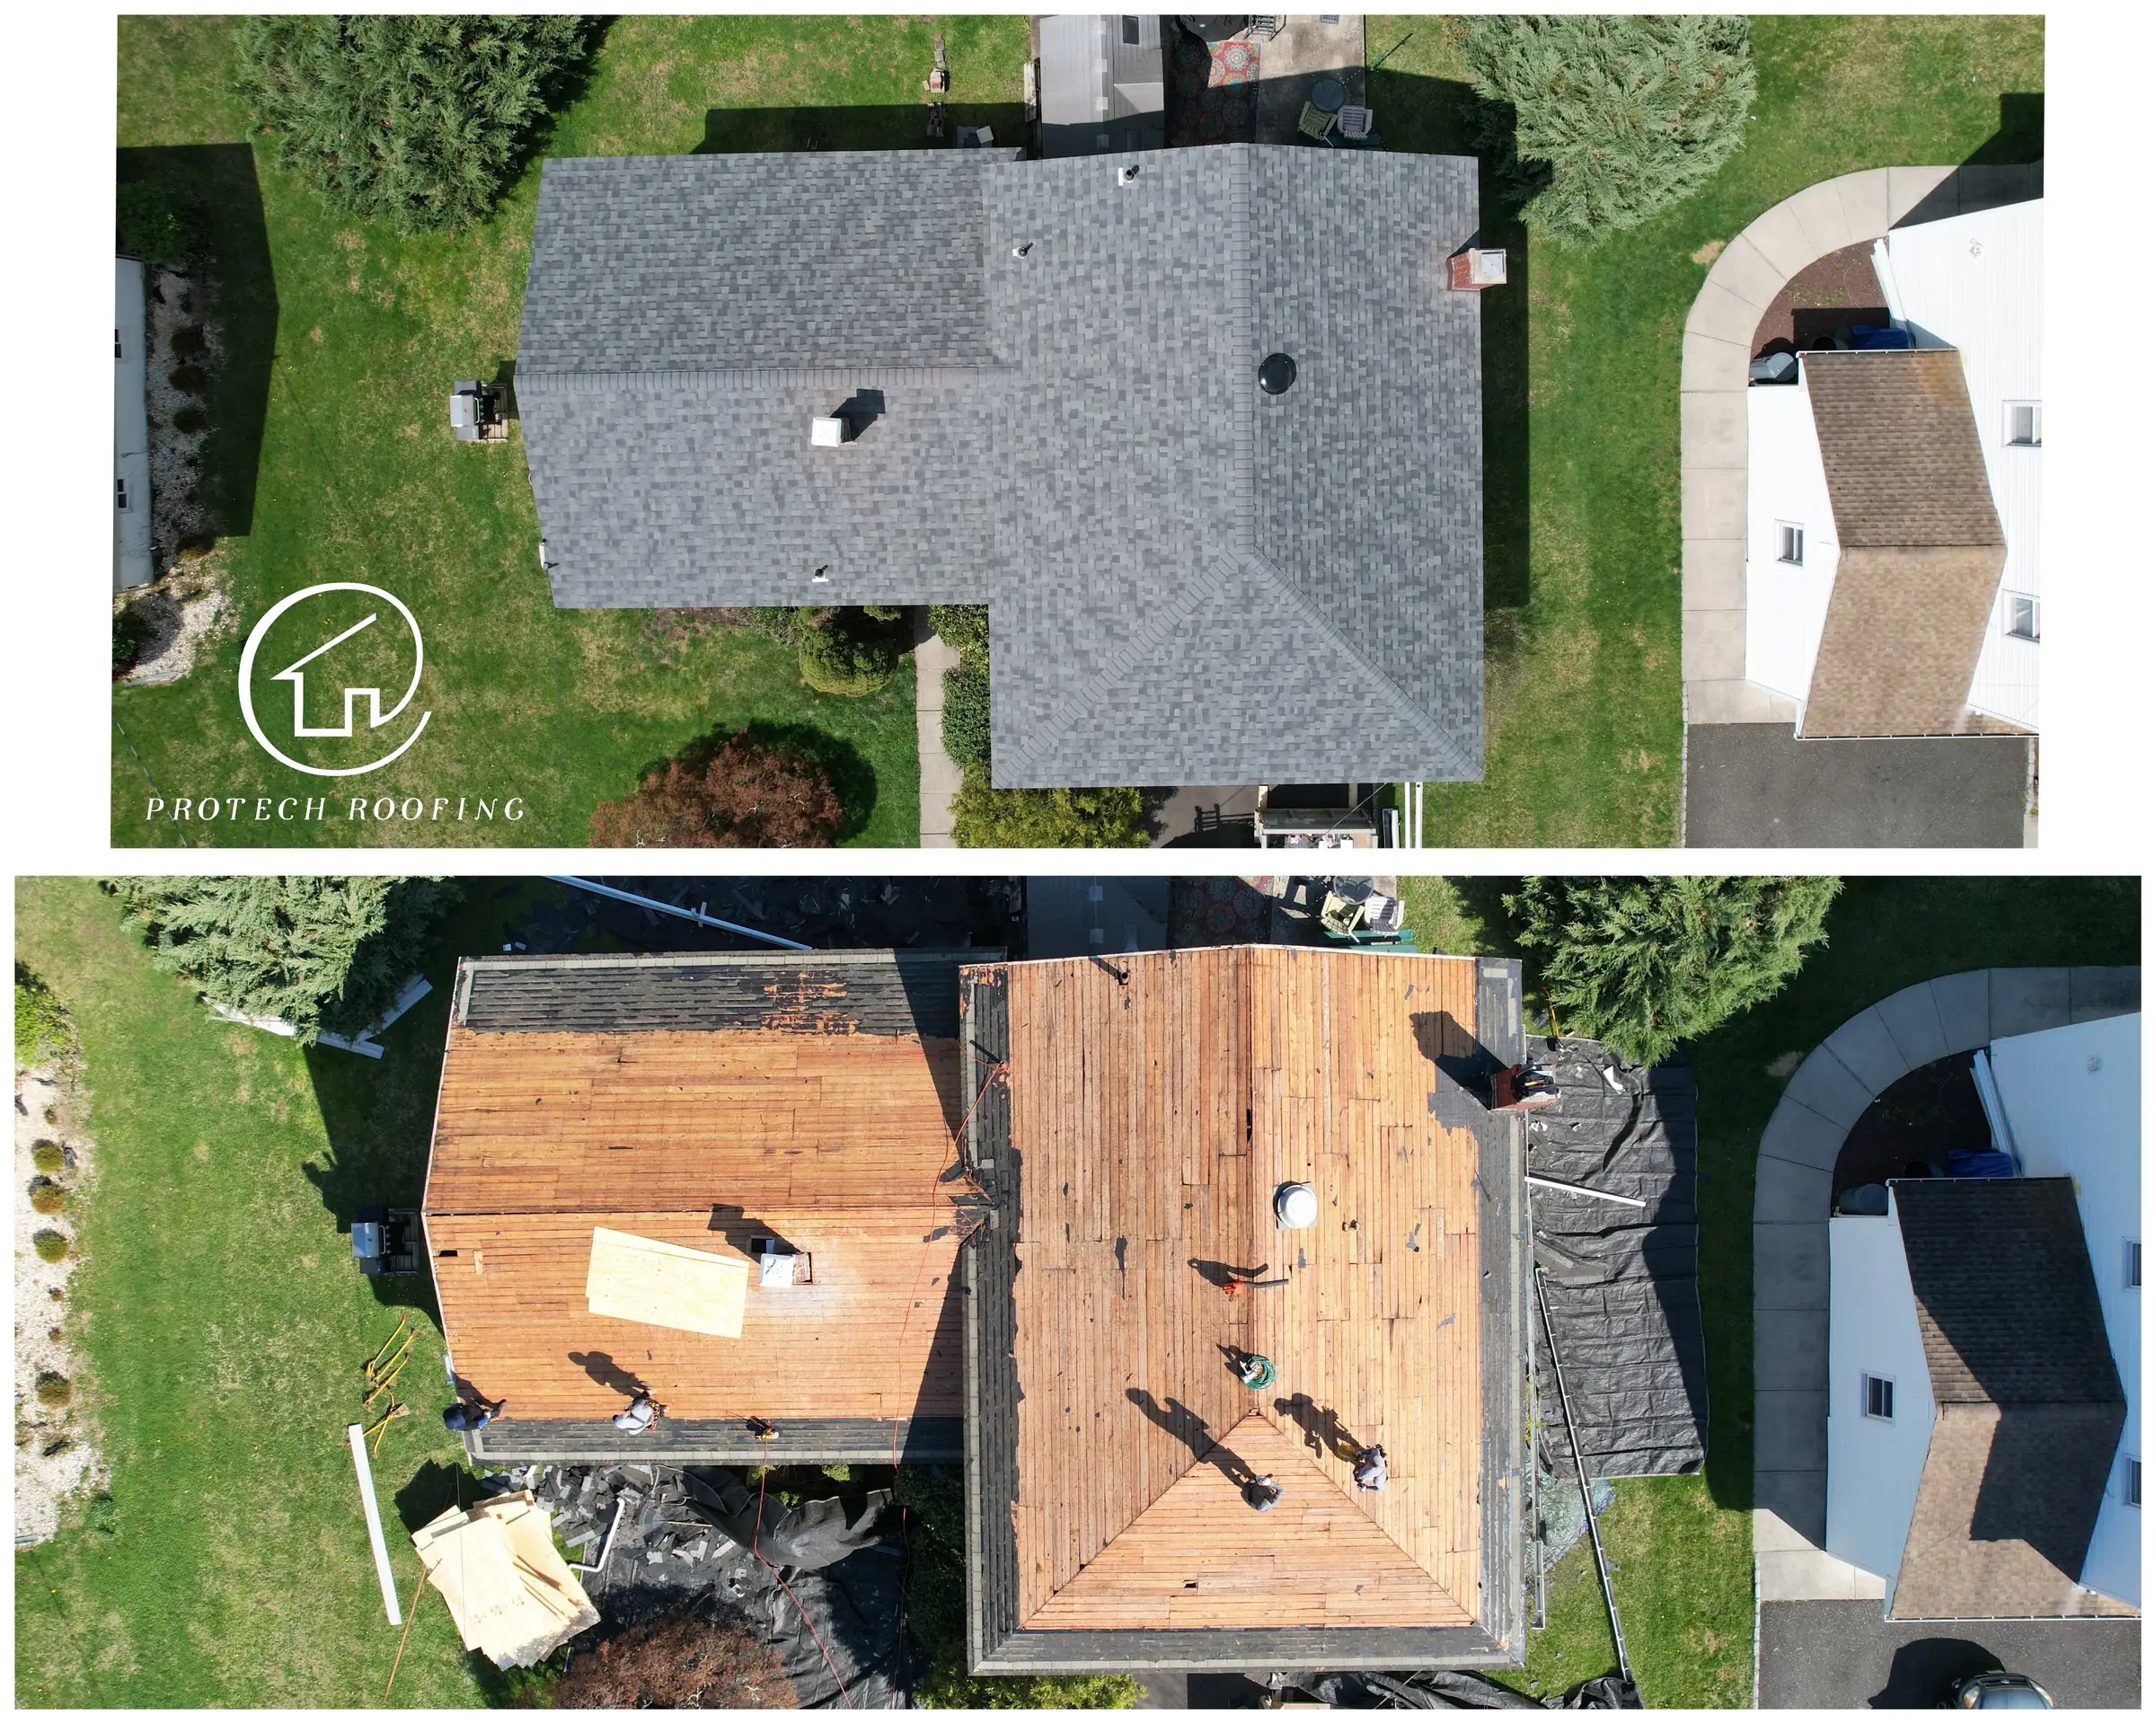
Before, during and after on one house: the old streaked roof, new plywood and synthetic underlayment mid-job, and the finished charcoal shingles.  View this photo set full size (opens in a new tab)
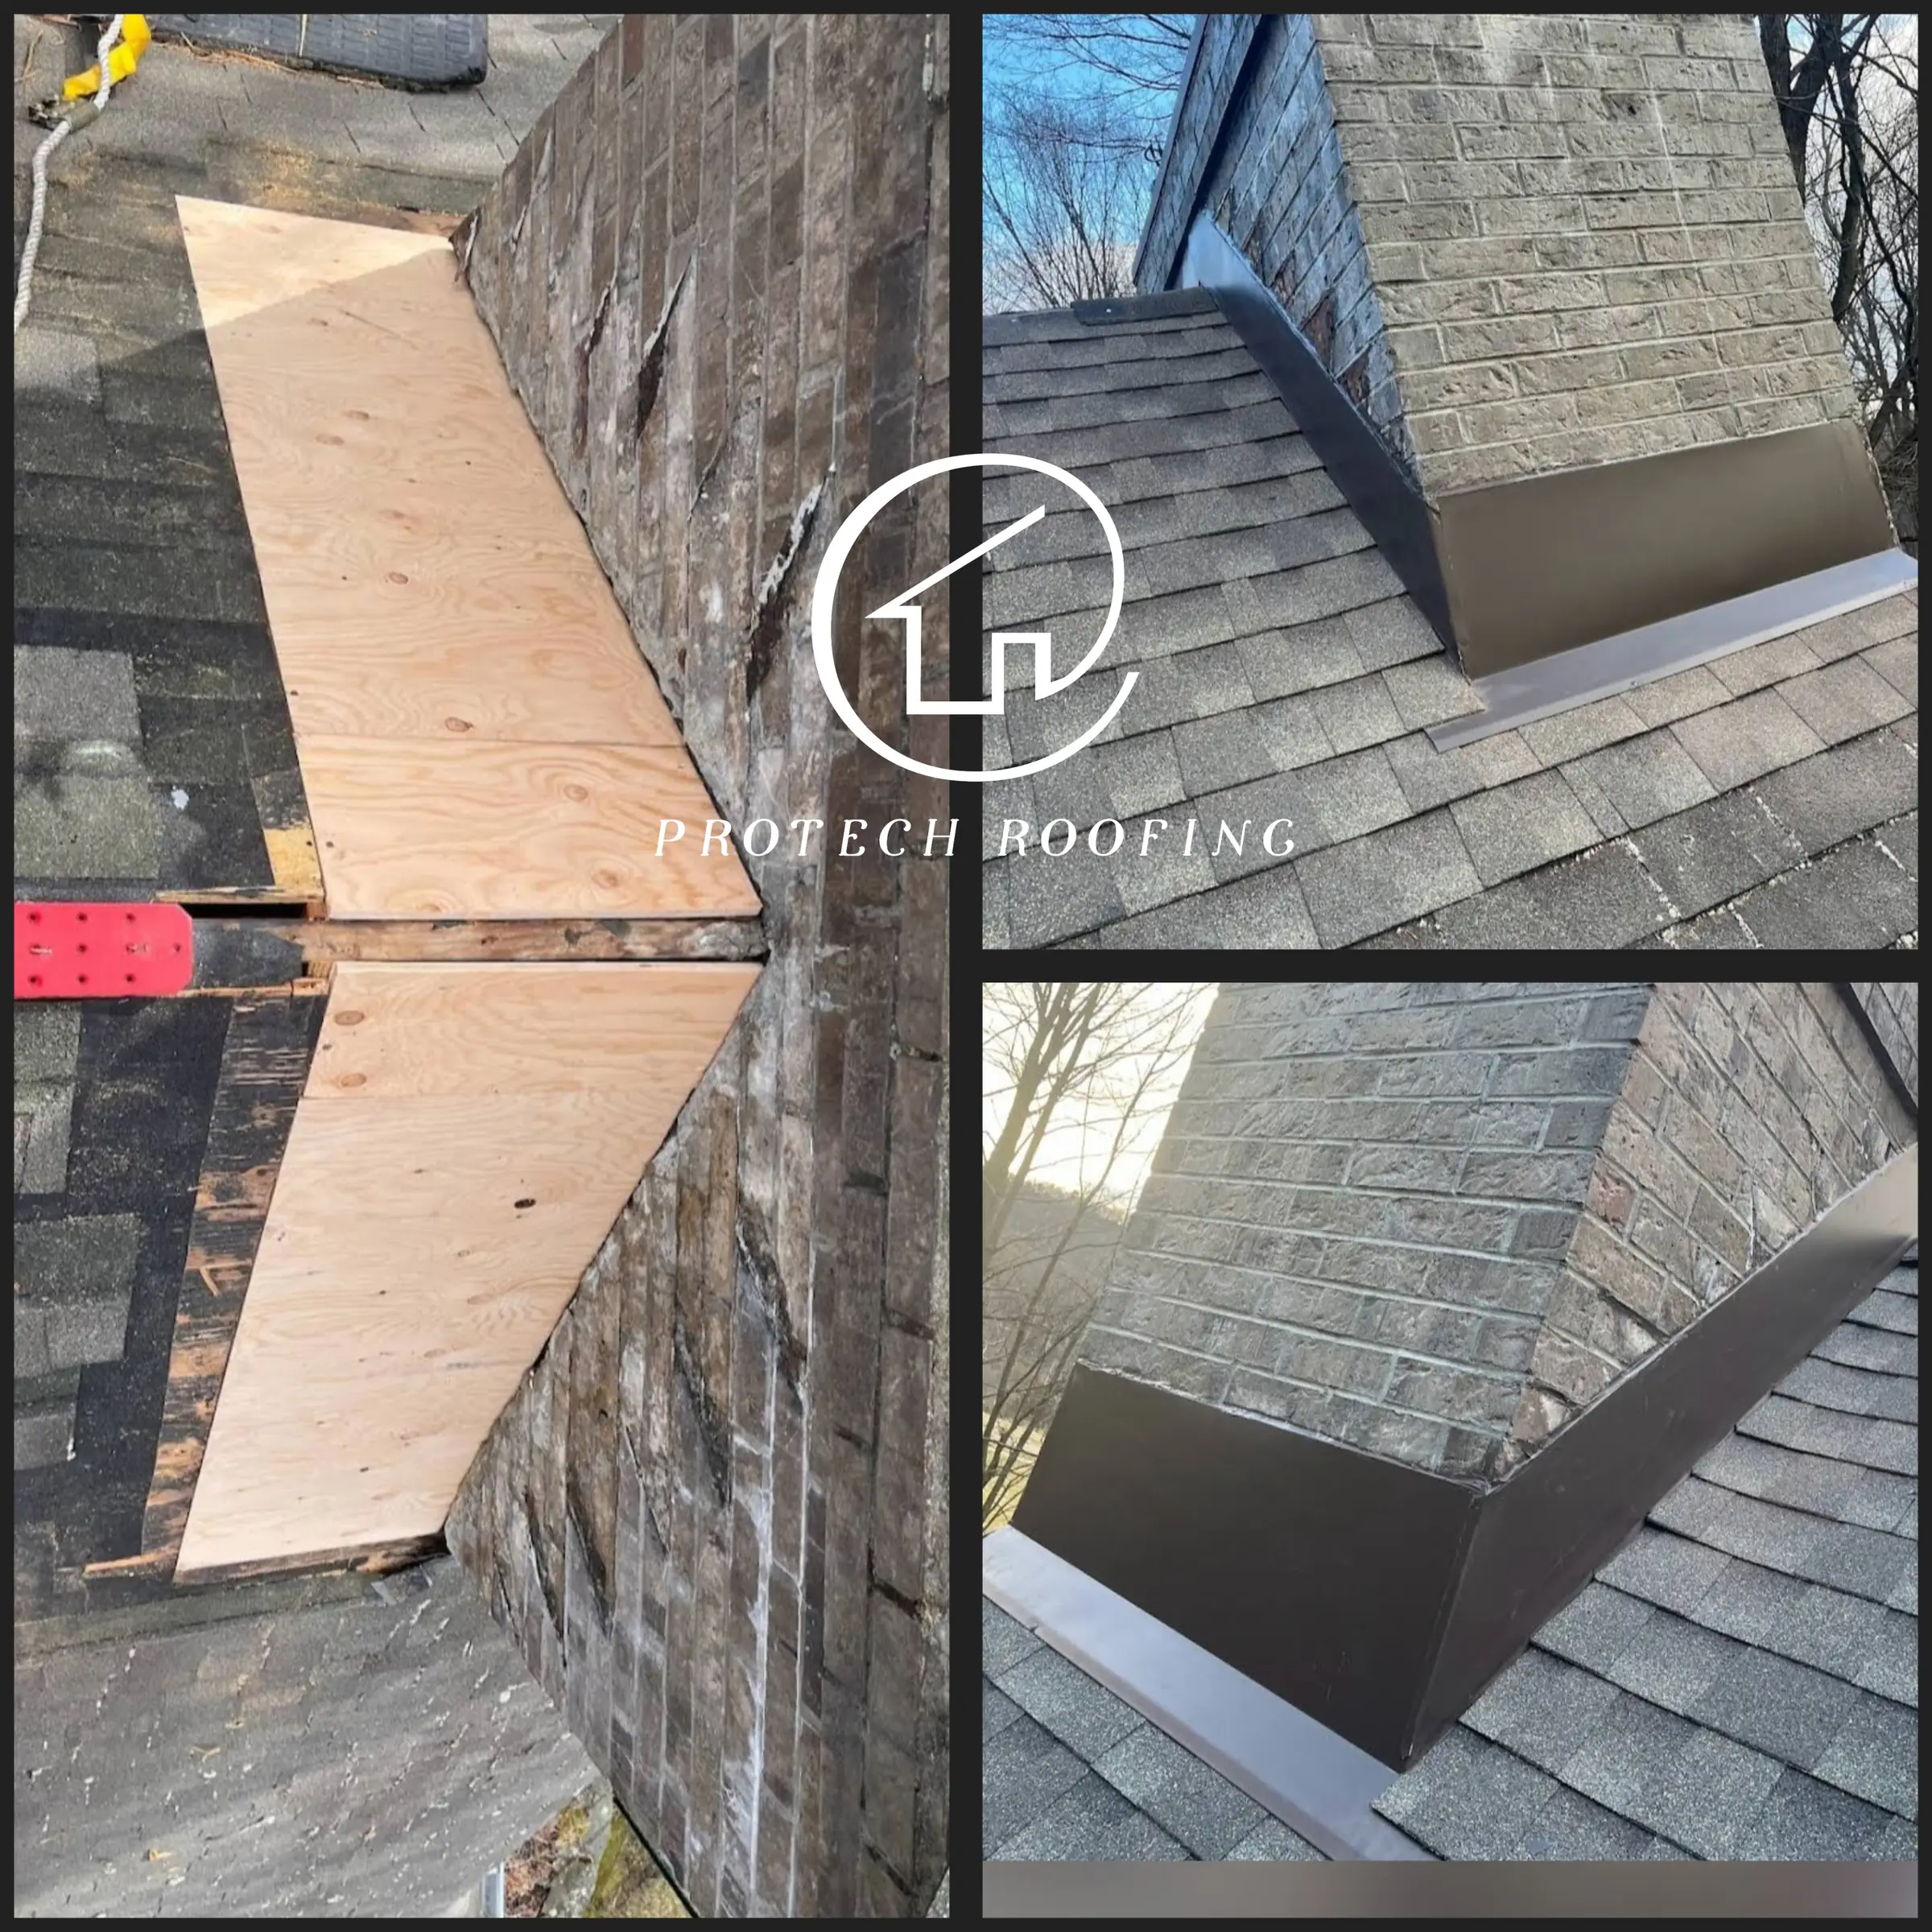
Before: old flashing buried in roof cement. After: new metal flashing and a cricket behind the chimney to split the water. 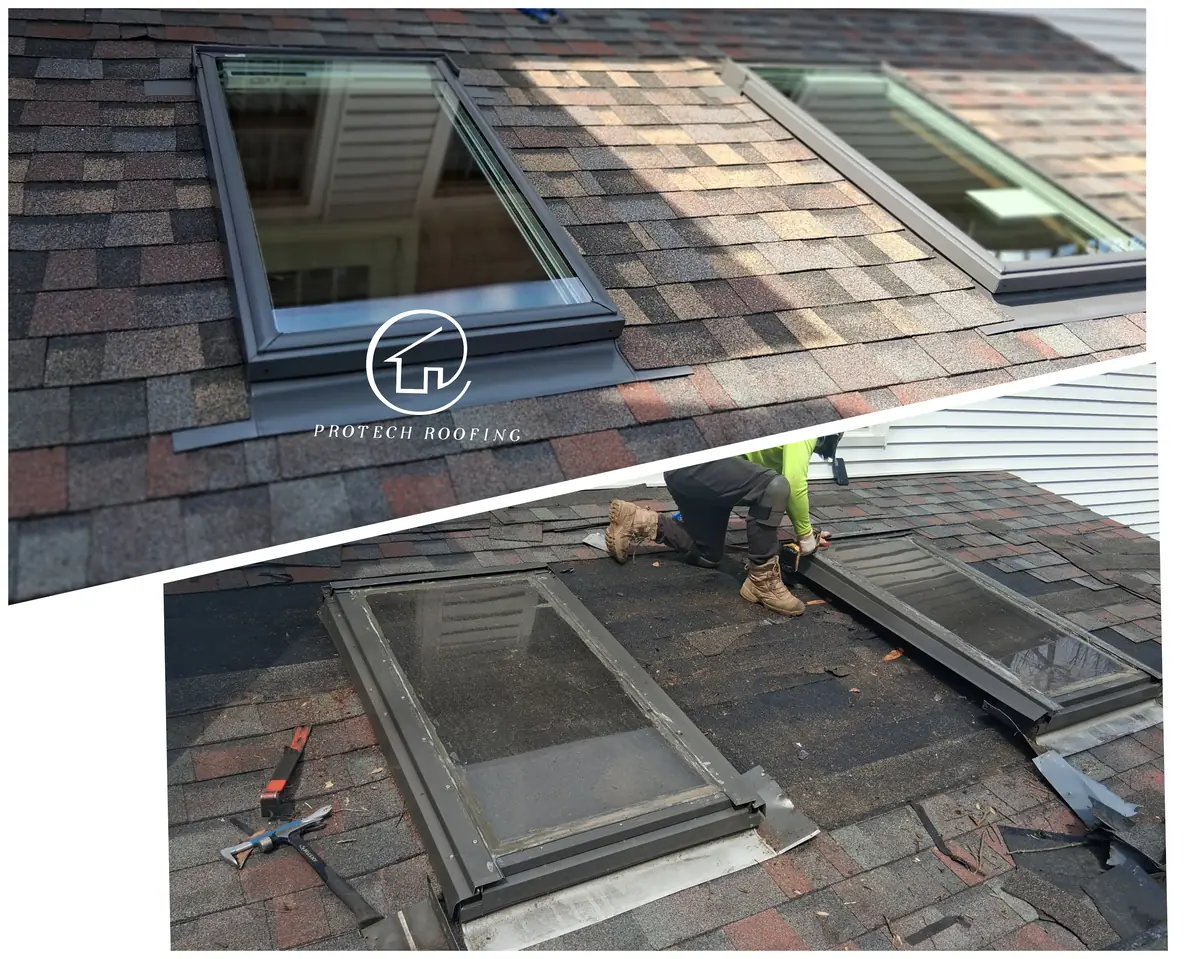 View this photo set full size (opens in a new tab)
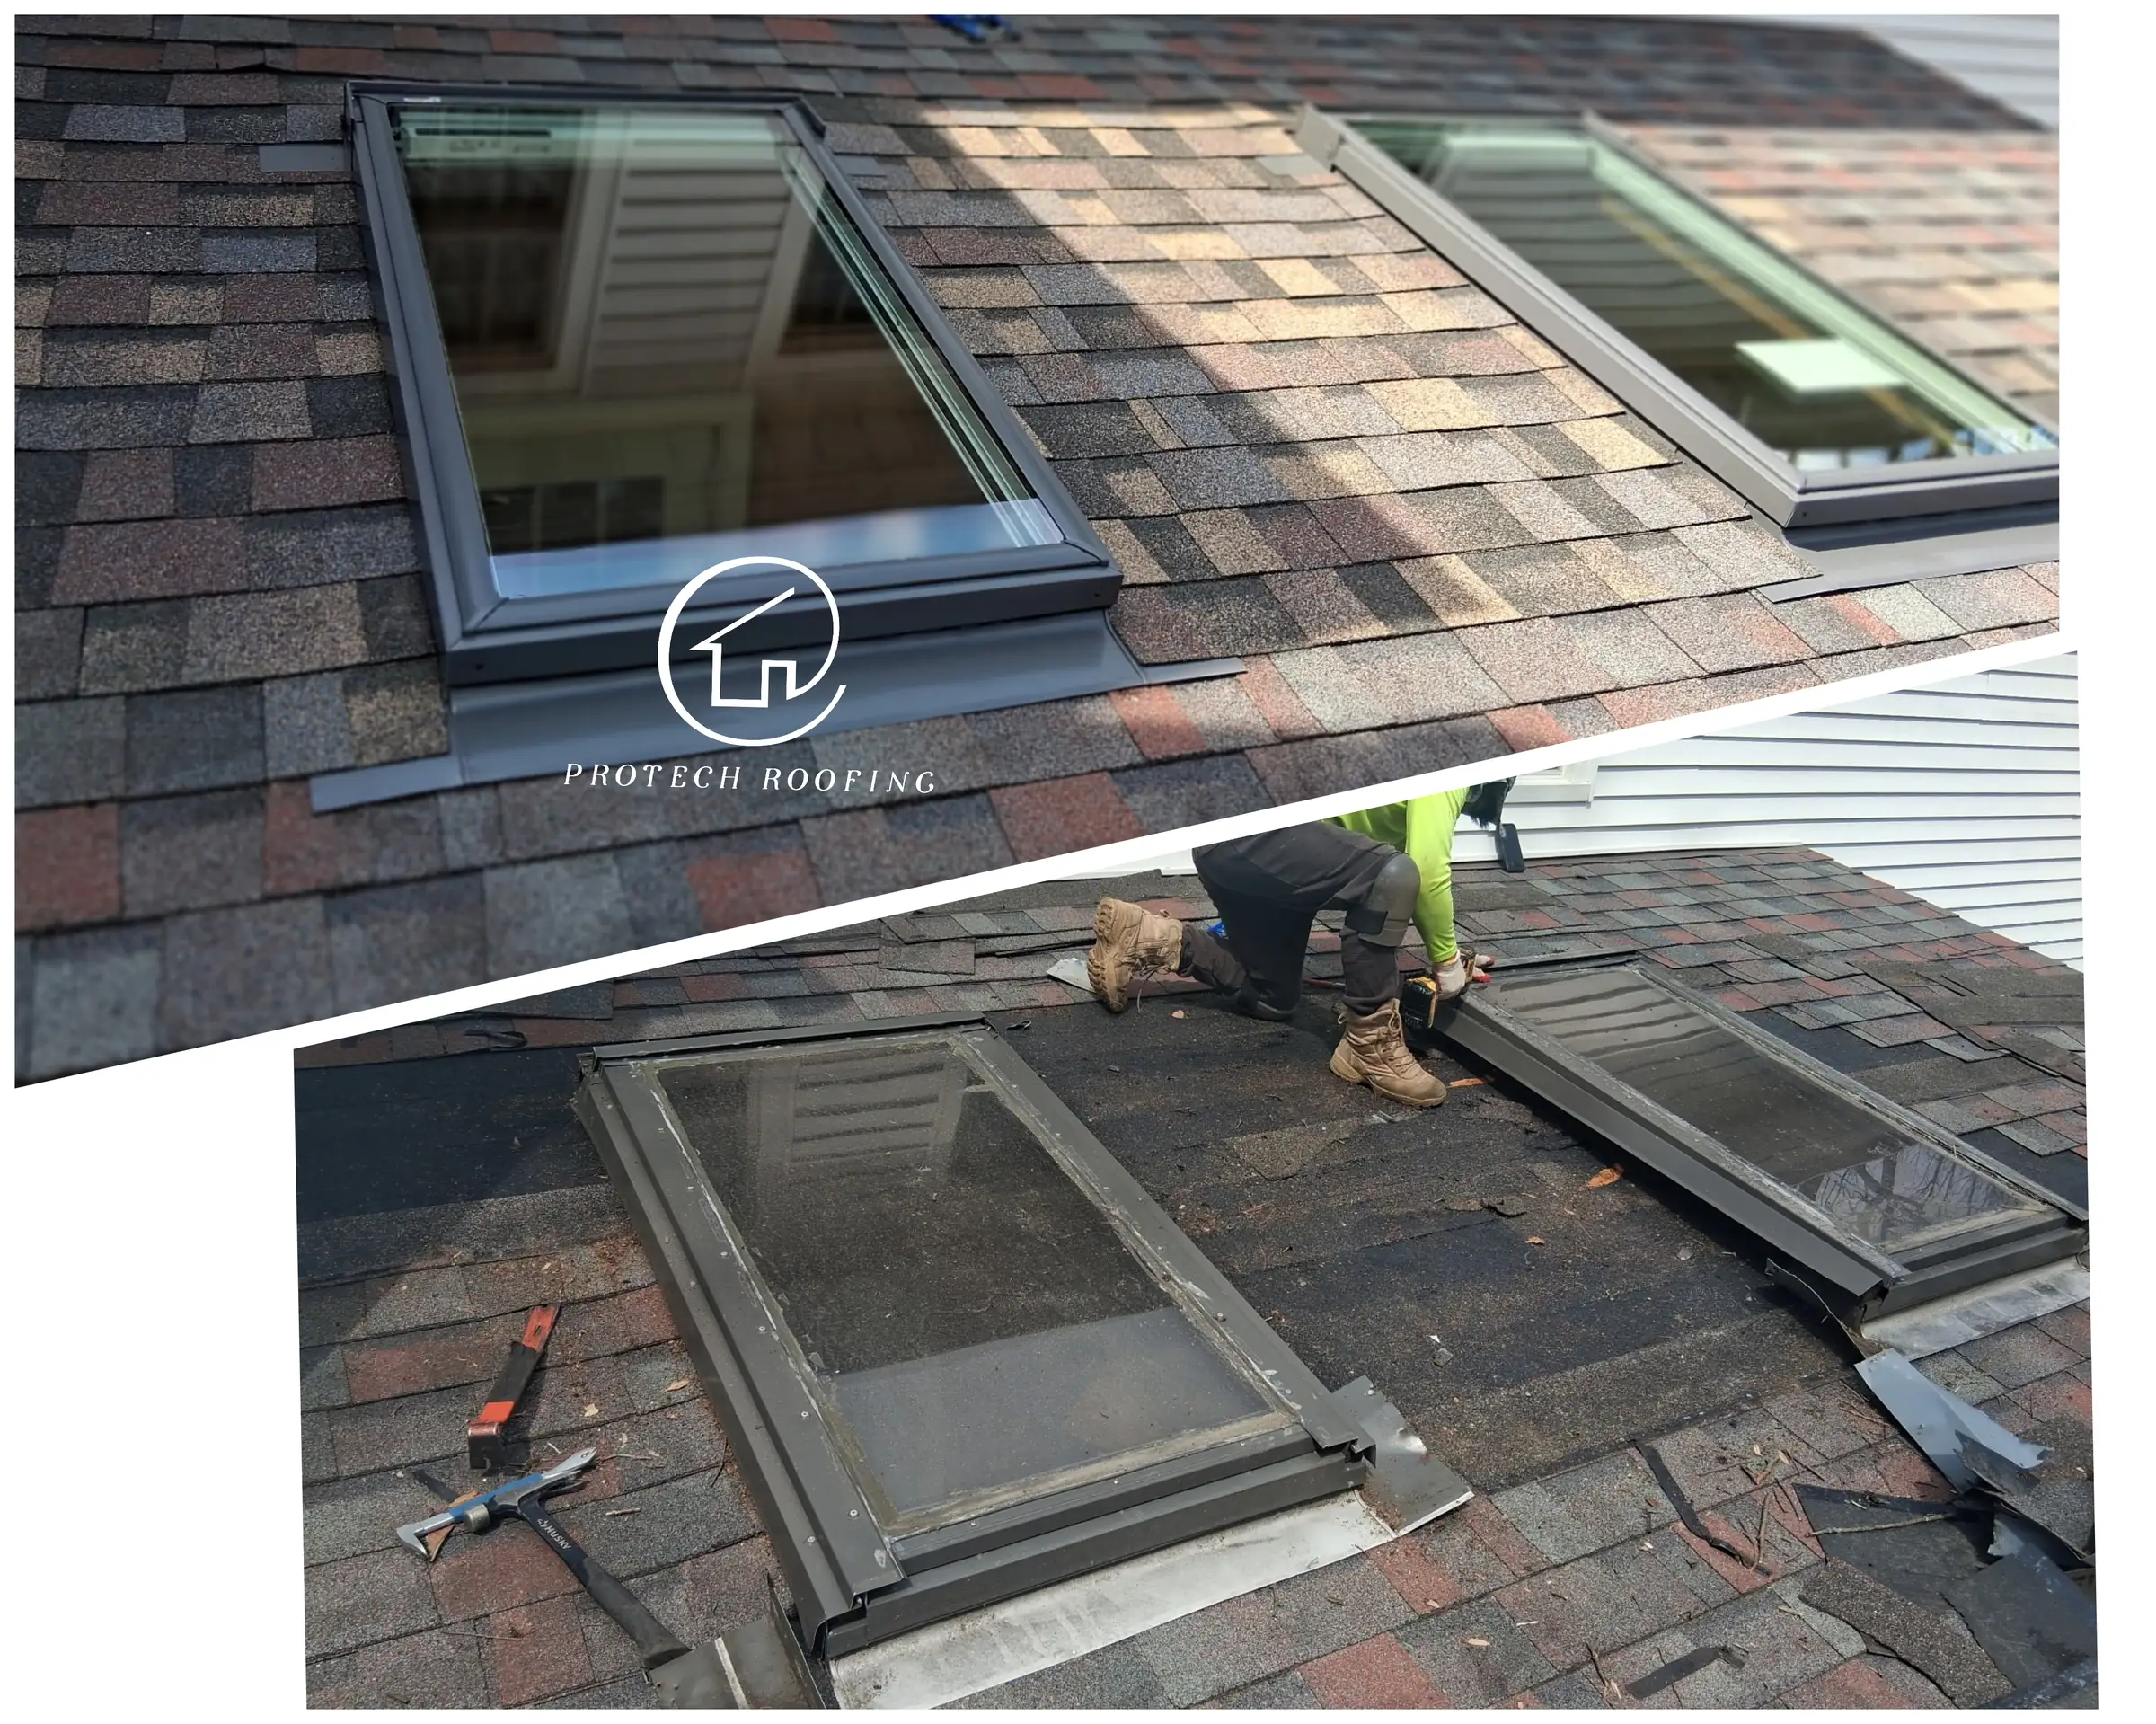
Bottom photo: two worn-out skylights coming out. Top photo: the new units in, with new flashing kits. 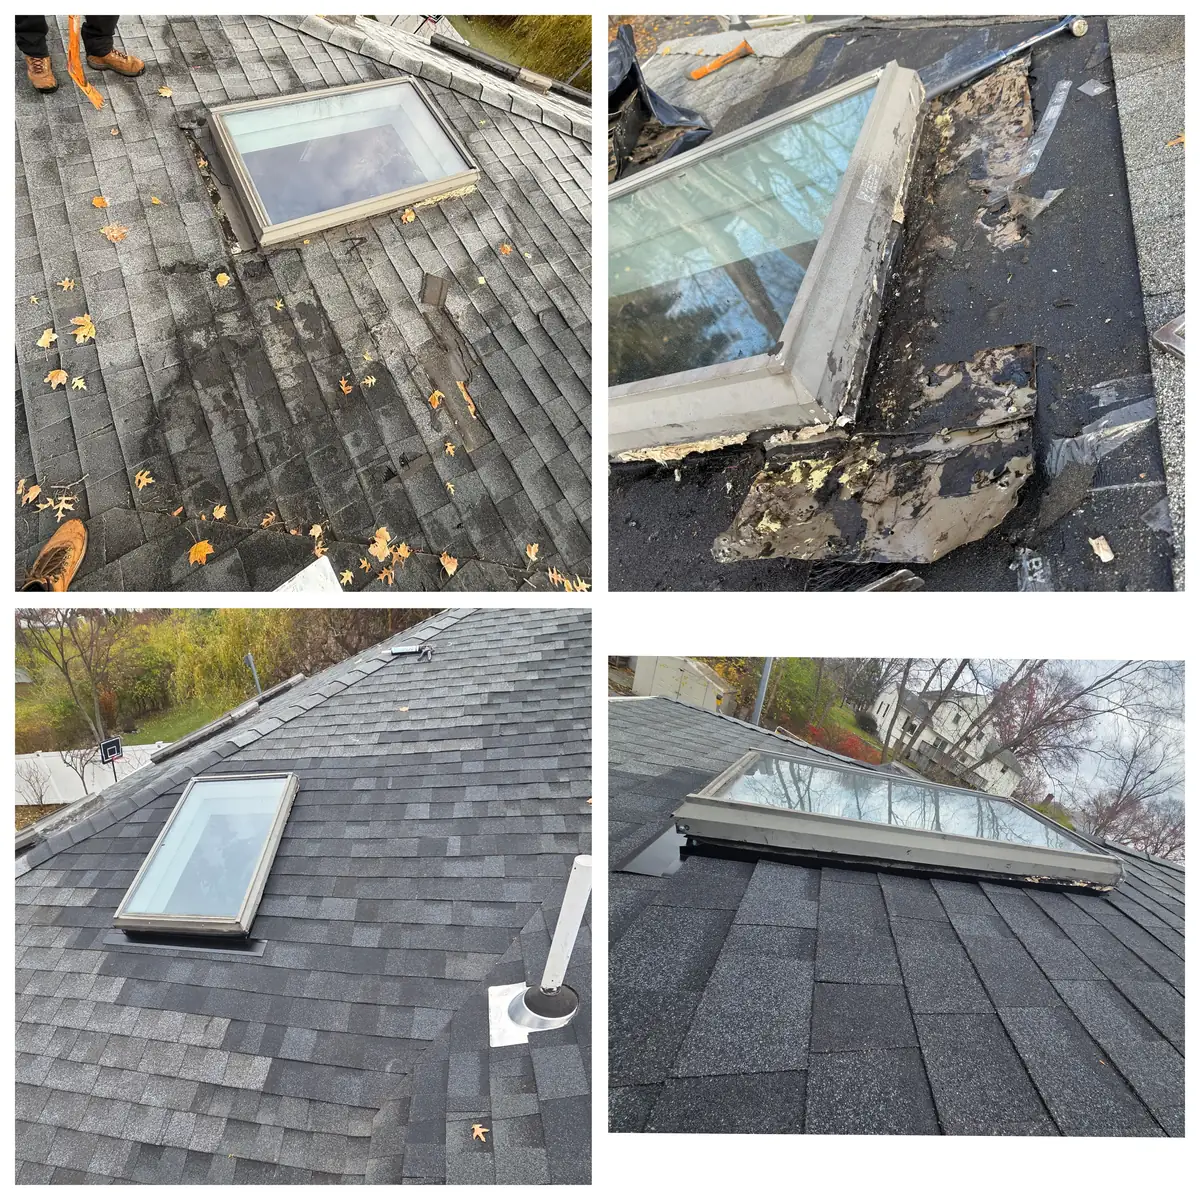 View this photo set full size (opens in a new tab)
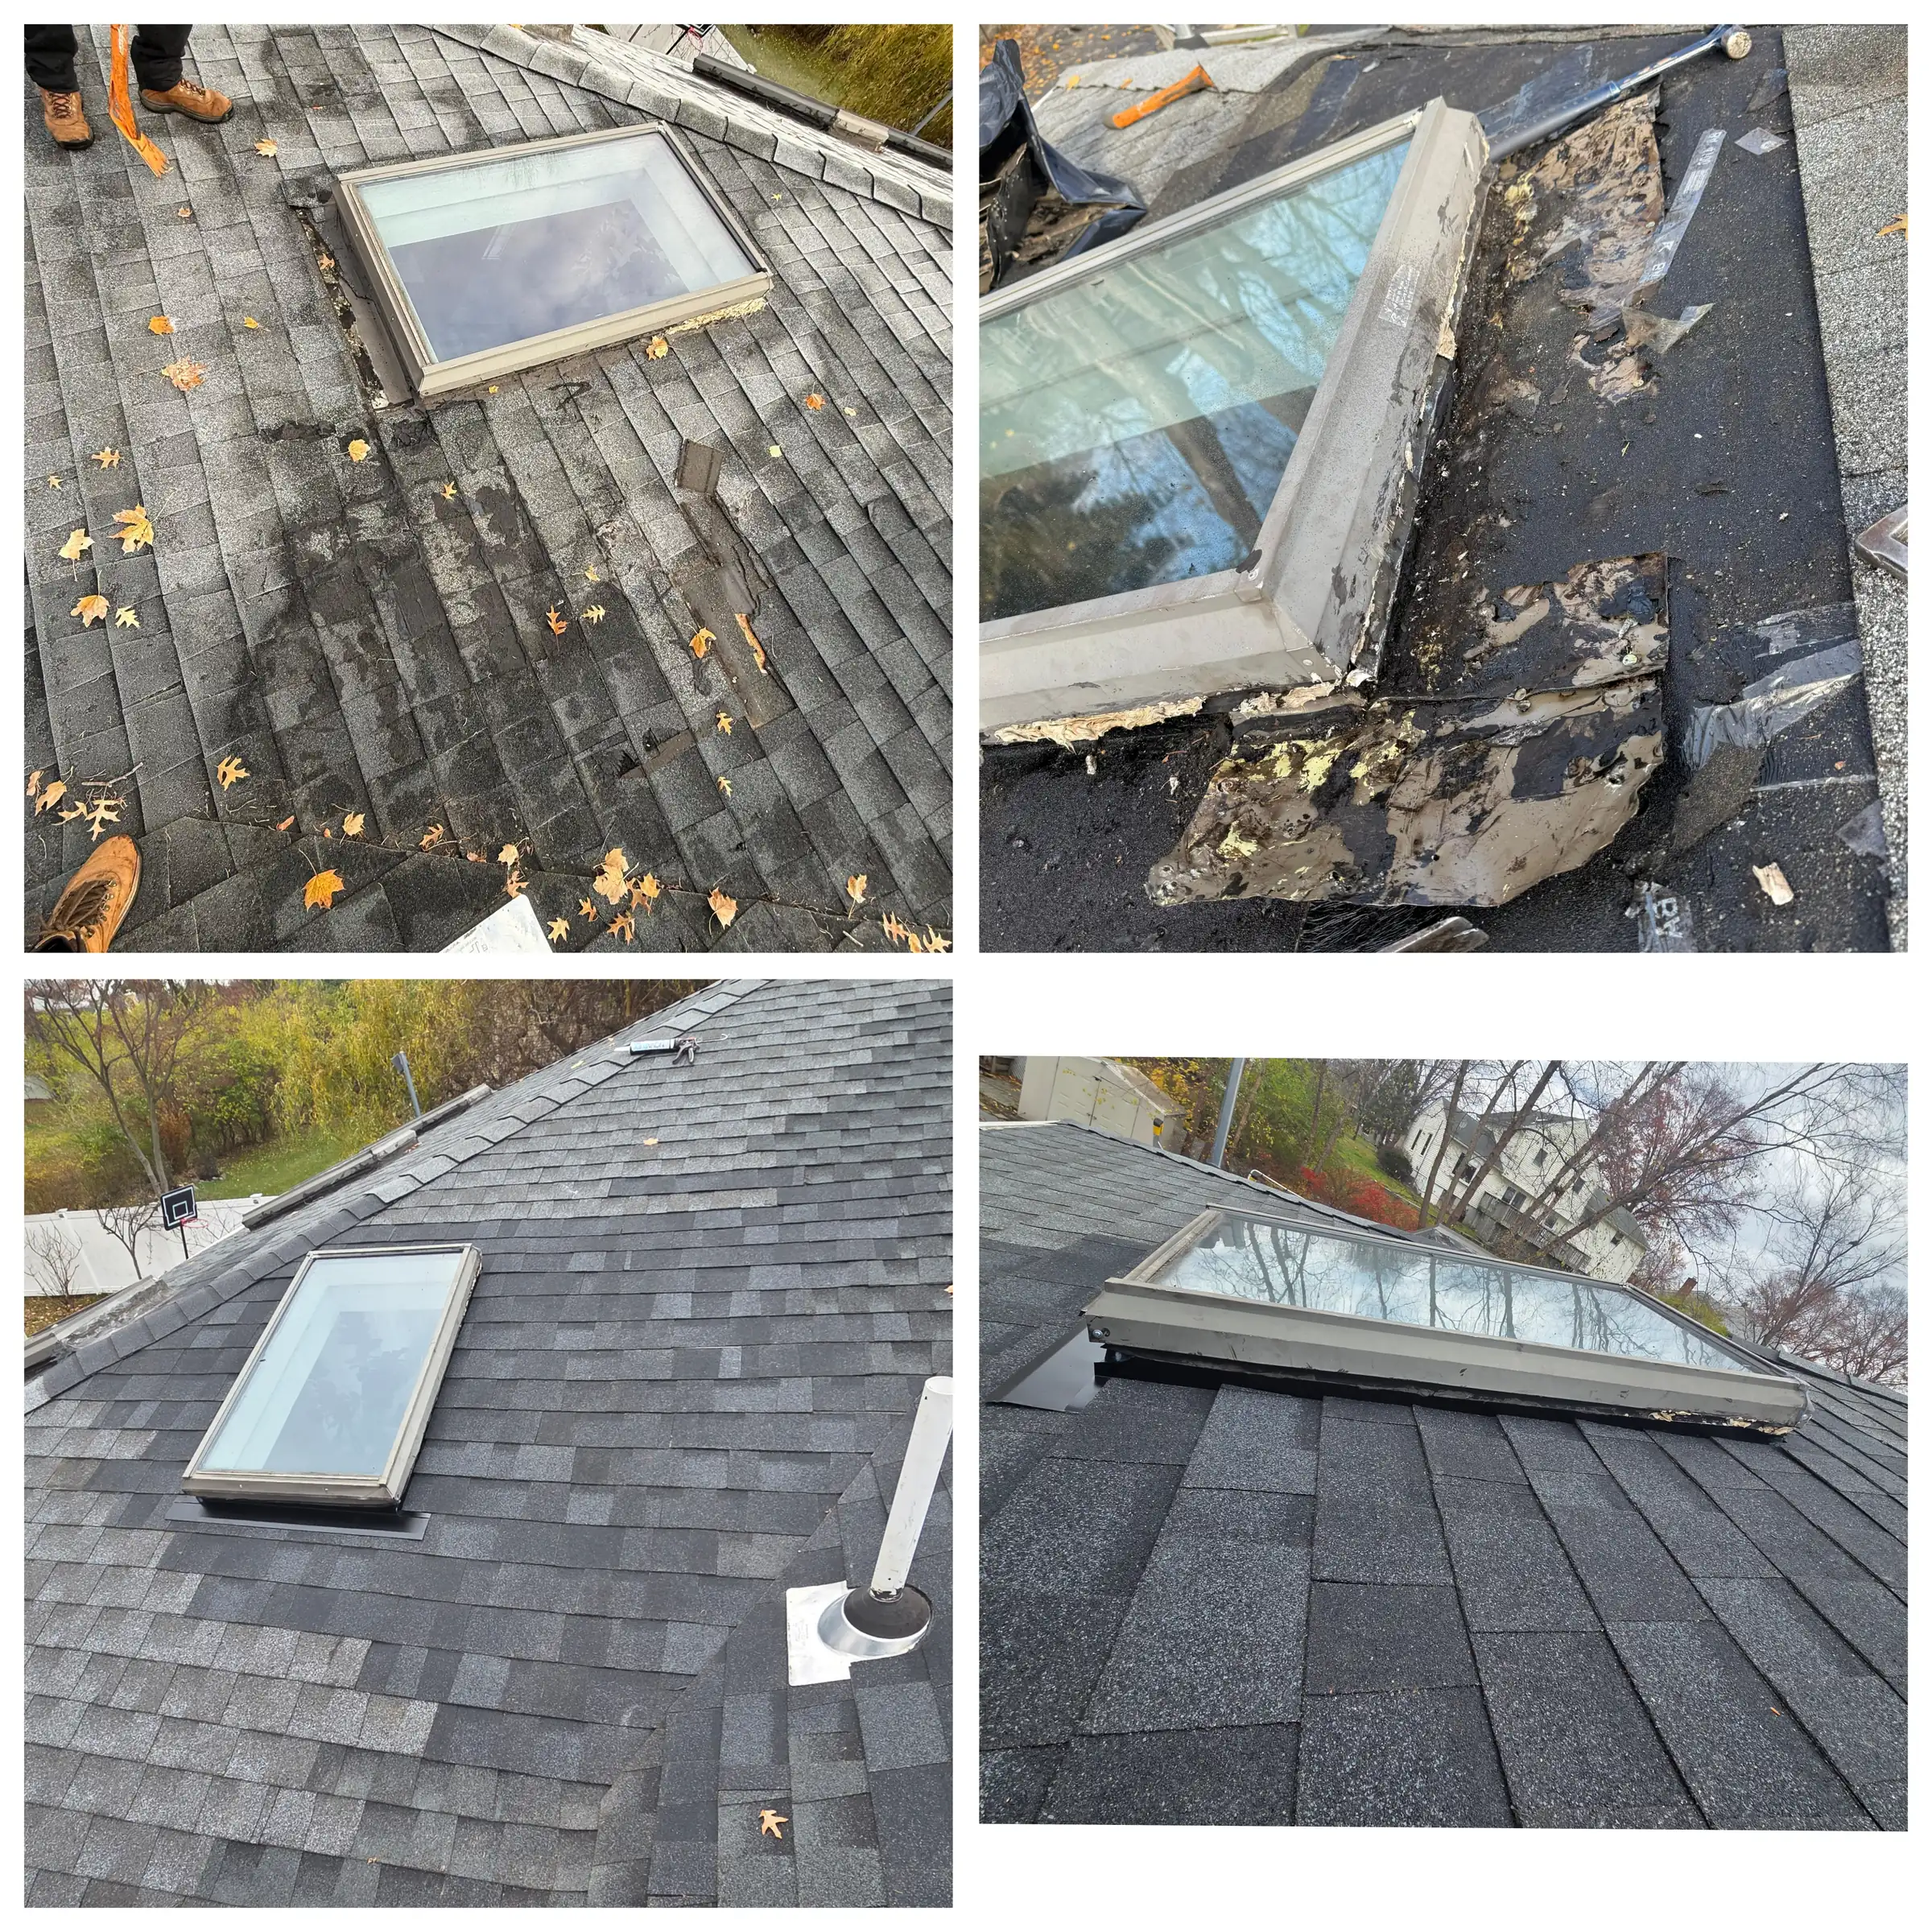
Before: an older skylight on a worn roof, its flashing patched with roof cement. After: the same skylight on the new roof, with new metal flashing around it. 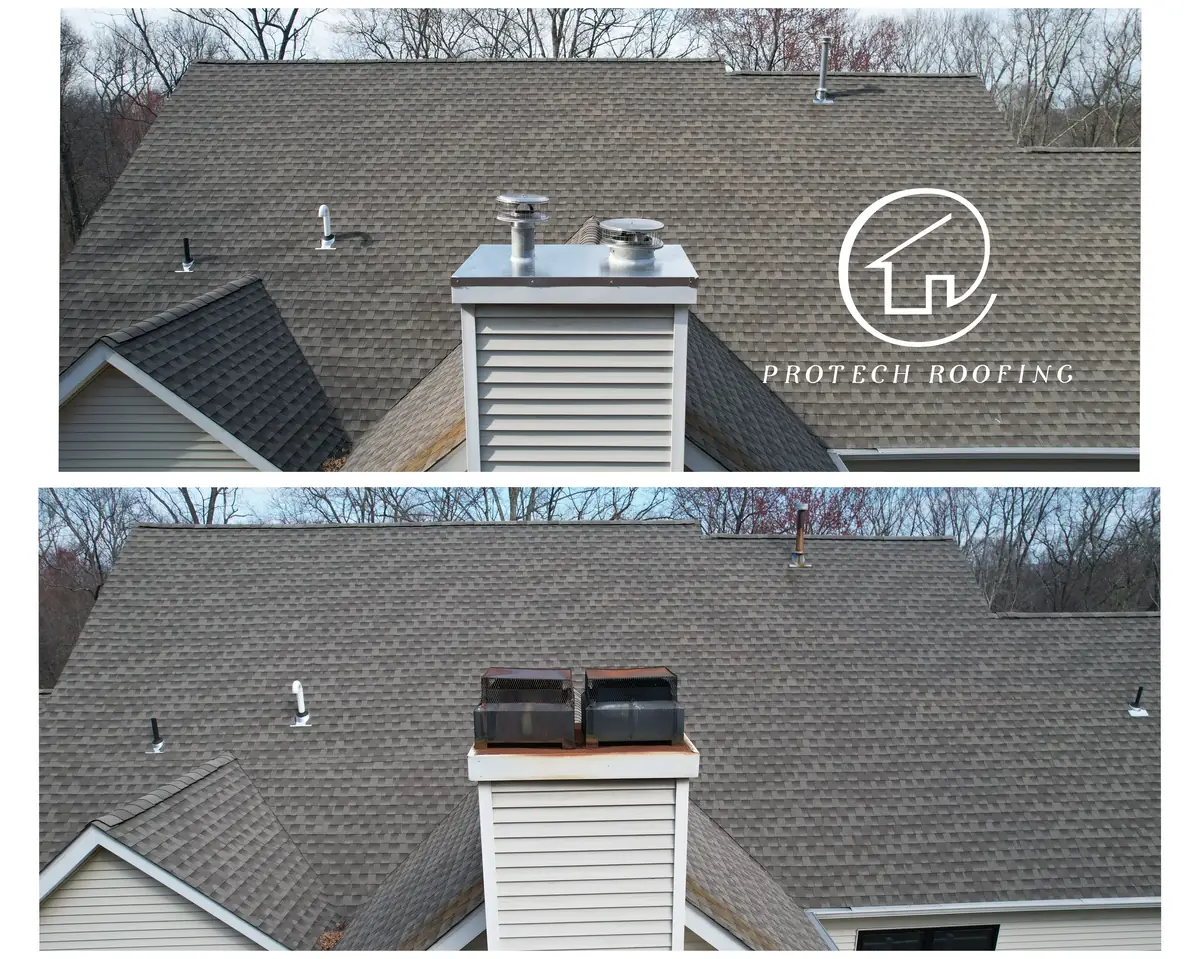 View this photo set full size (opens in a new tab)
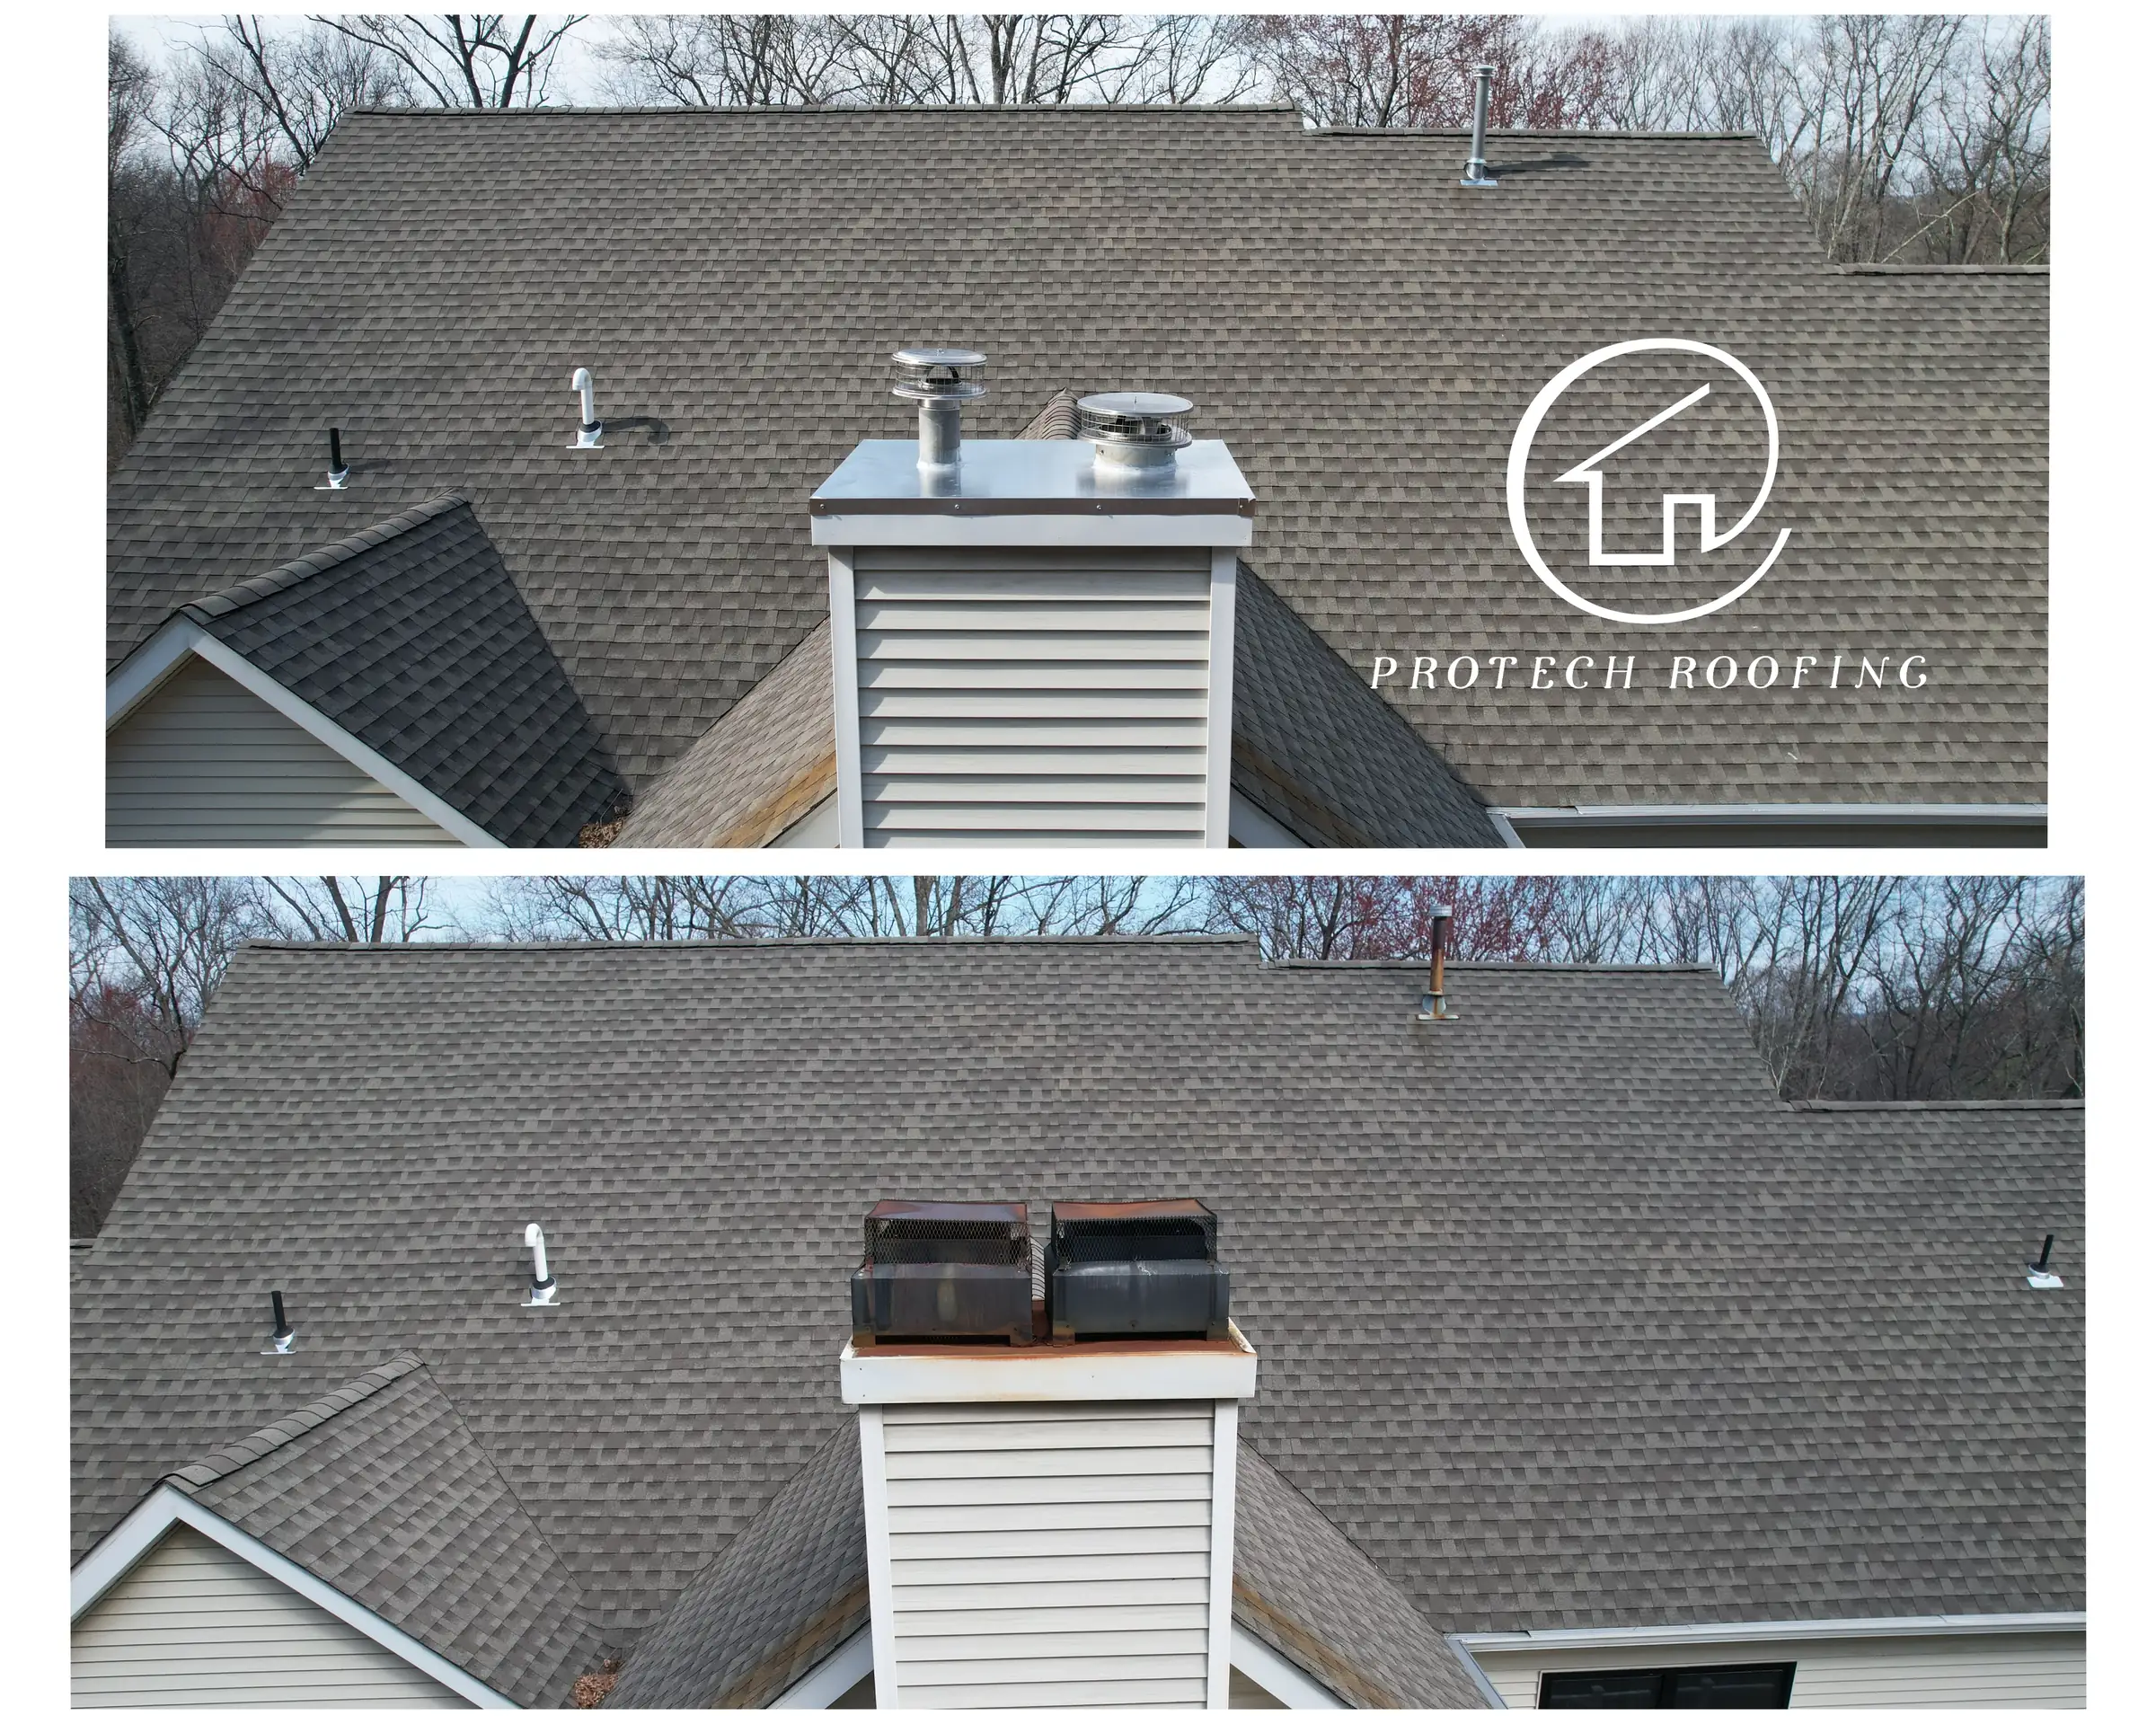
Before (bottom photo): a rusted chase cover. After (top photo): the new metal chase cover. 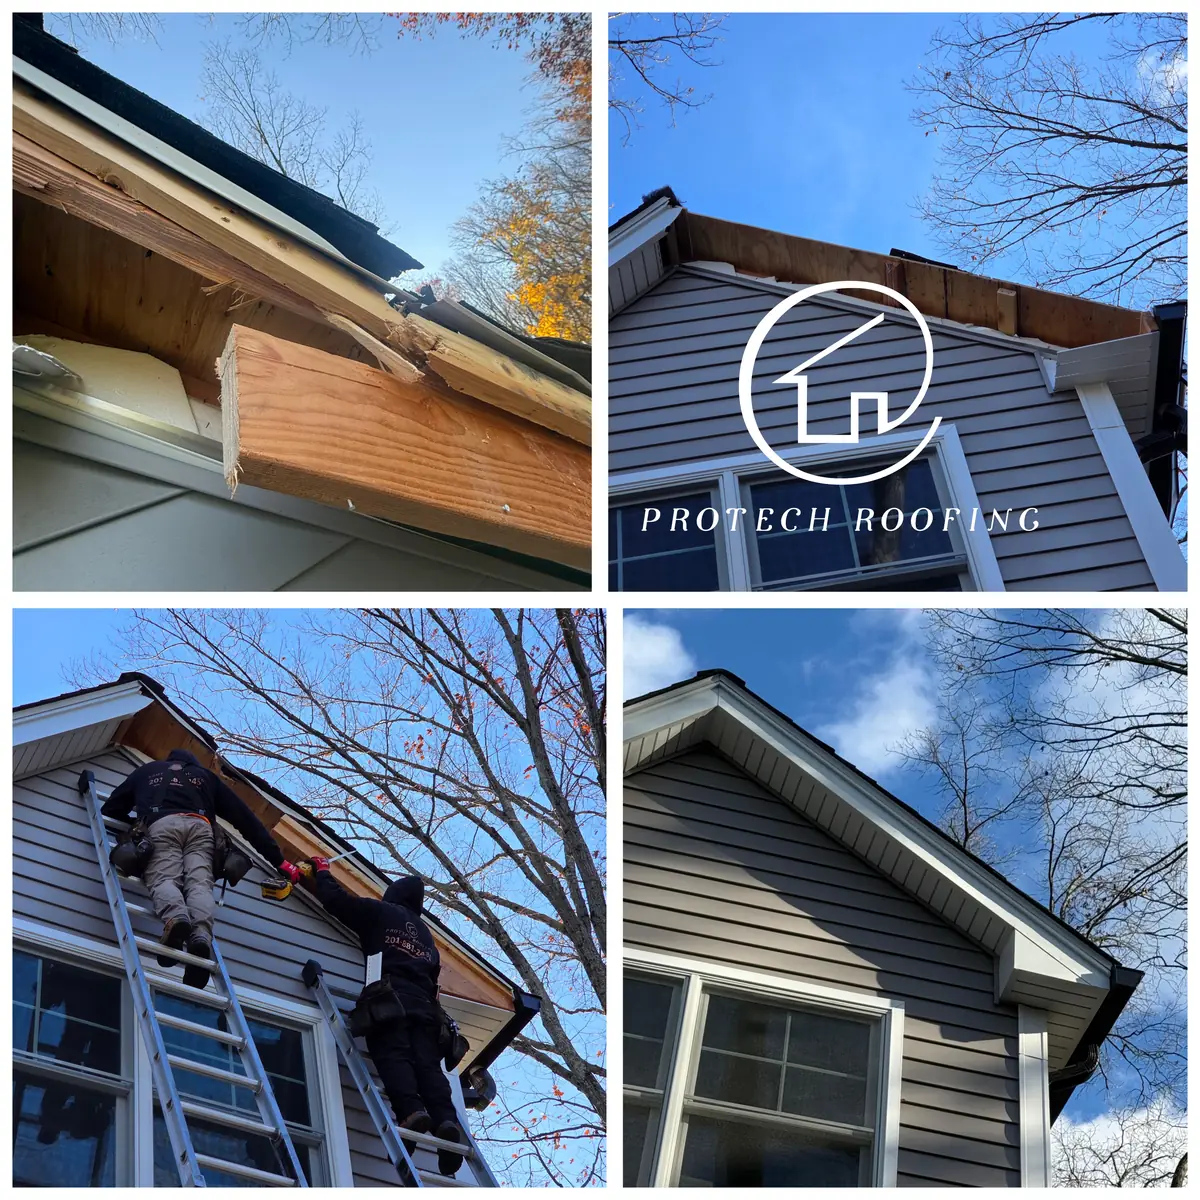 View this photo set full size (opens in a new tab)
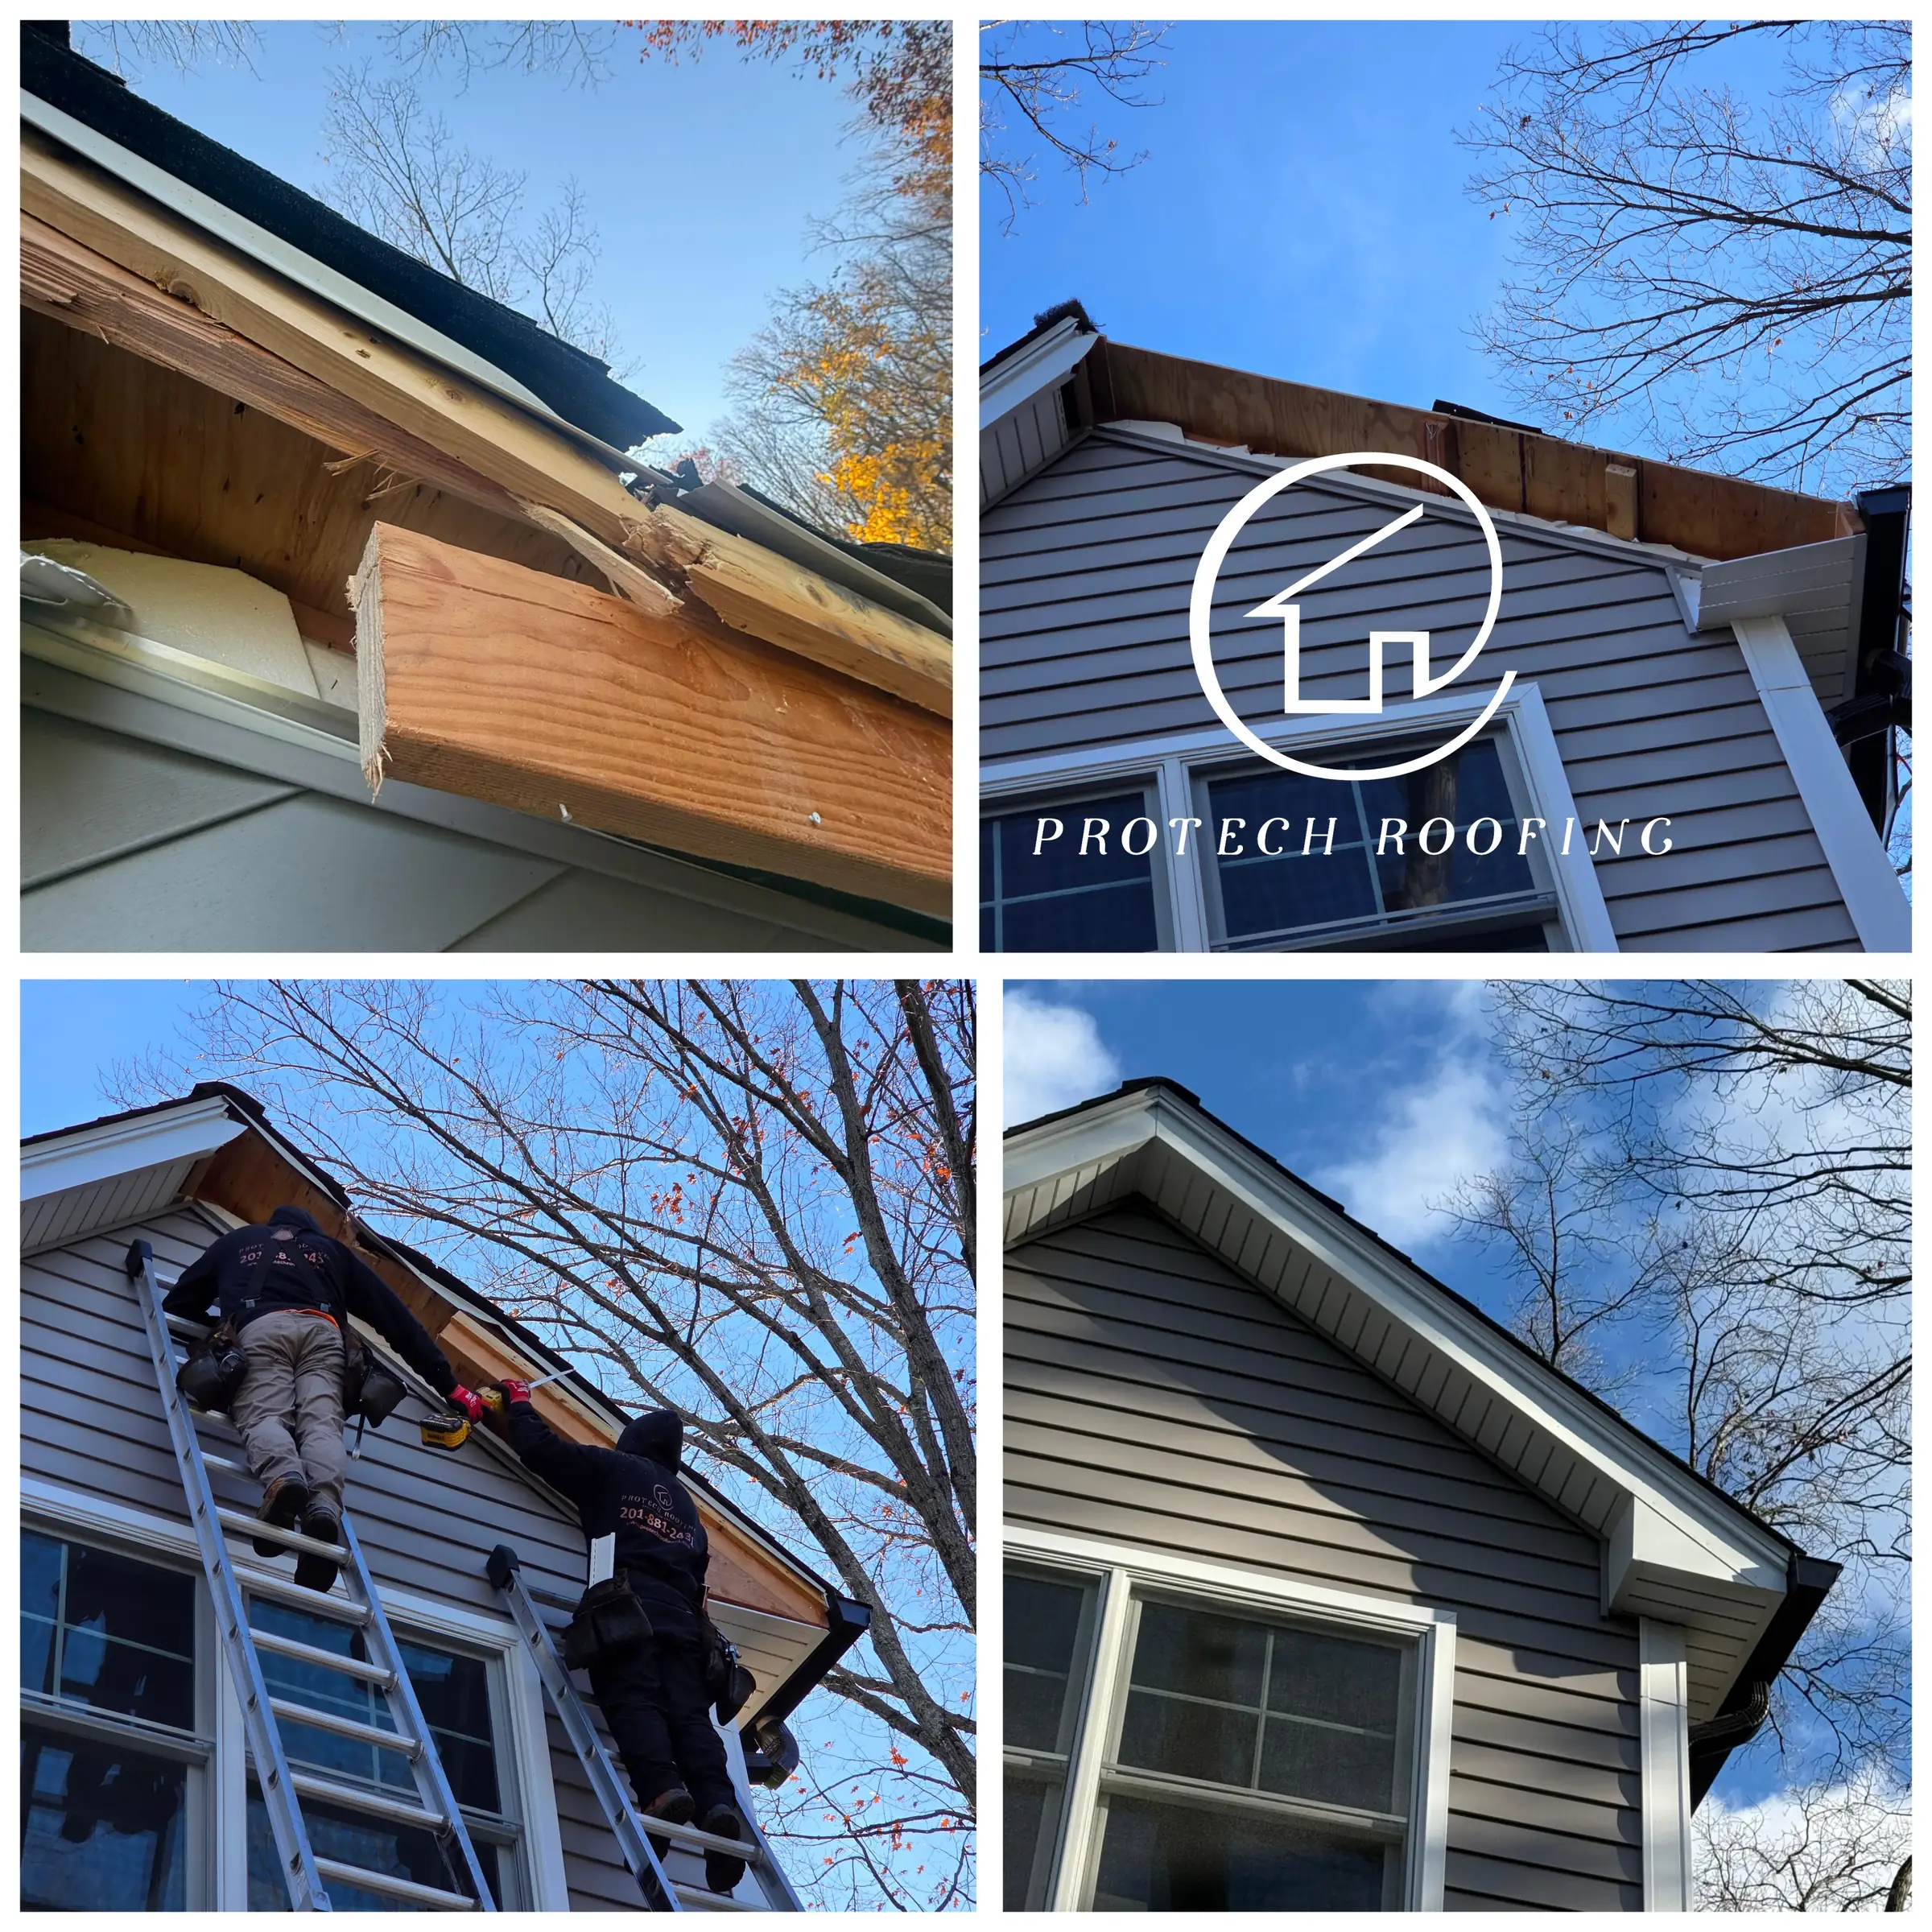
A broken rake board (the trim board along the sloped edge of the roof), cut out, rebuilt and wrapped in new trim to match the house.


Step by step
Roof replacements and repairs, step by step
Each set follows a single job through the work to the finished result. Click or tap any set to see it full size.
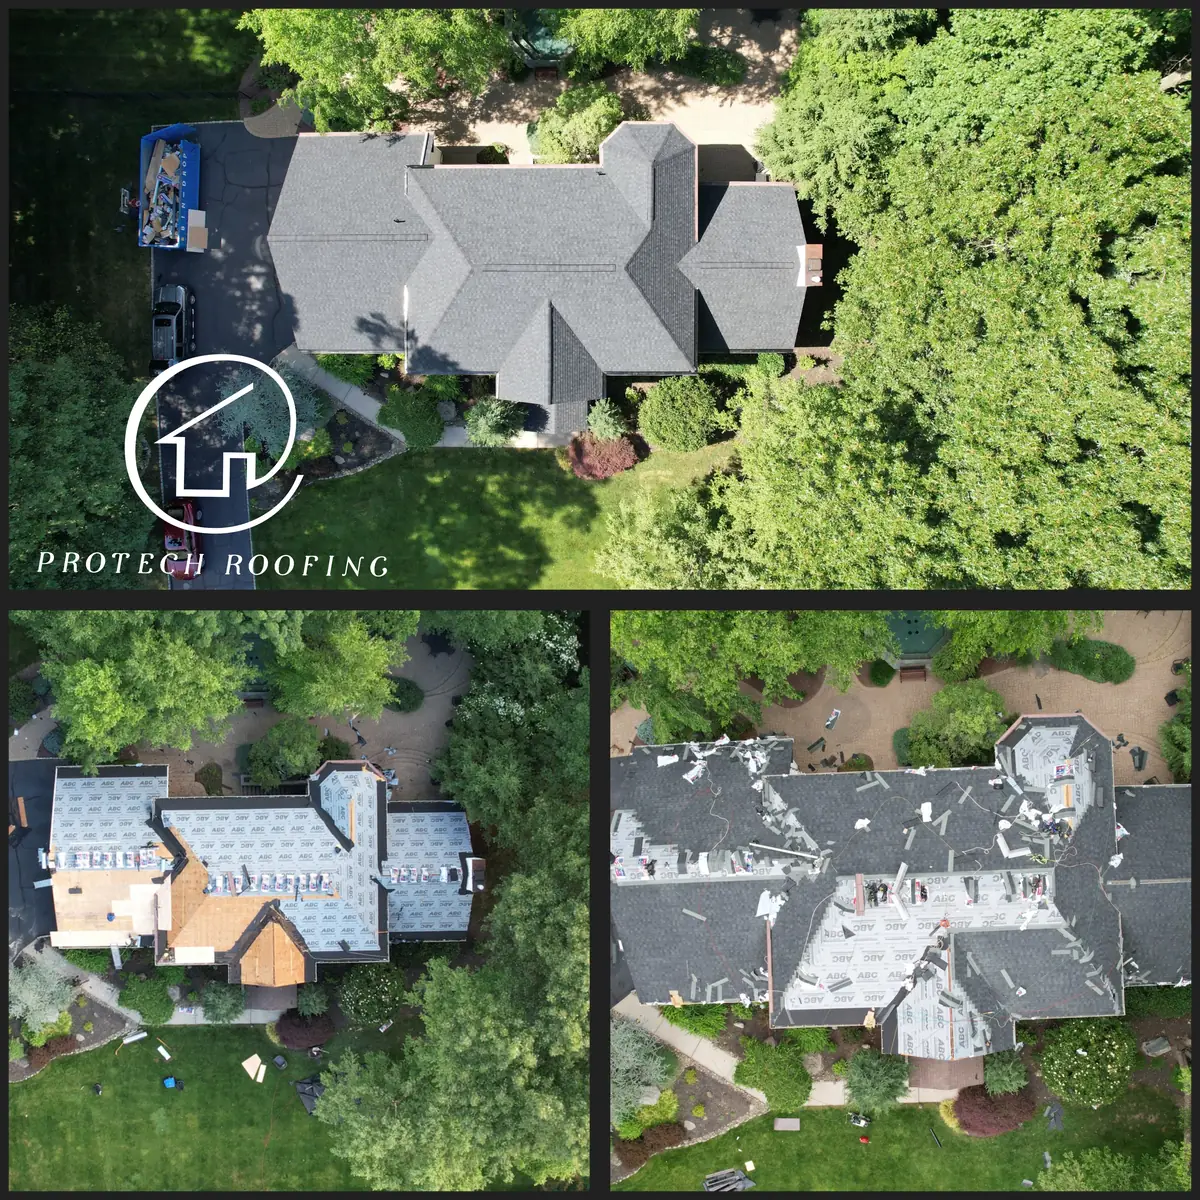 View this photo set full size (opens in a new tab)
A large roof with many hips and valleys, in three stages: decking and underlayment, shingles going on, and the finished roof. 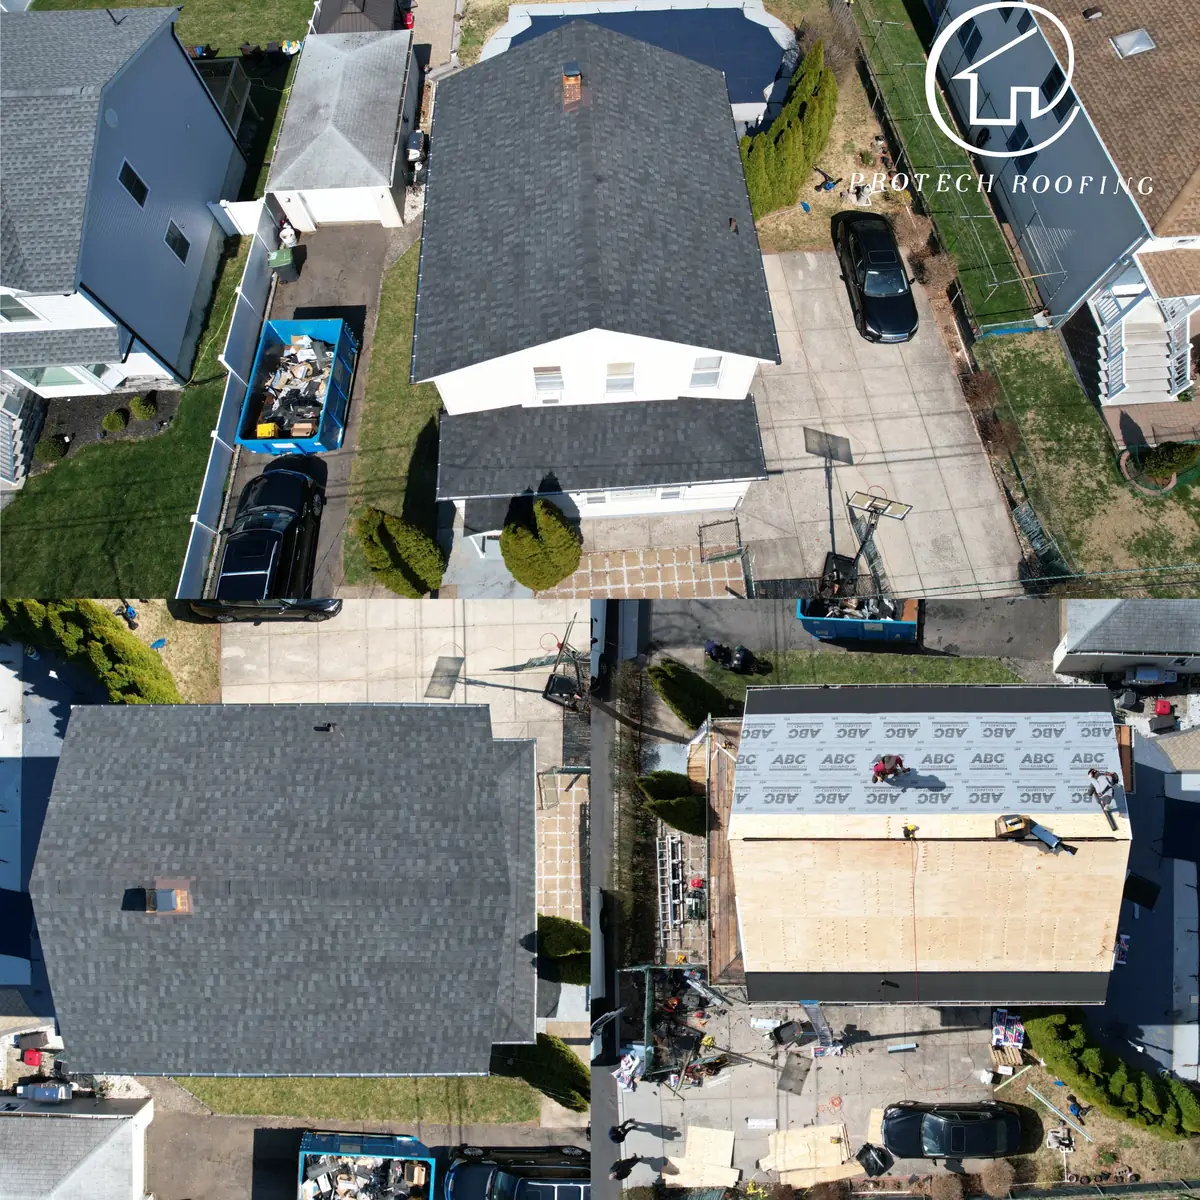 View this photo set full size (opens in a new tab)
New plywood decking and synthetic underlayment, then the finished charcoal roof seen from two angles. 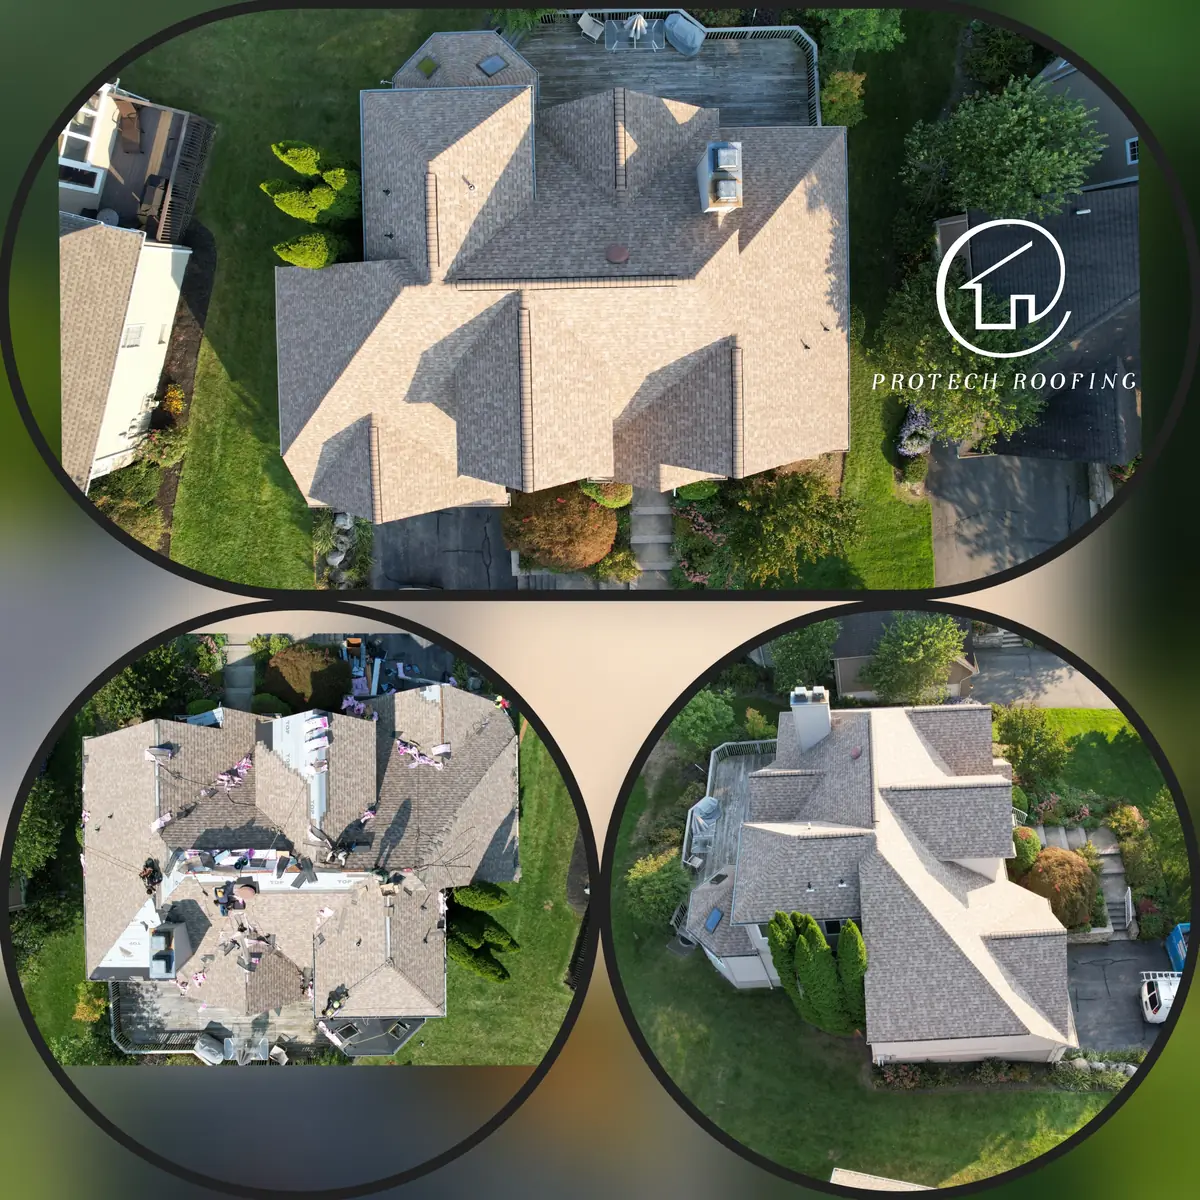 View this photo set full size (opens in a new tab)
A complex roof with many hips and valleys, shown mid-installation and finished. 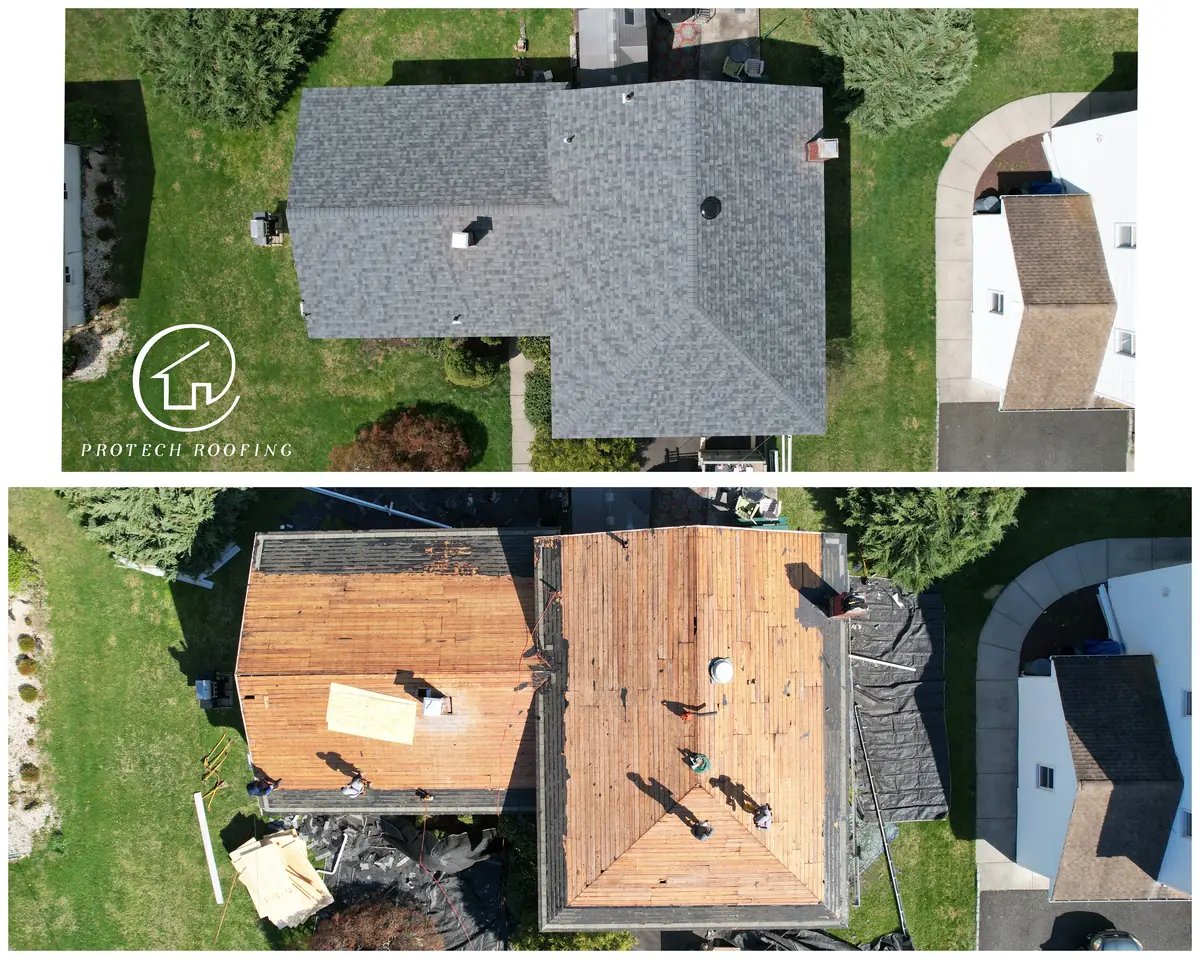 View this photo set full size (opens in a new tab)
Stripped to the original plank deck with the crew at work, then the finished gray architectural shingles. 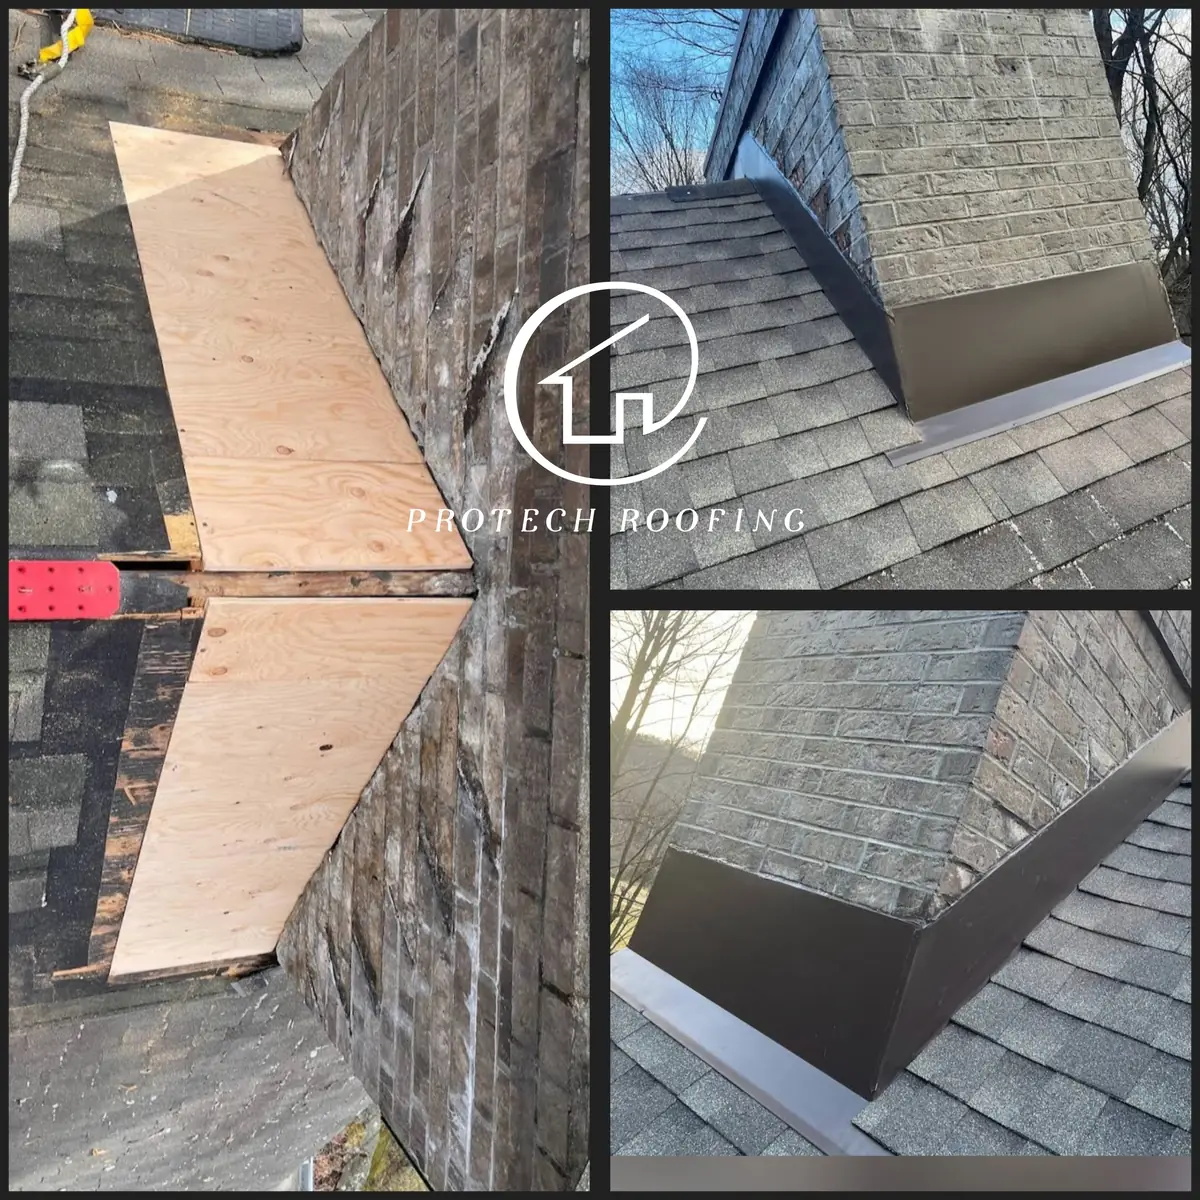 View this photo set full size (opens in a new tab)
Damaged decking beside the chimney replaced with new plywood, then new dark bronze flashing around the base.
Finished roofs
Completed shingle roofs

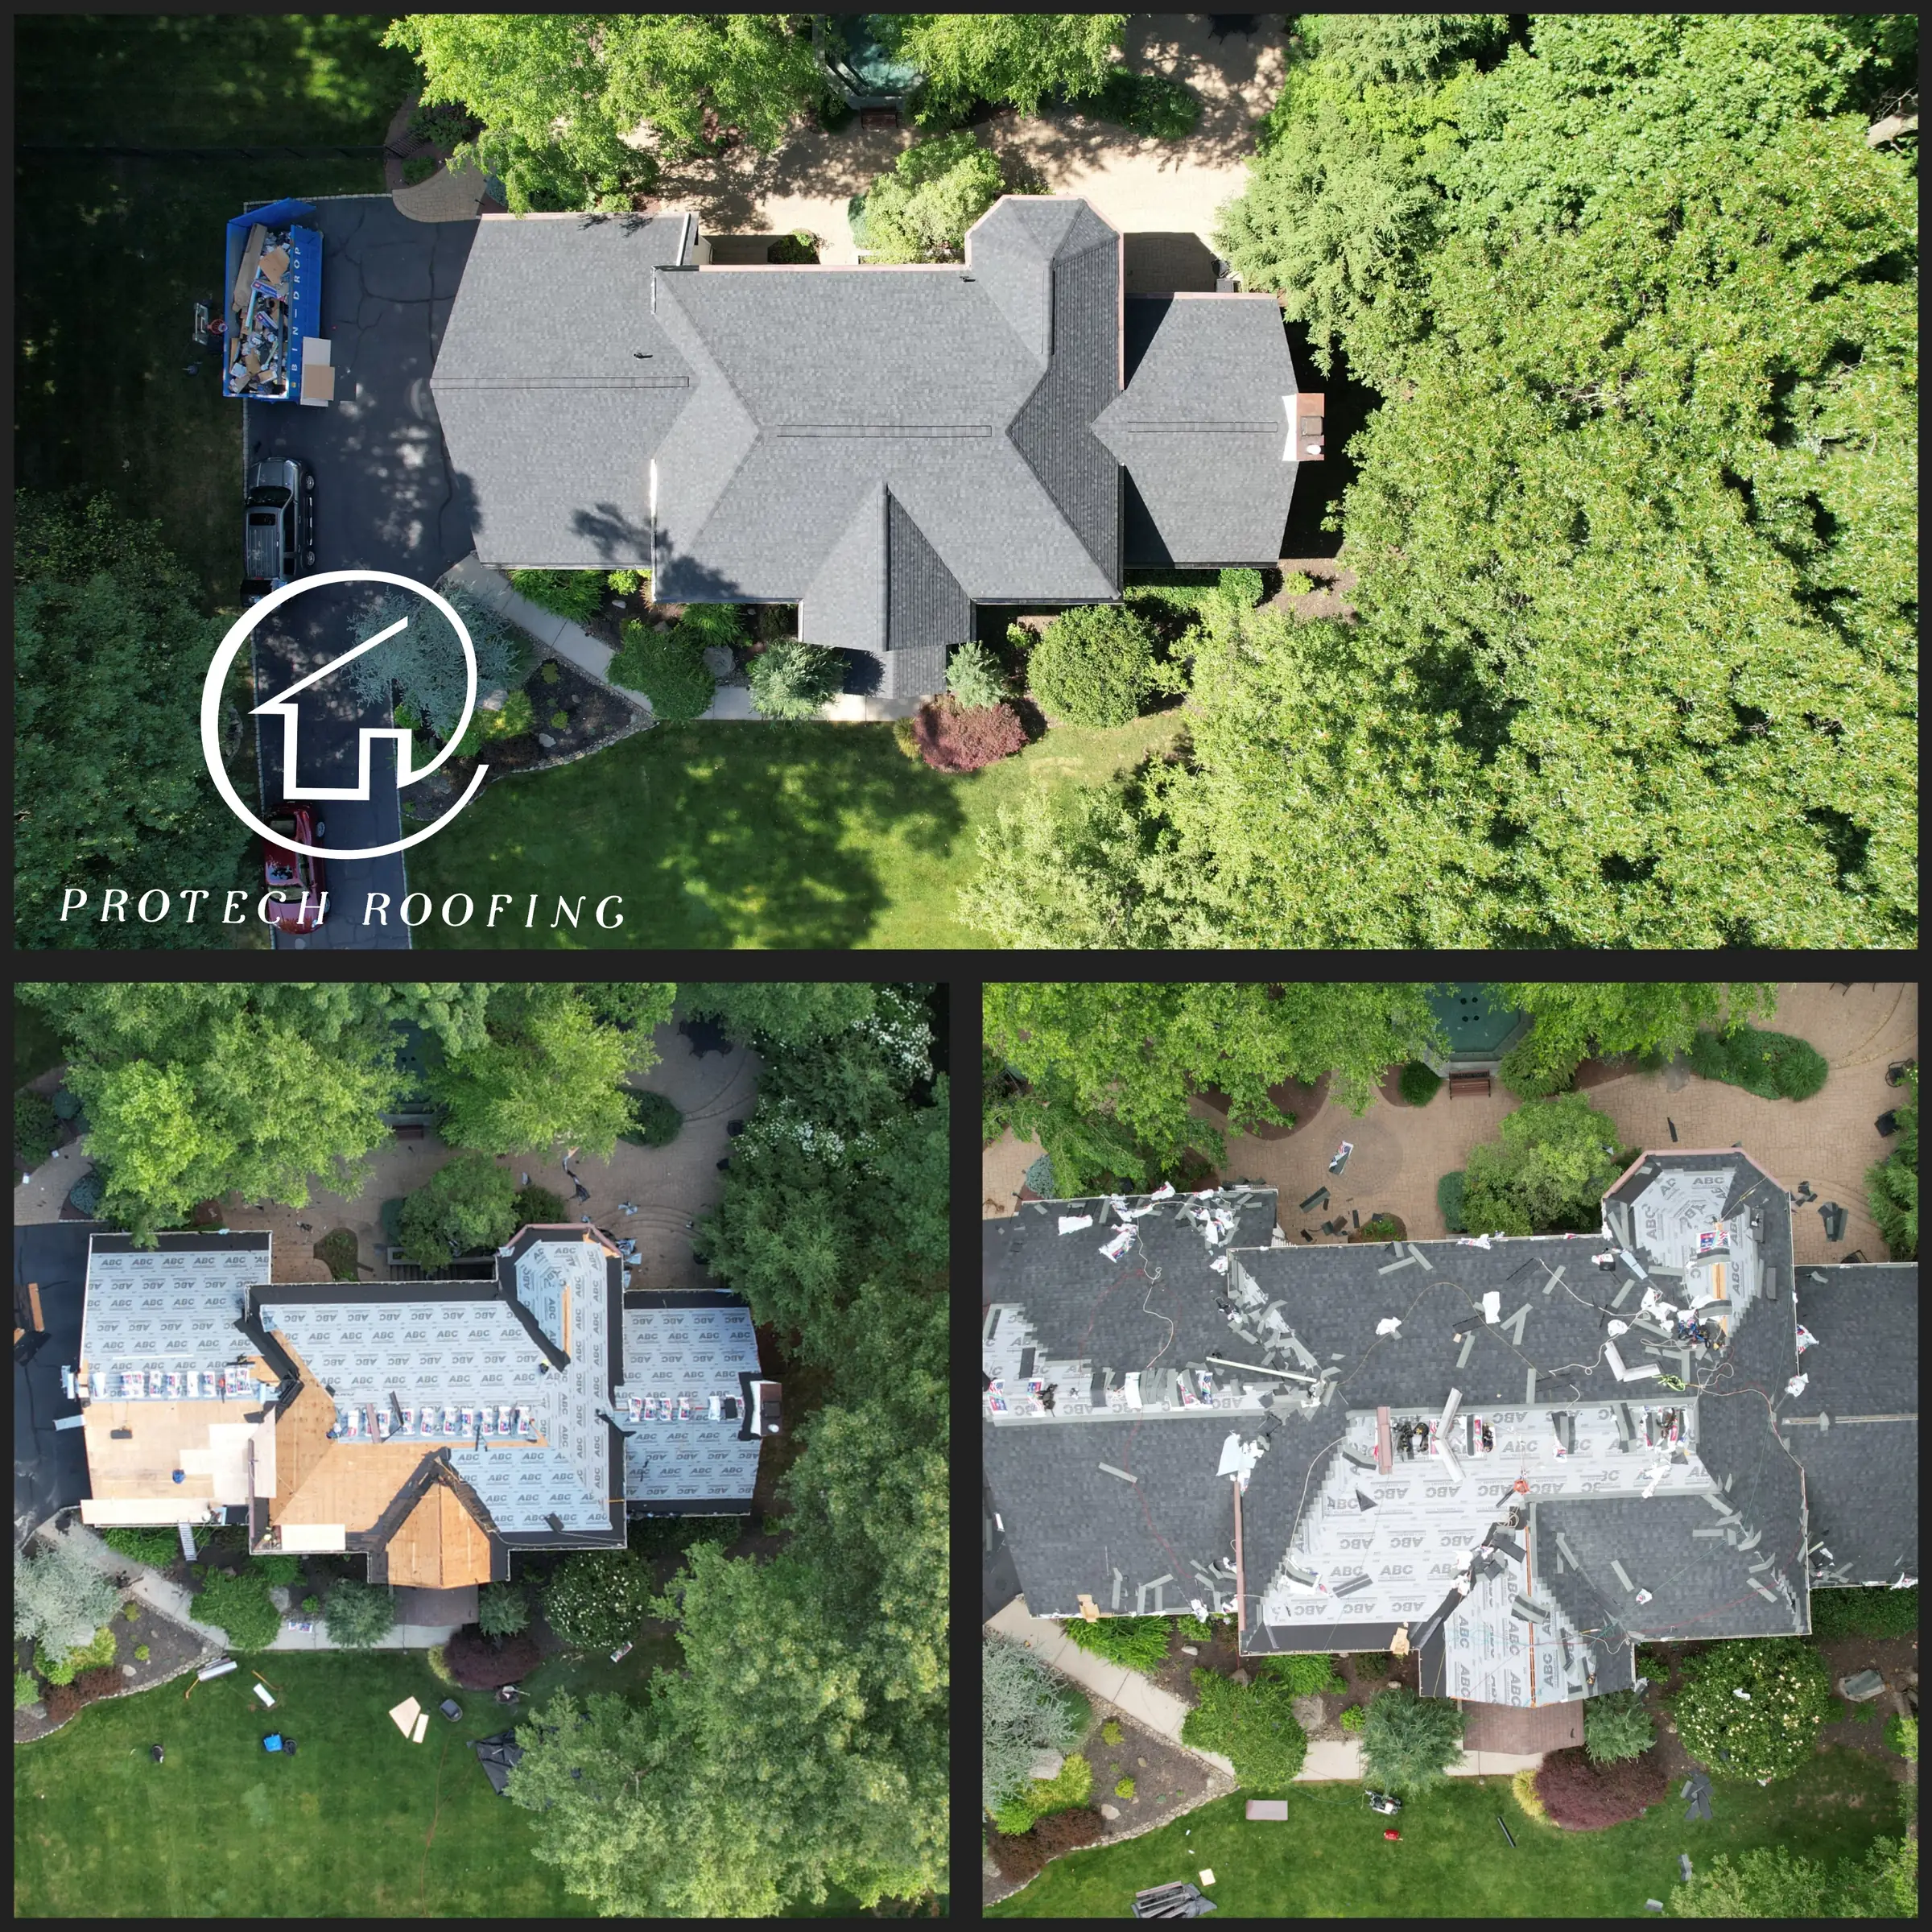
Full replacement on a large home with multiple hips and valleys. Dumpster and debris hauled away. 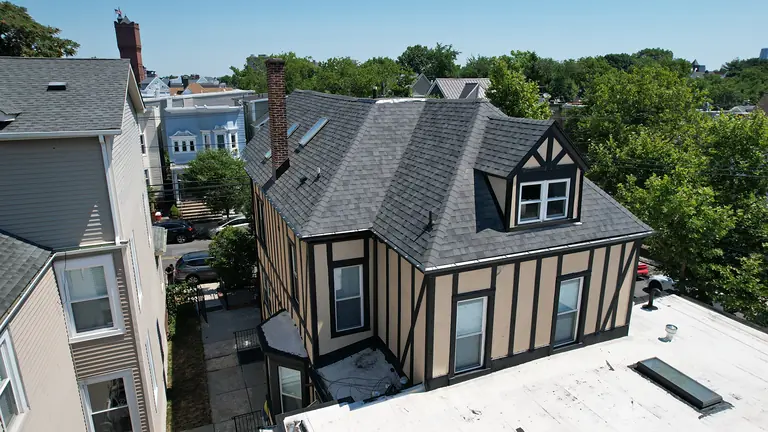
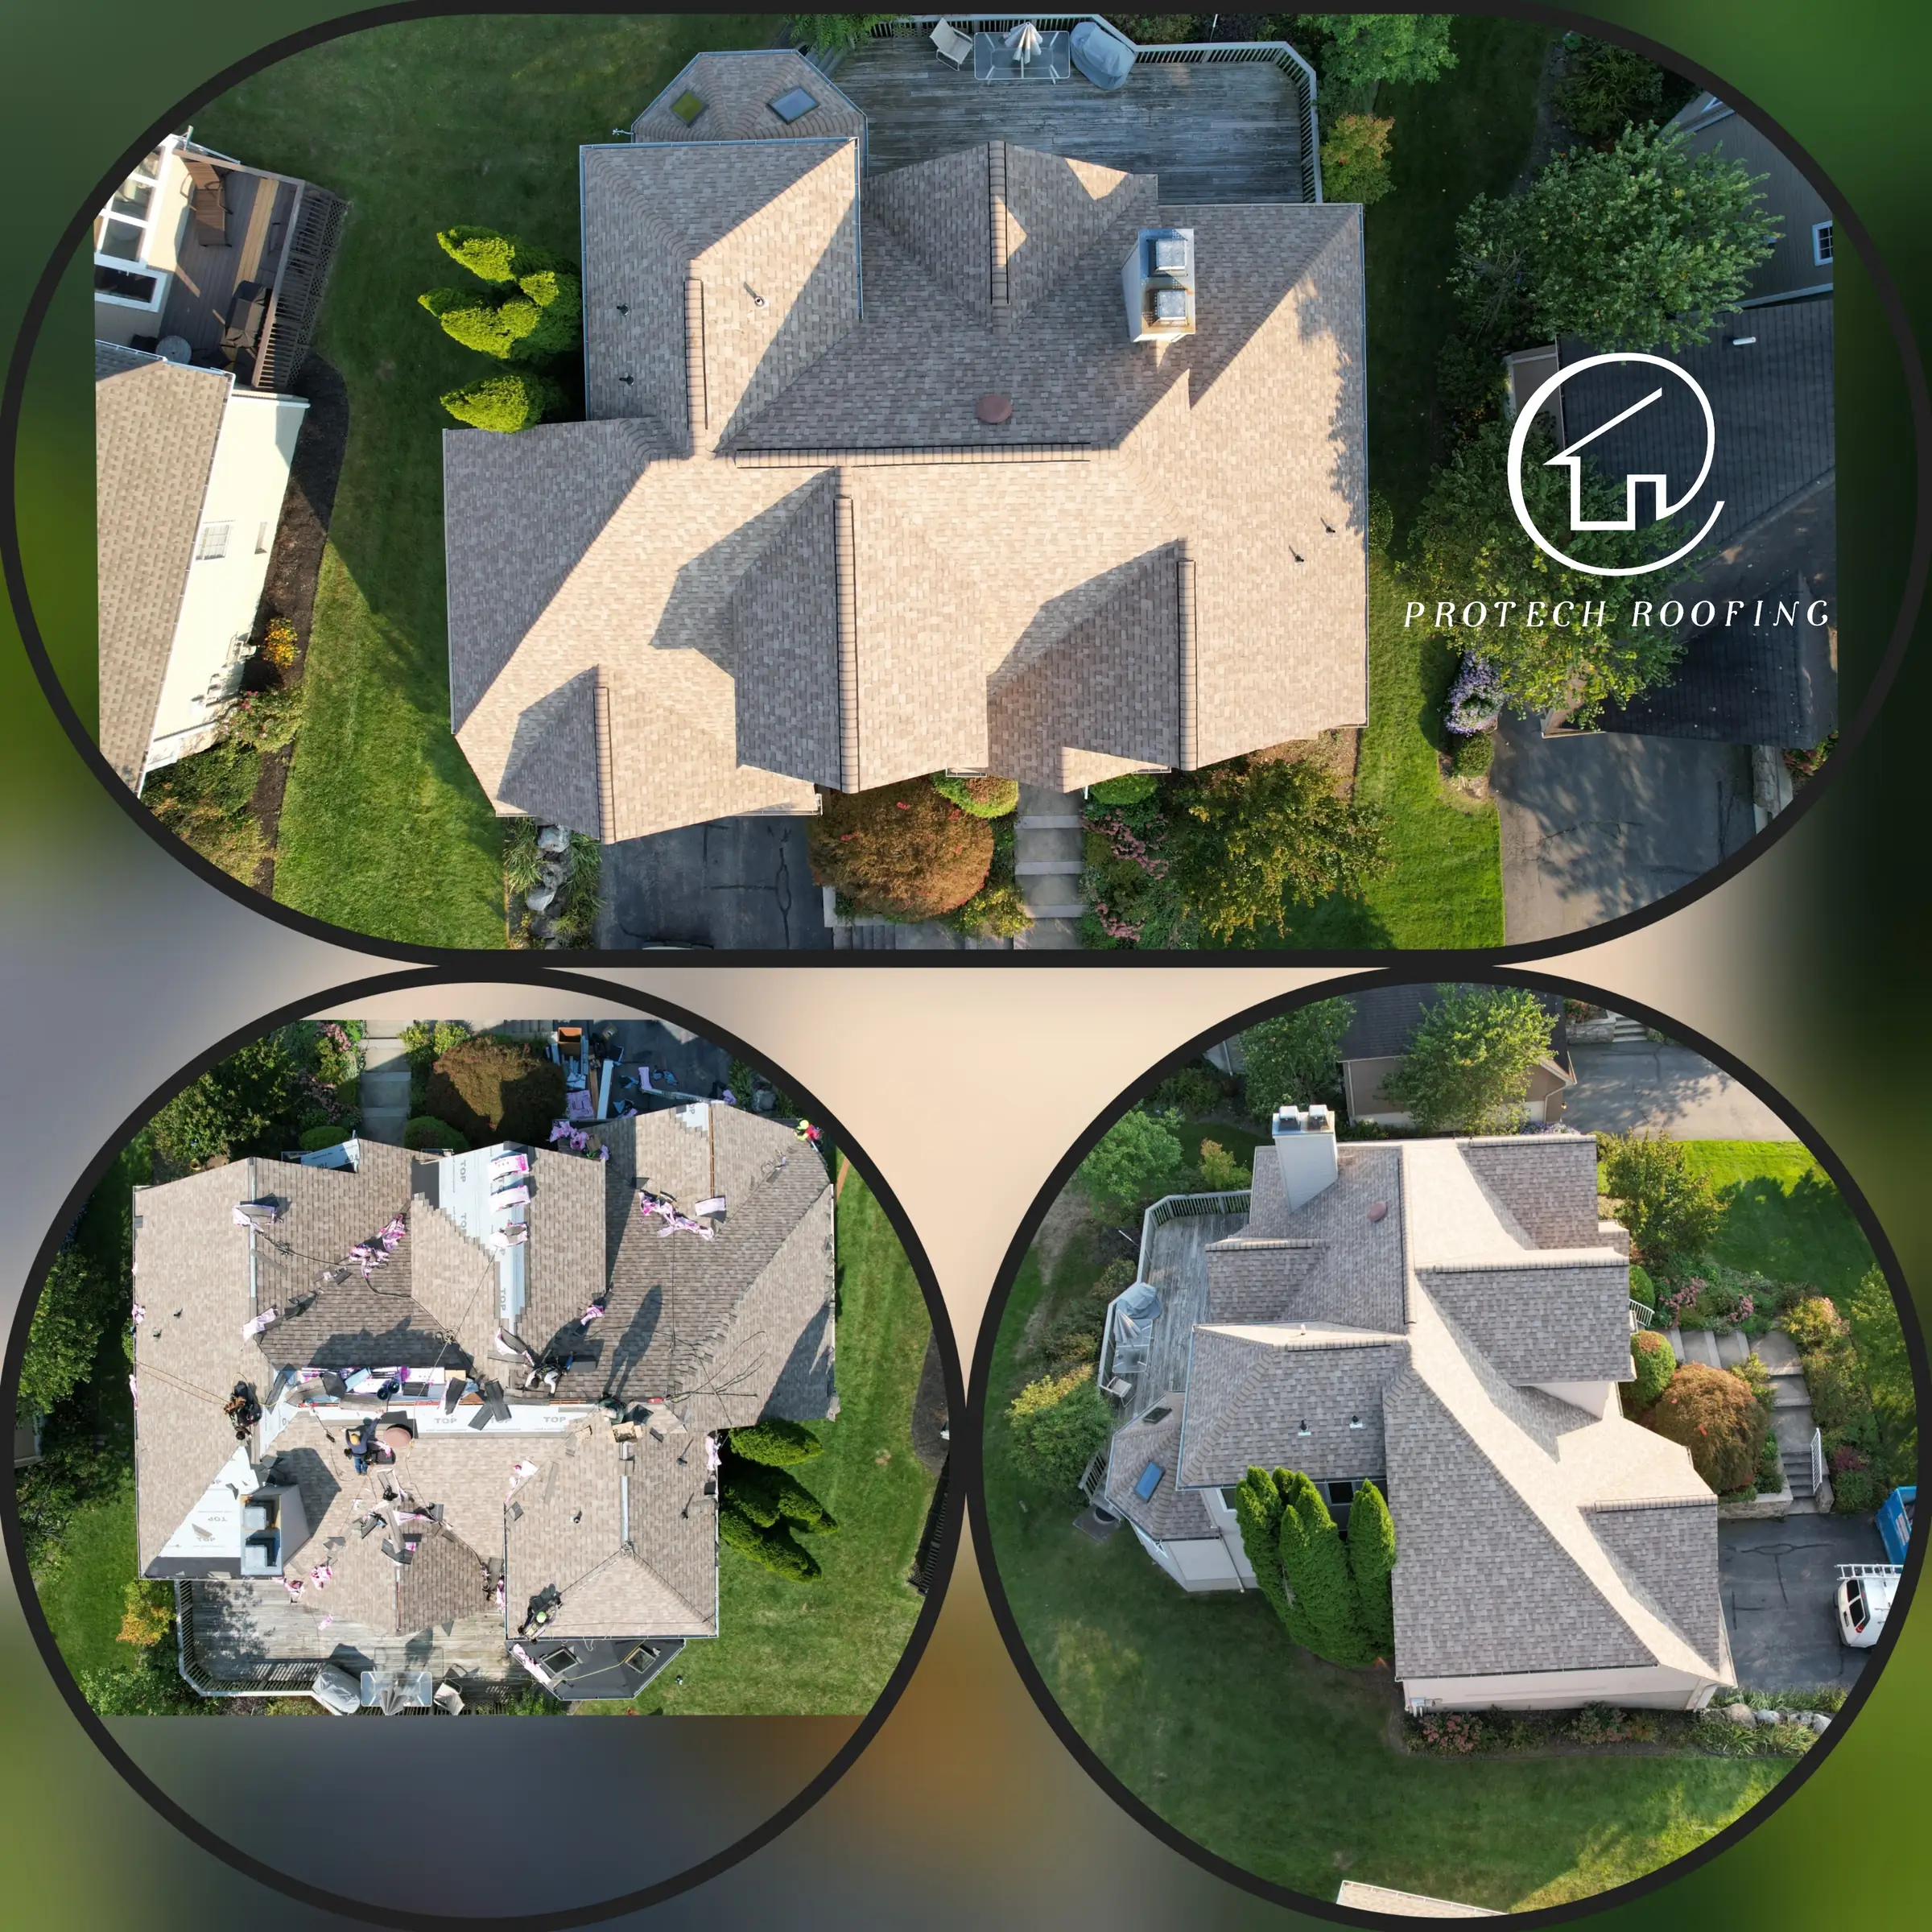
New charcoal shingles on a Tudor-style home with a dormer, skylights and a tall chimney. 
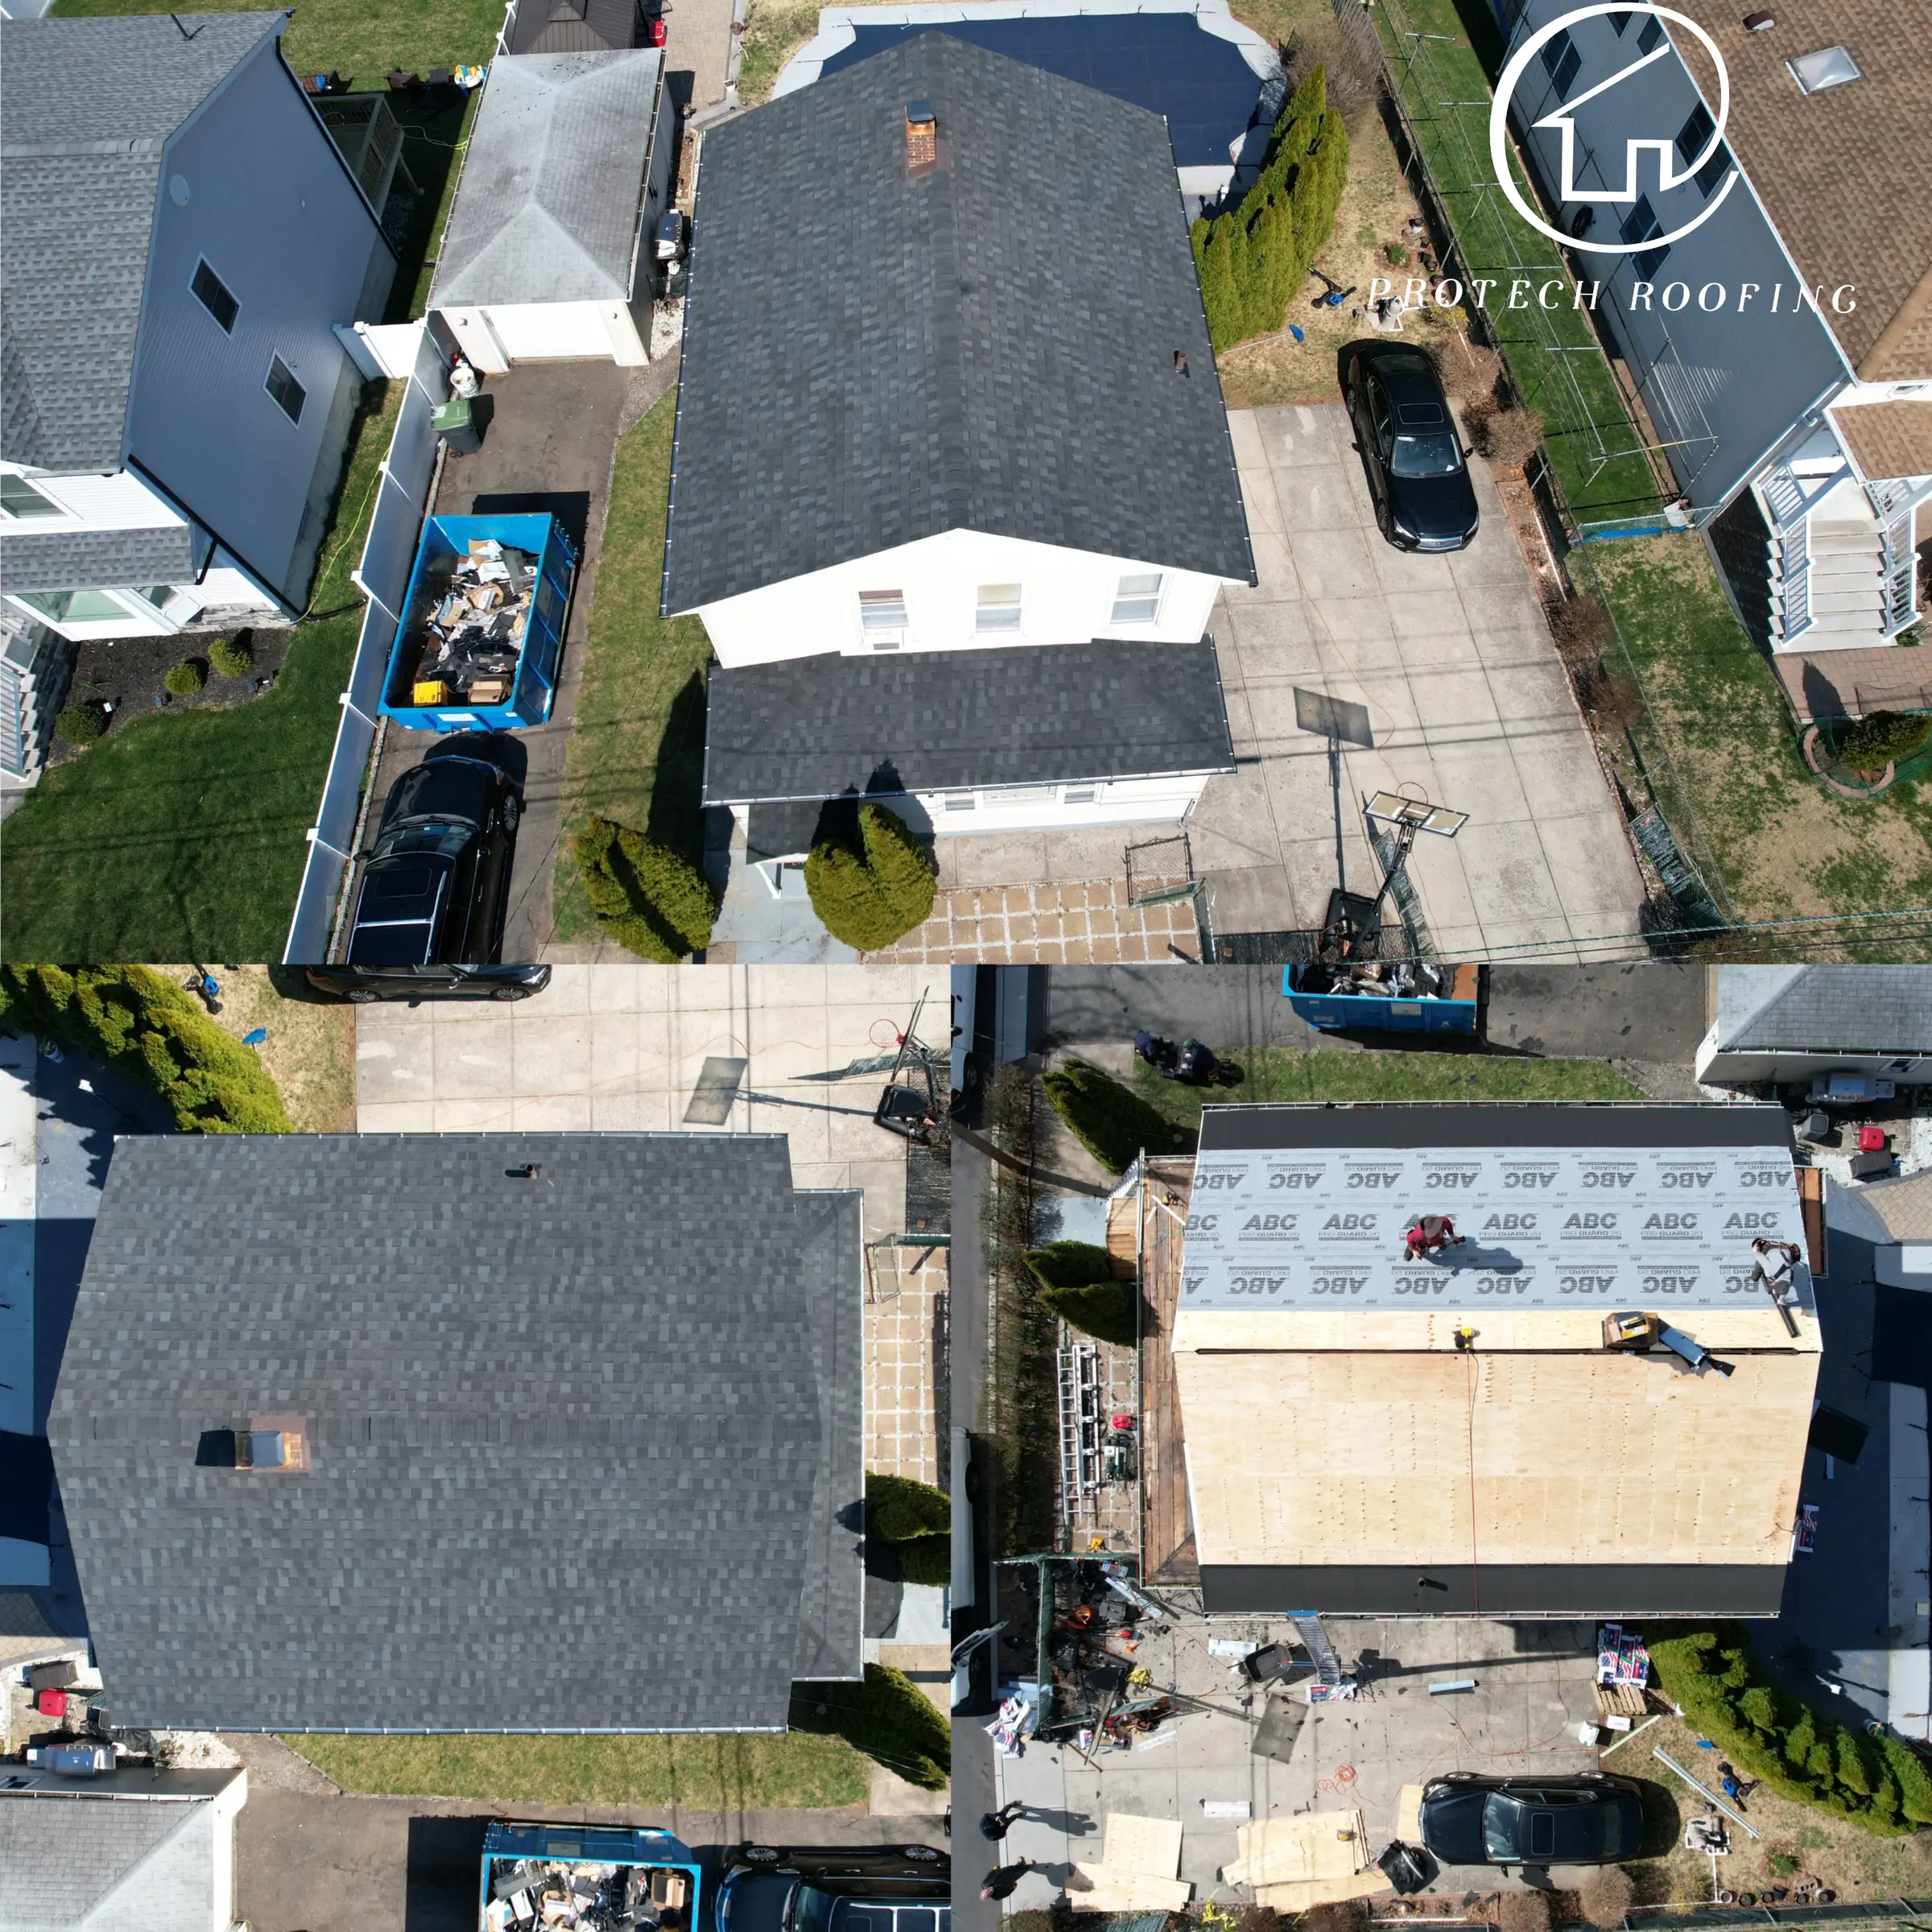
Two-section gable roof in charcoal architectural shingles with new ridge caps. 
Gray architectural shingles with new pipe flashings, ridge vent and chimney flashing. 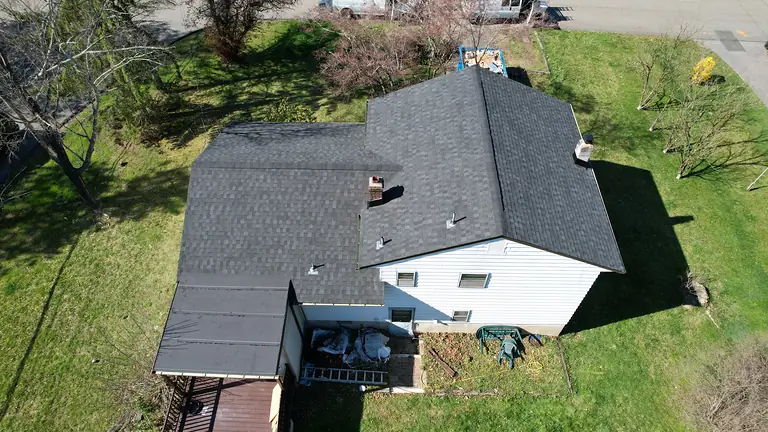
Shingle roof replacement with a low-slope membrane section over the rear porch. 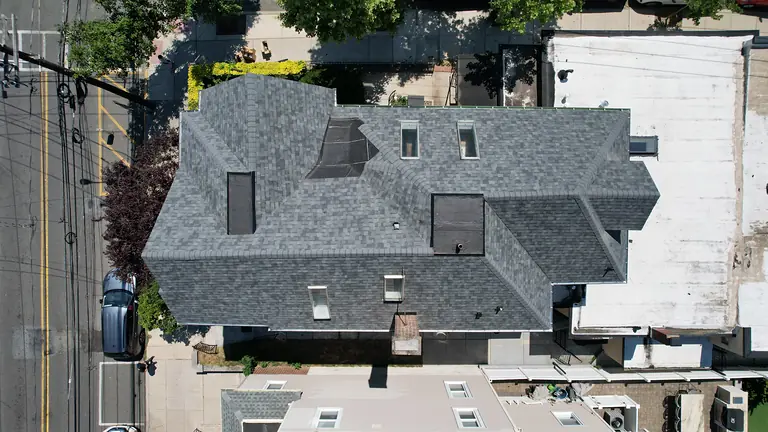
Multi-family roof with four skylights and three low-slope membrane sections tied into the shingles.
Behind the shingles
What a roof looks like mid-job
The layers you never see are the ones that keep you dry. These photos show tear-off, new decking, ice and water barrier and synthetic underlayment going down.

Section-by-section replacement. Underlayment is down and shingles are going on, so the house is never left open. 
Ice and water barrier in the valleys and at the eaves, synthetic underlayment above, and a crew tied off with safety lines. 
Old shingles and rotted boards removed down to the rafters, with new plywood decking and underlayment installed.
Flat roofs and details
Flat roofs, chimneys and flashing
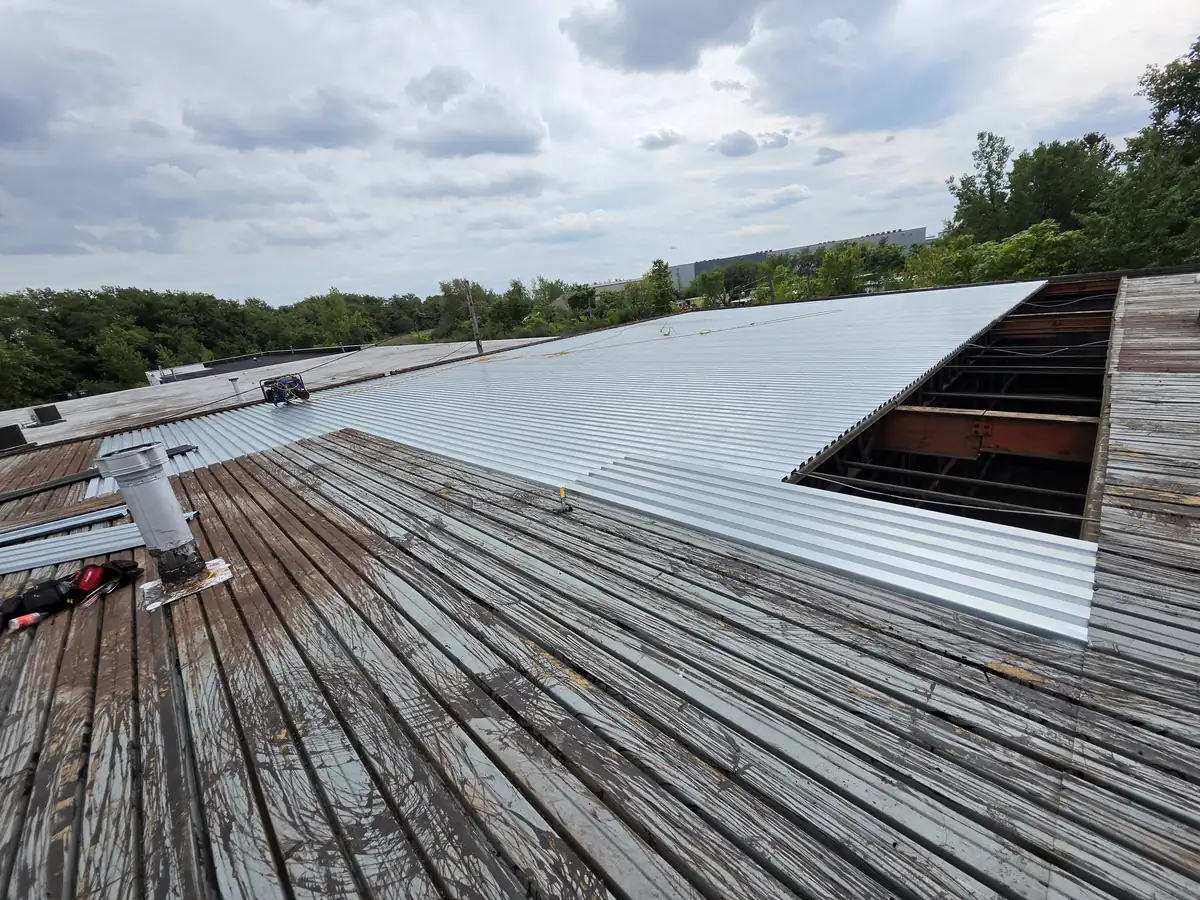
New steel roof deck going down on a commercial building before insulation and membrane. 
A low-slope modified bitumen roof tied into a shingled dormer on a multi-family home. 
Brick chimney with new counter-flashing cut into the mortar joints. 
New step flashing and counter-flashing where a shingle roof meets a stucco wall.
Commercial
Commercial projects: tear-off, installation and finished membrane
Larger buildings, steel decks, parapet walls and a terrace deck with pavers. Click or tap any set to see it full size.
 View this photo set full size (opens in a new tab)
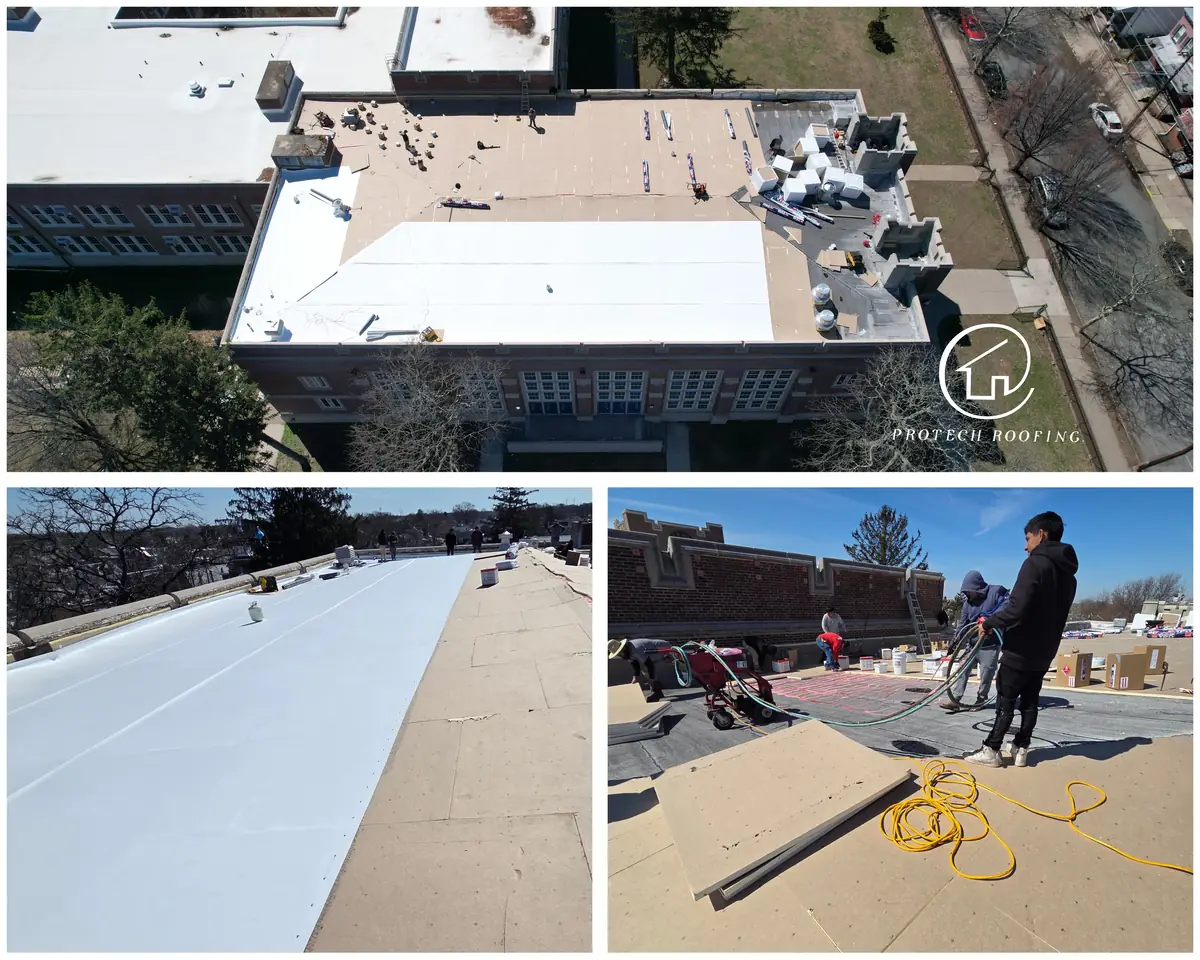
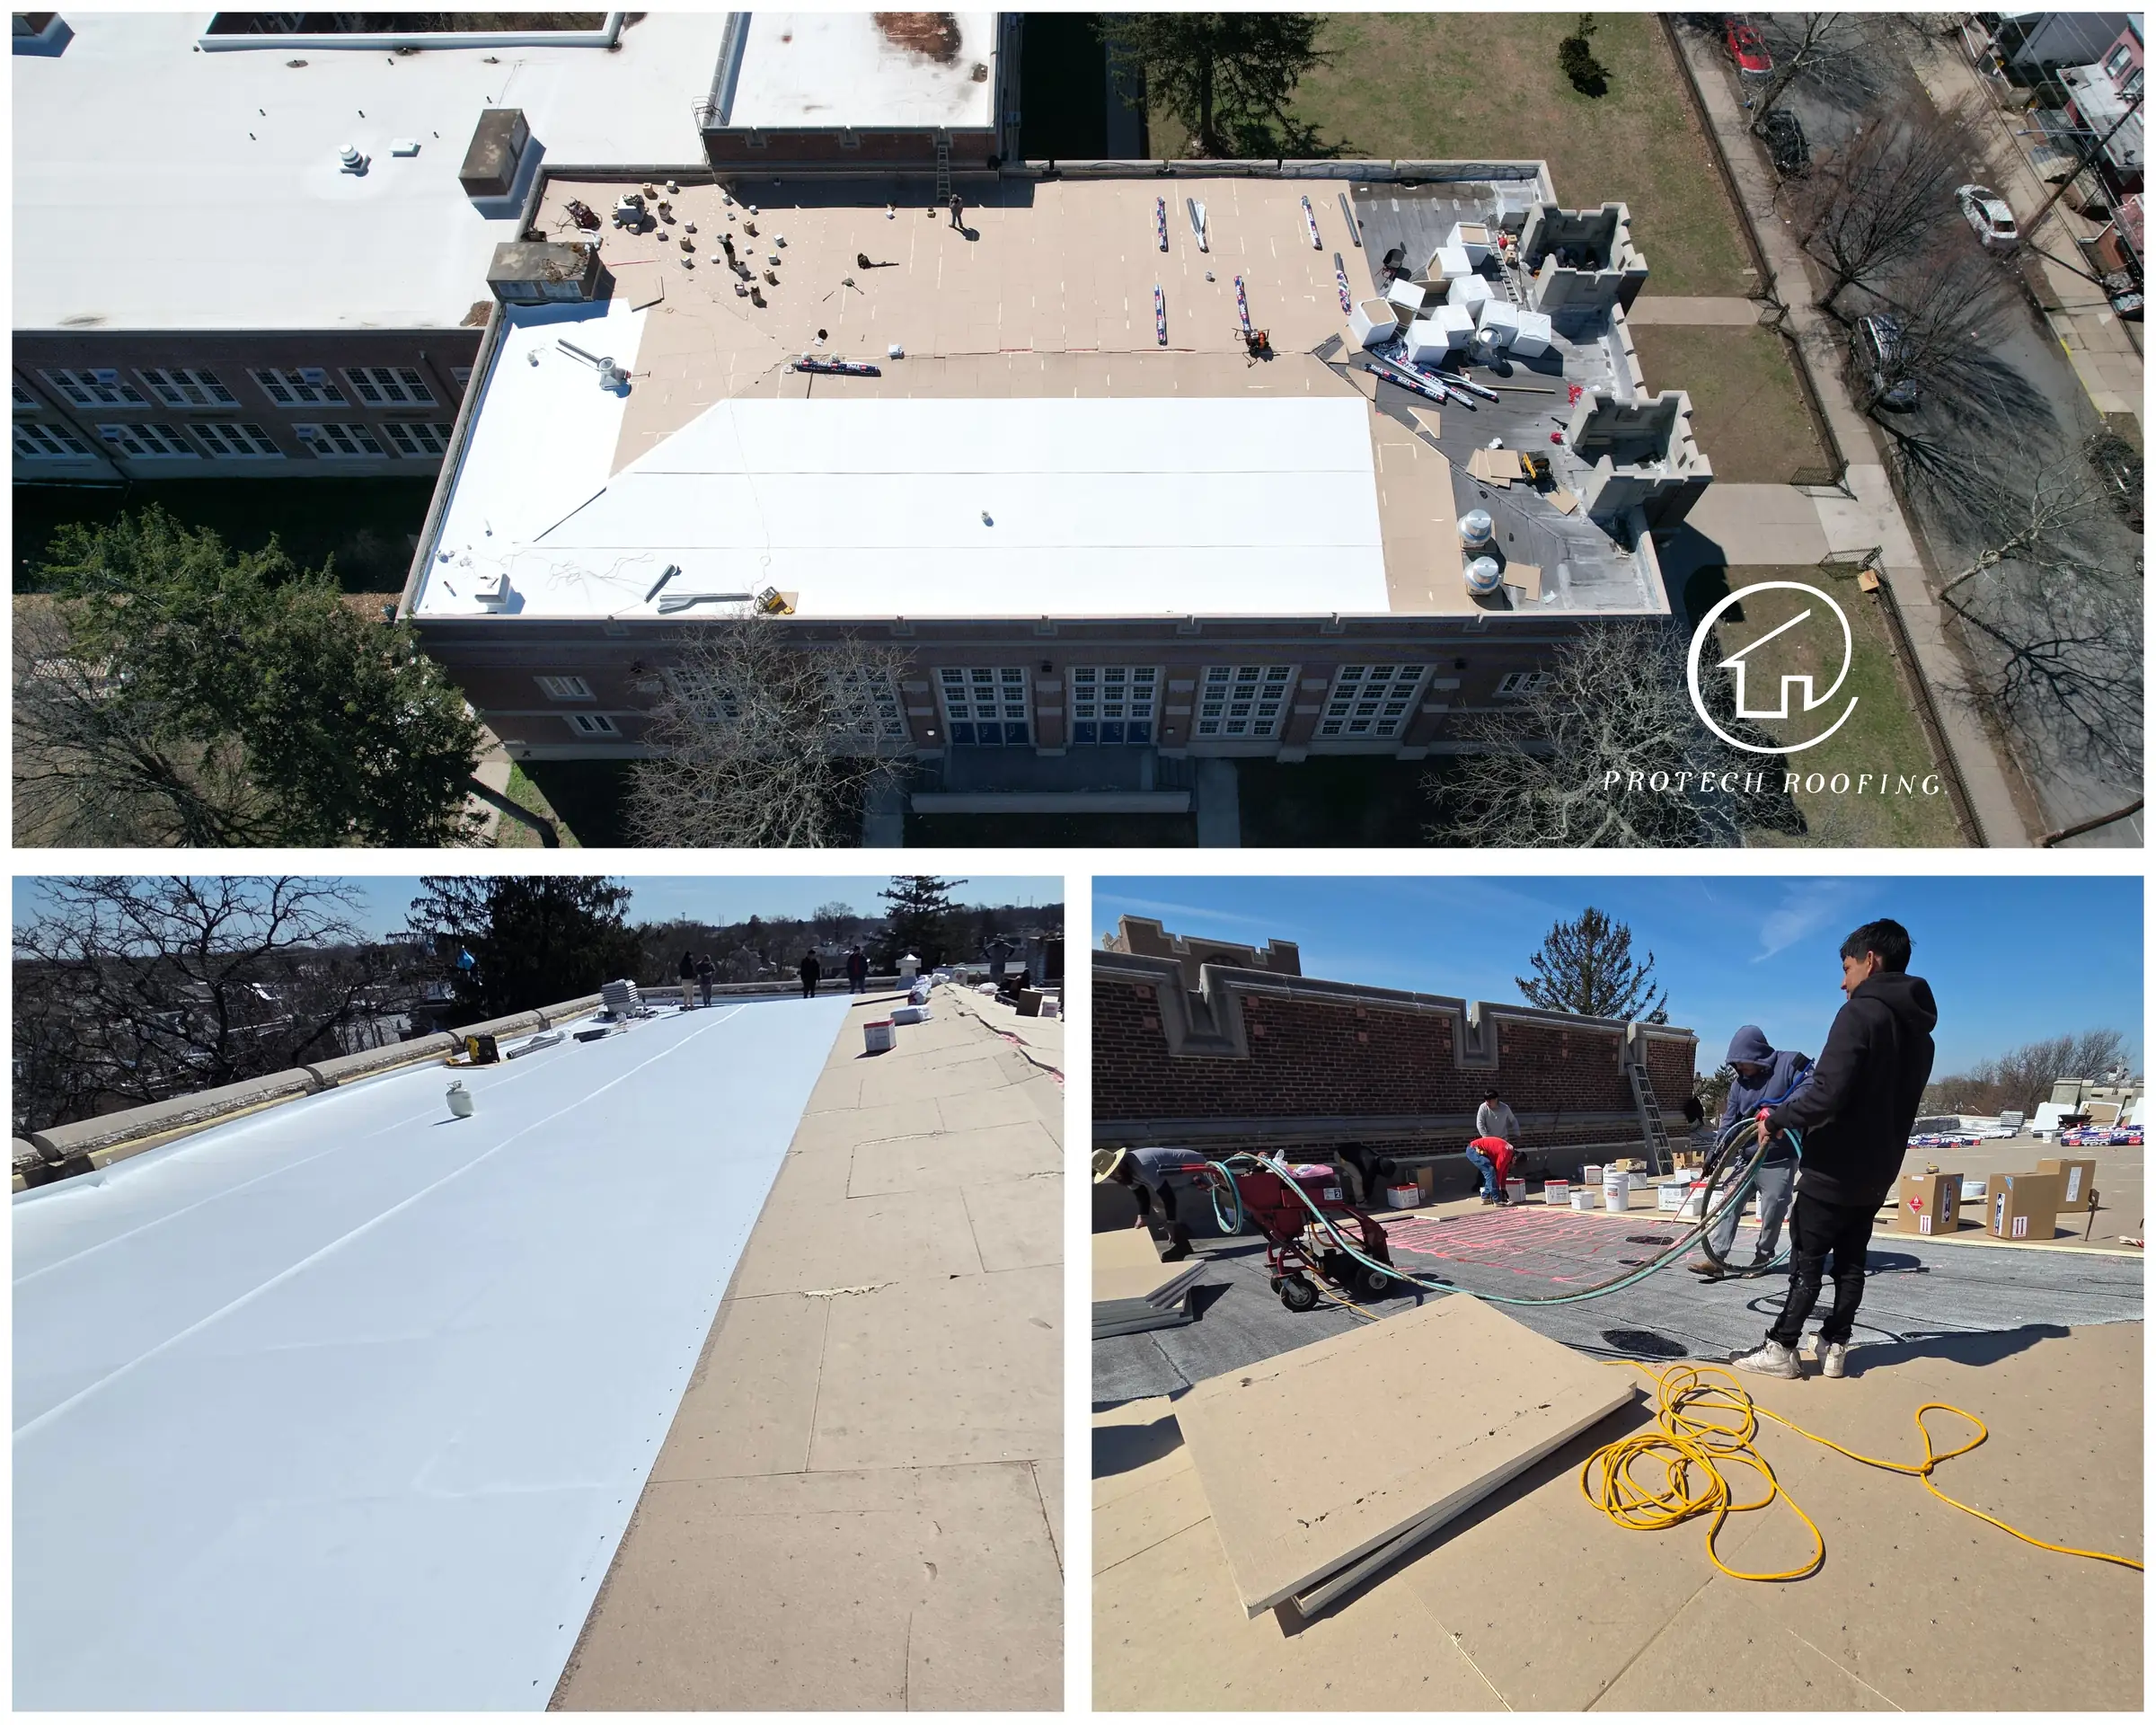
A large re-roof in progress: cover board across the deck, adhesive going down and TPO membrane rolled out sheet by sheet. 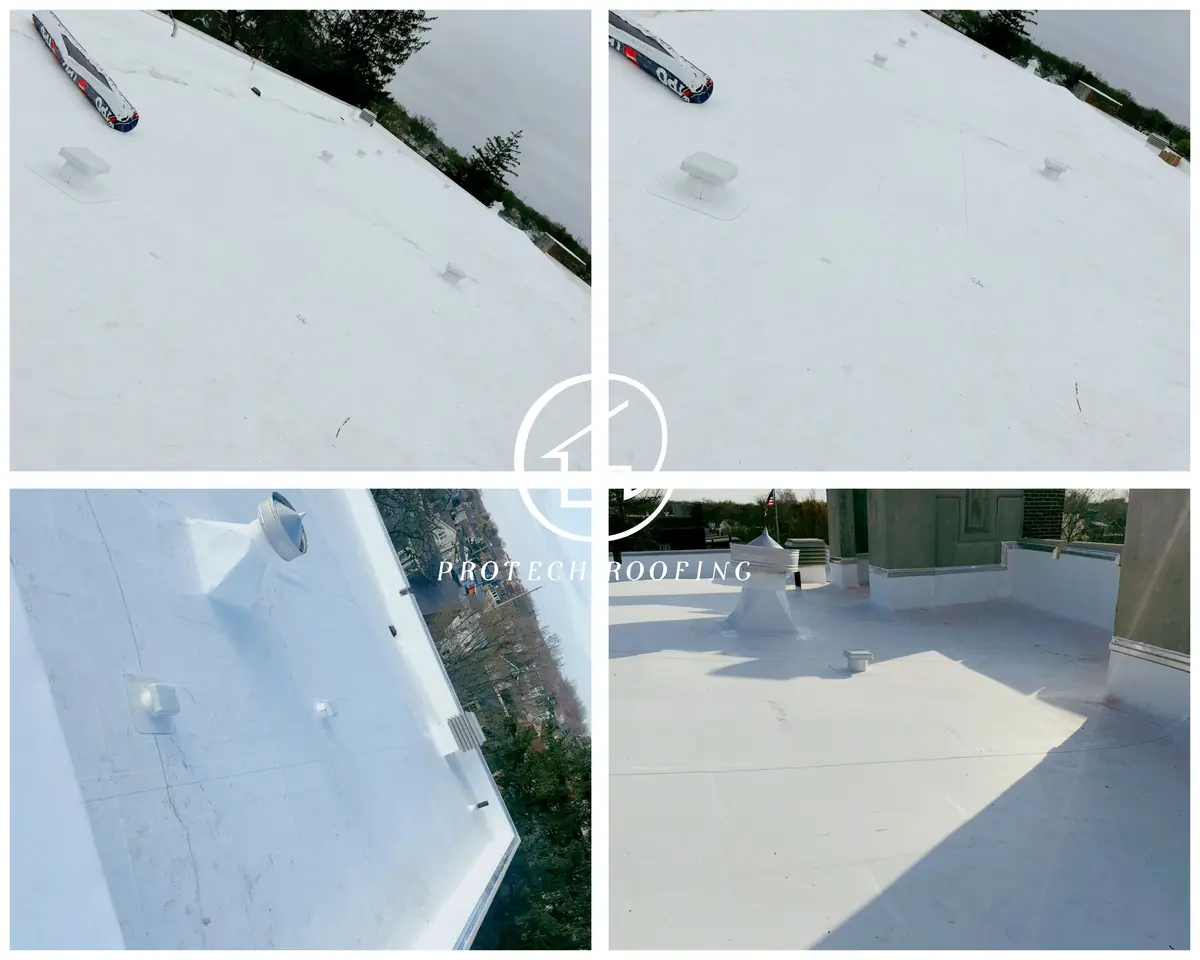 View this photo set full size (opens in a new tab)
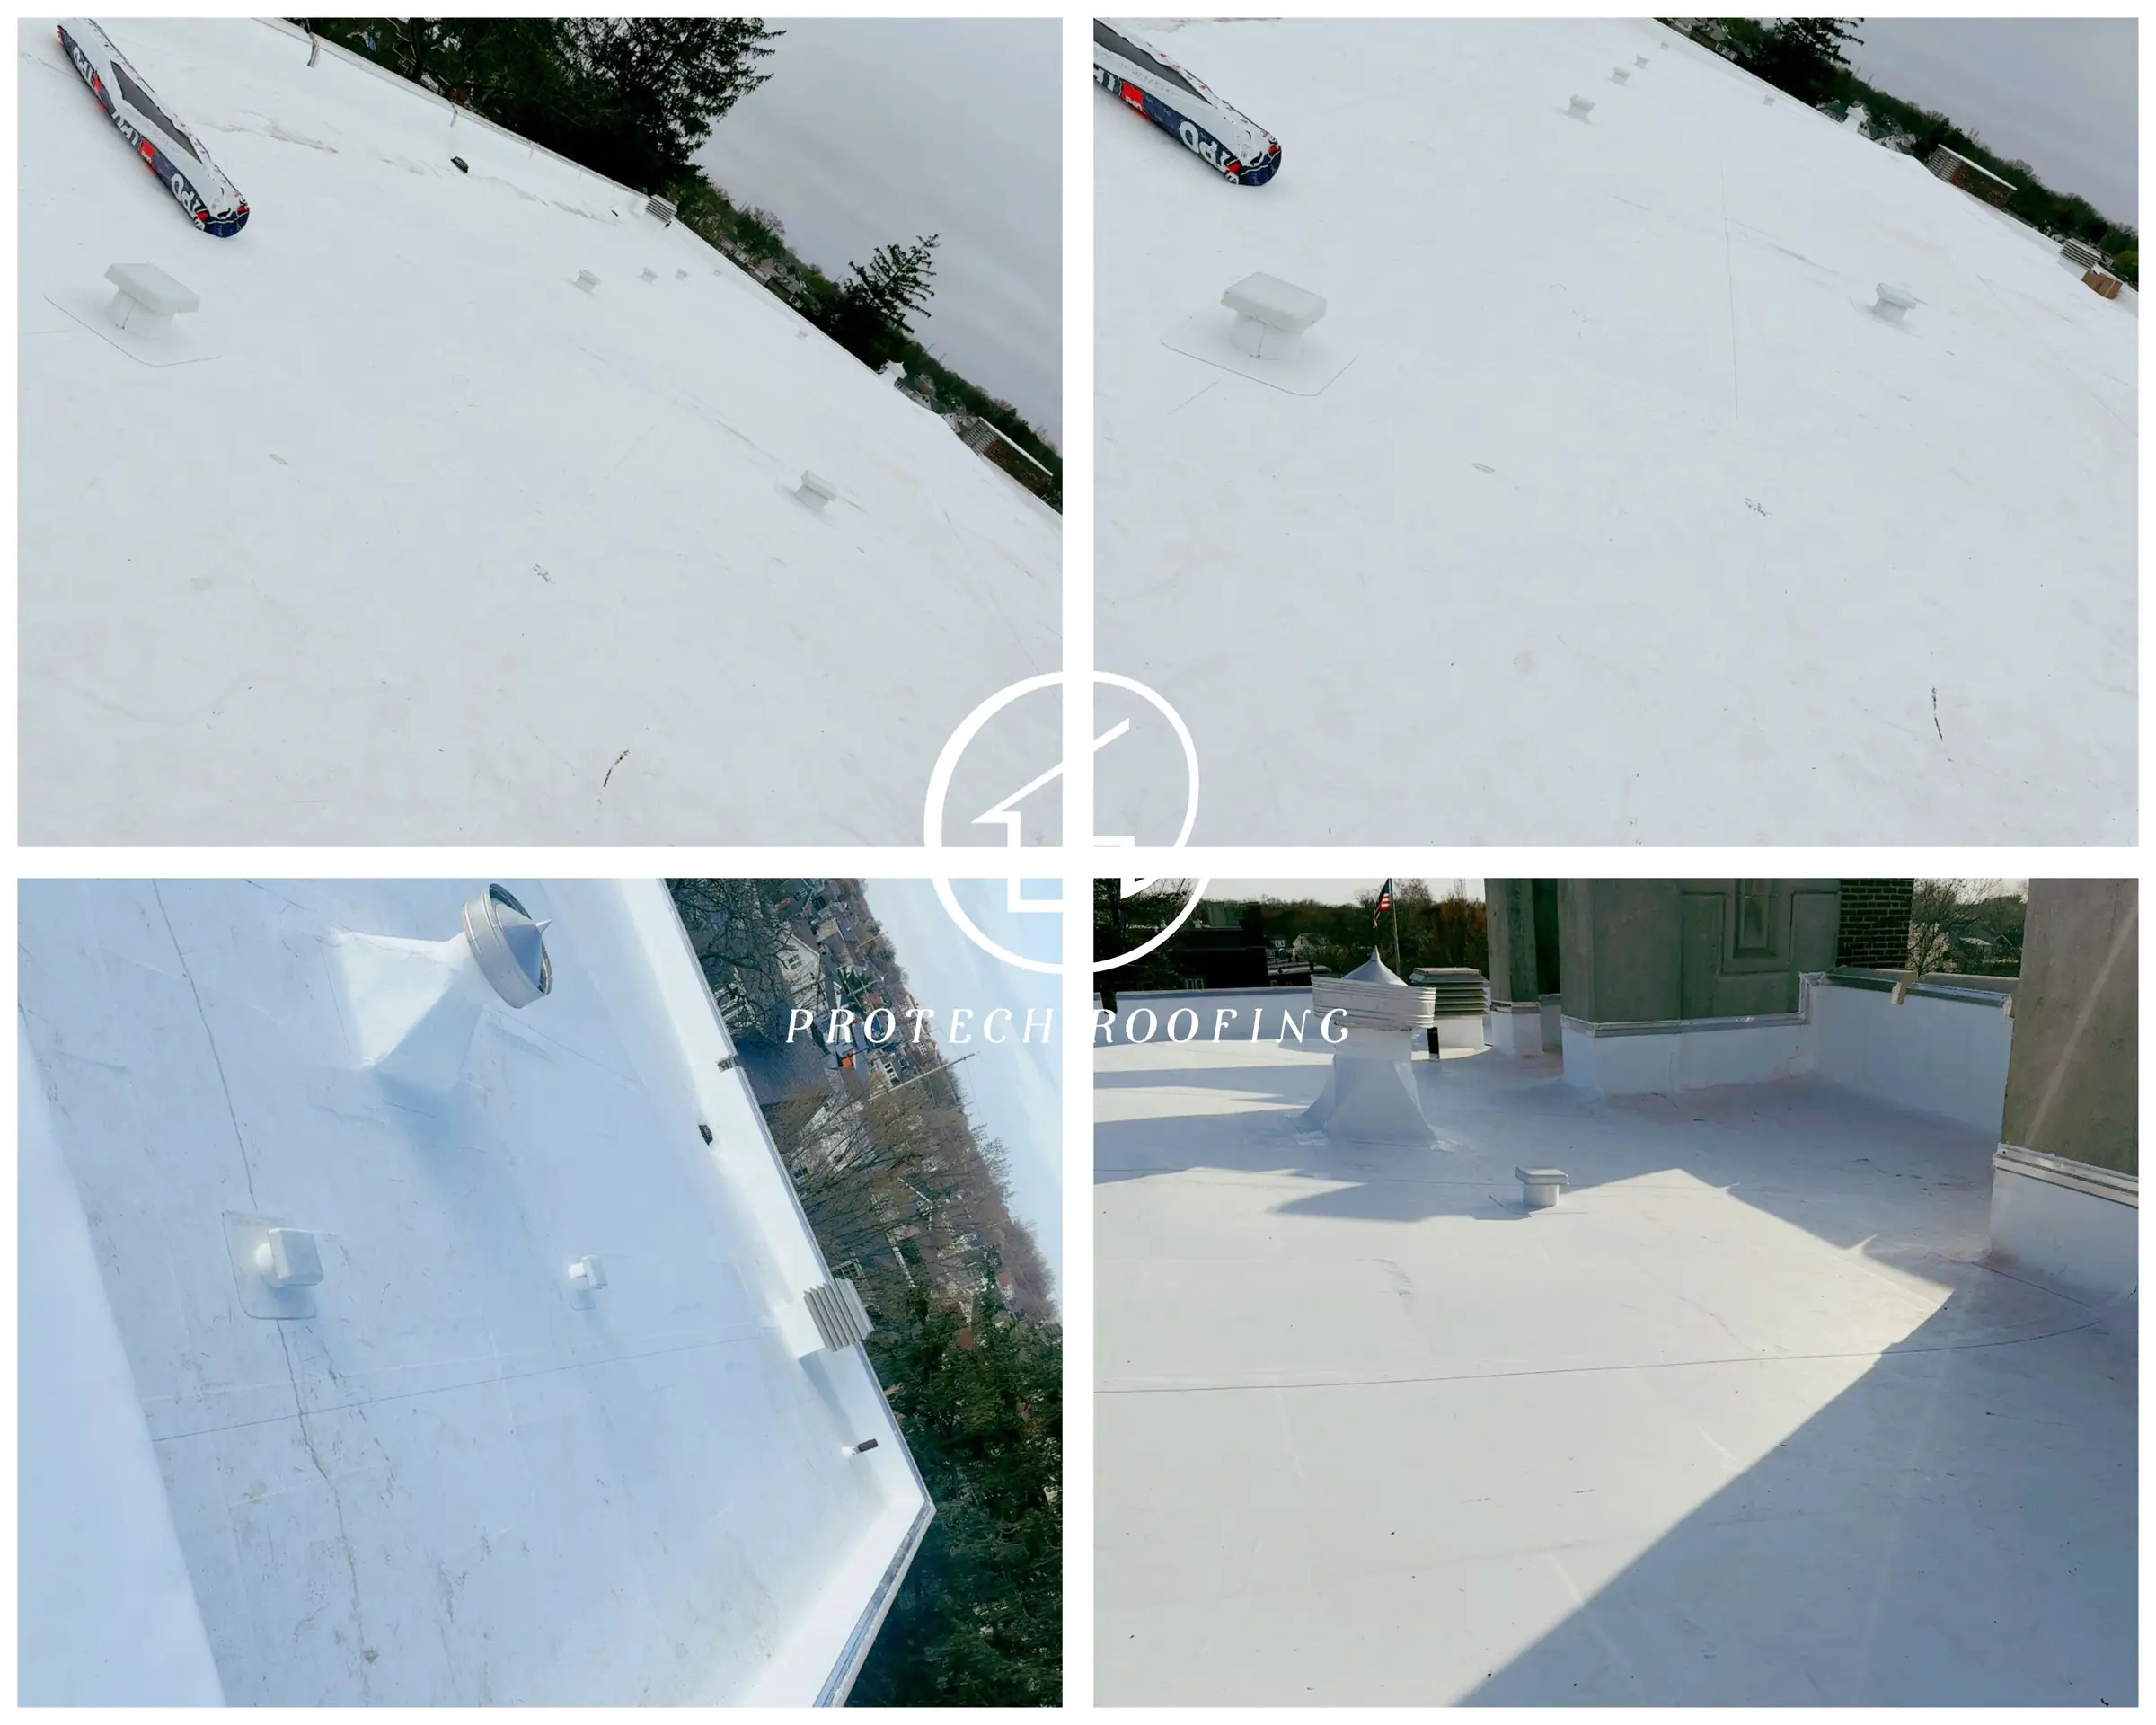
A finished TPO roof. Vents, ventilators and parapet walls are all flashed in the same material. 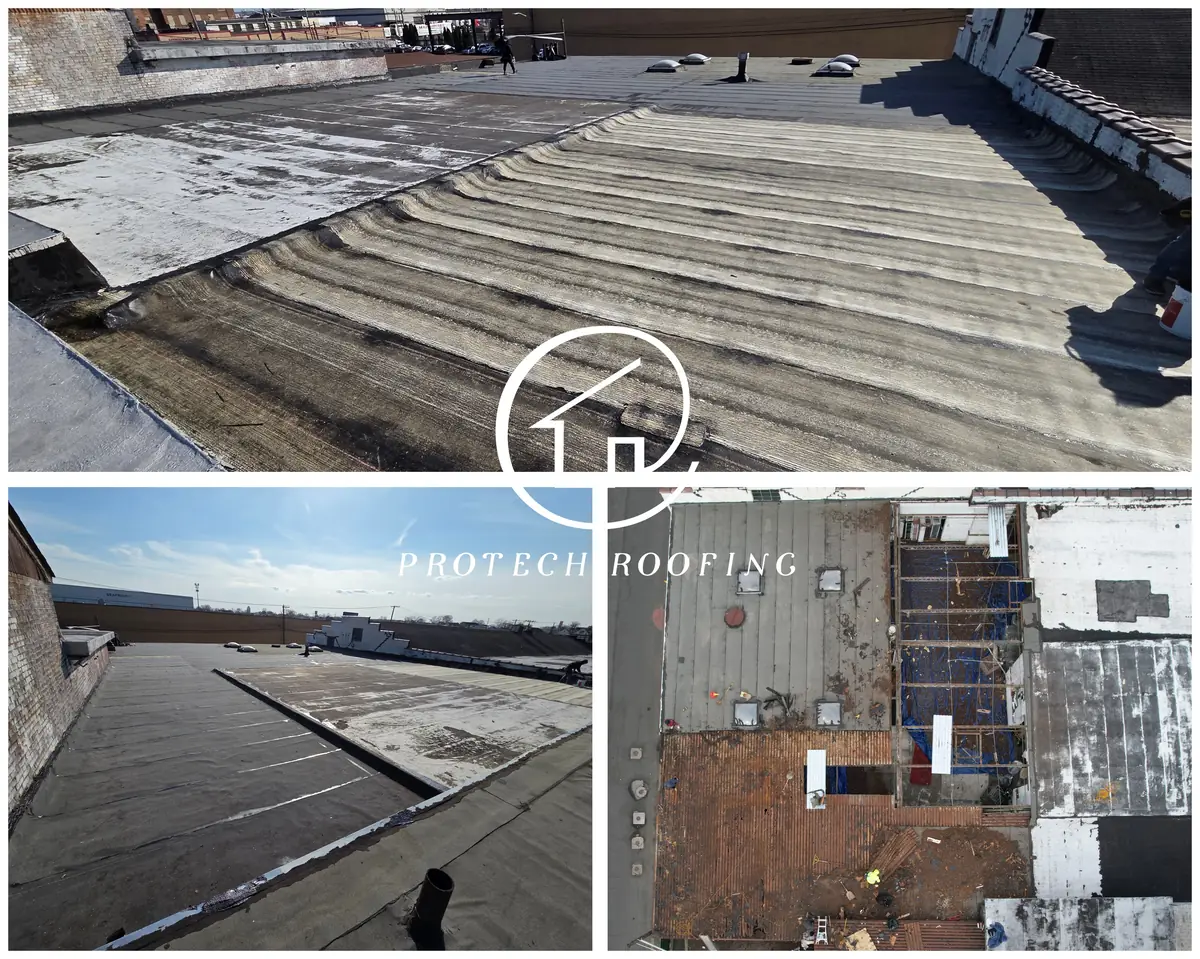 View this photo set full size (opens in a new tab)
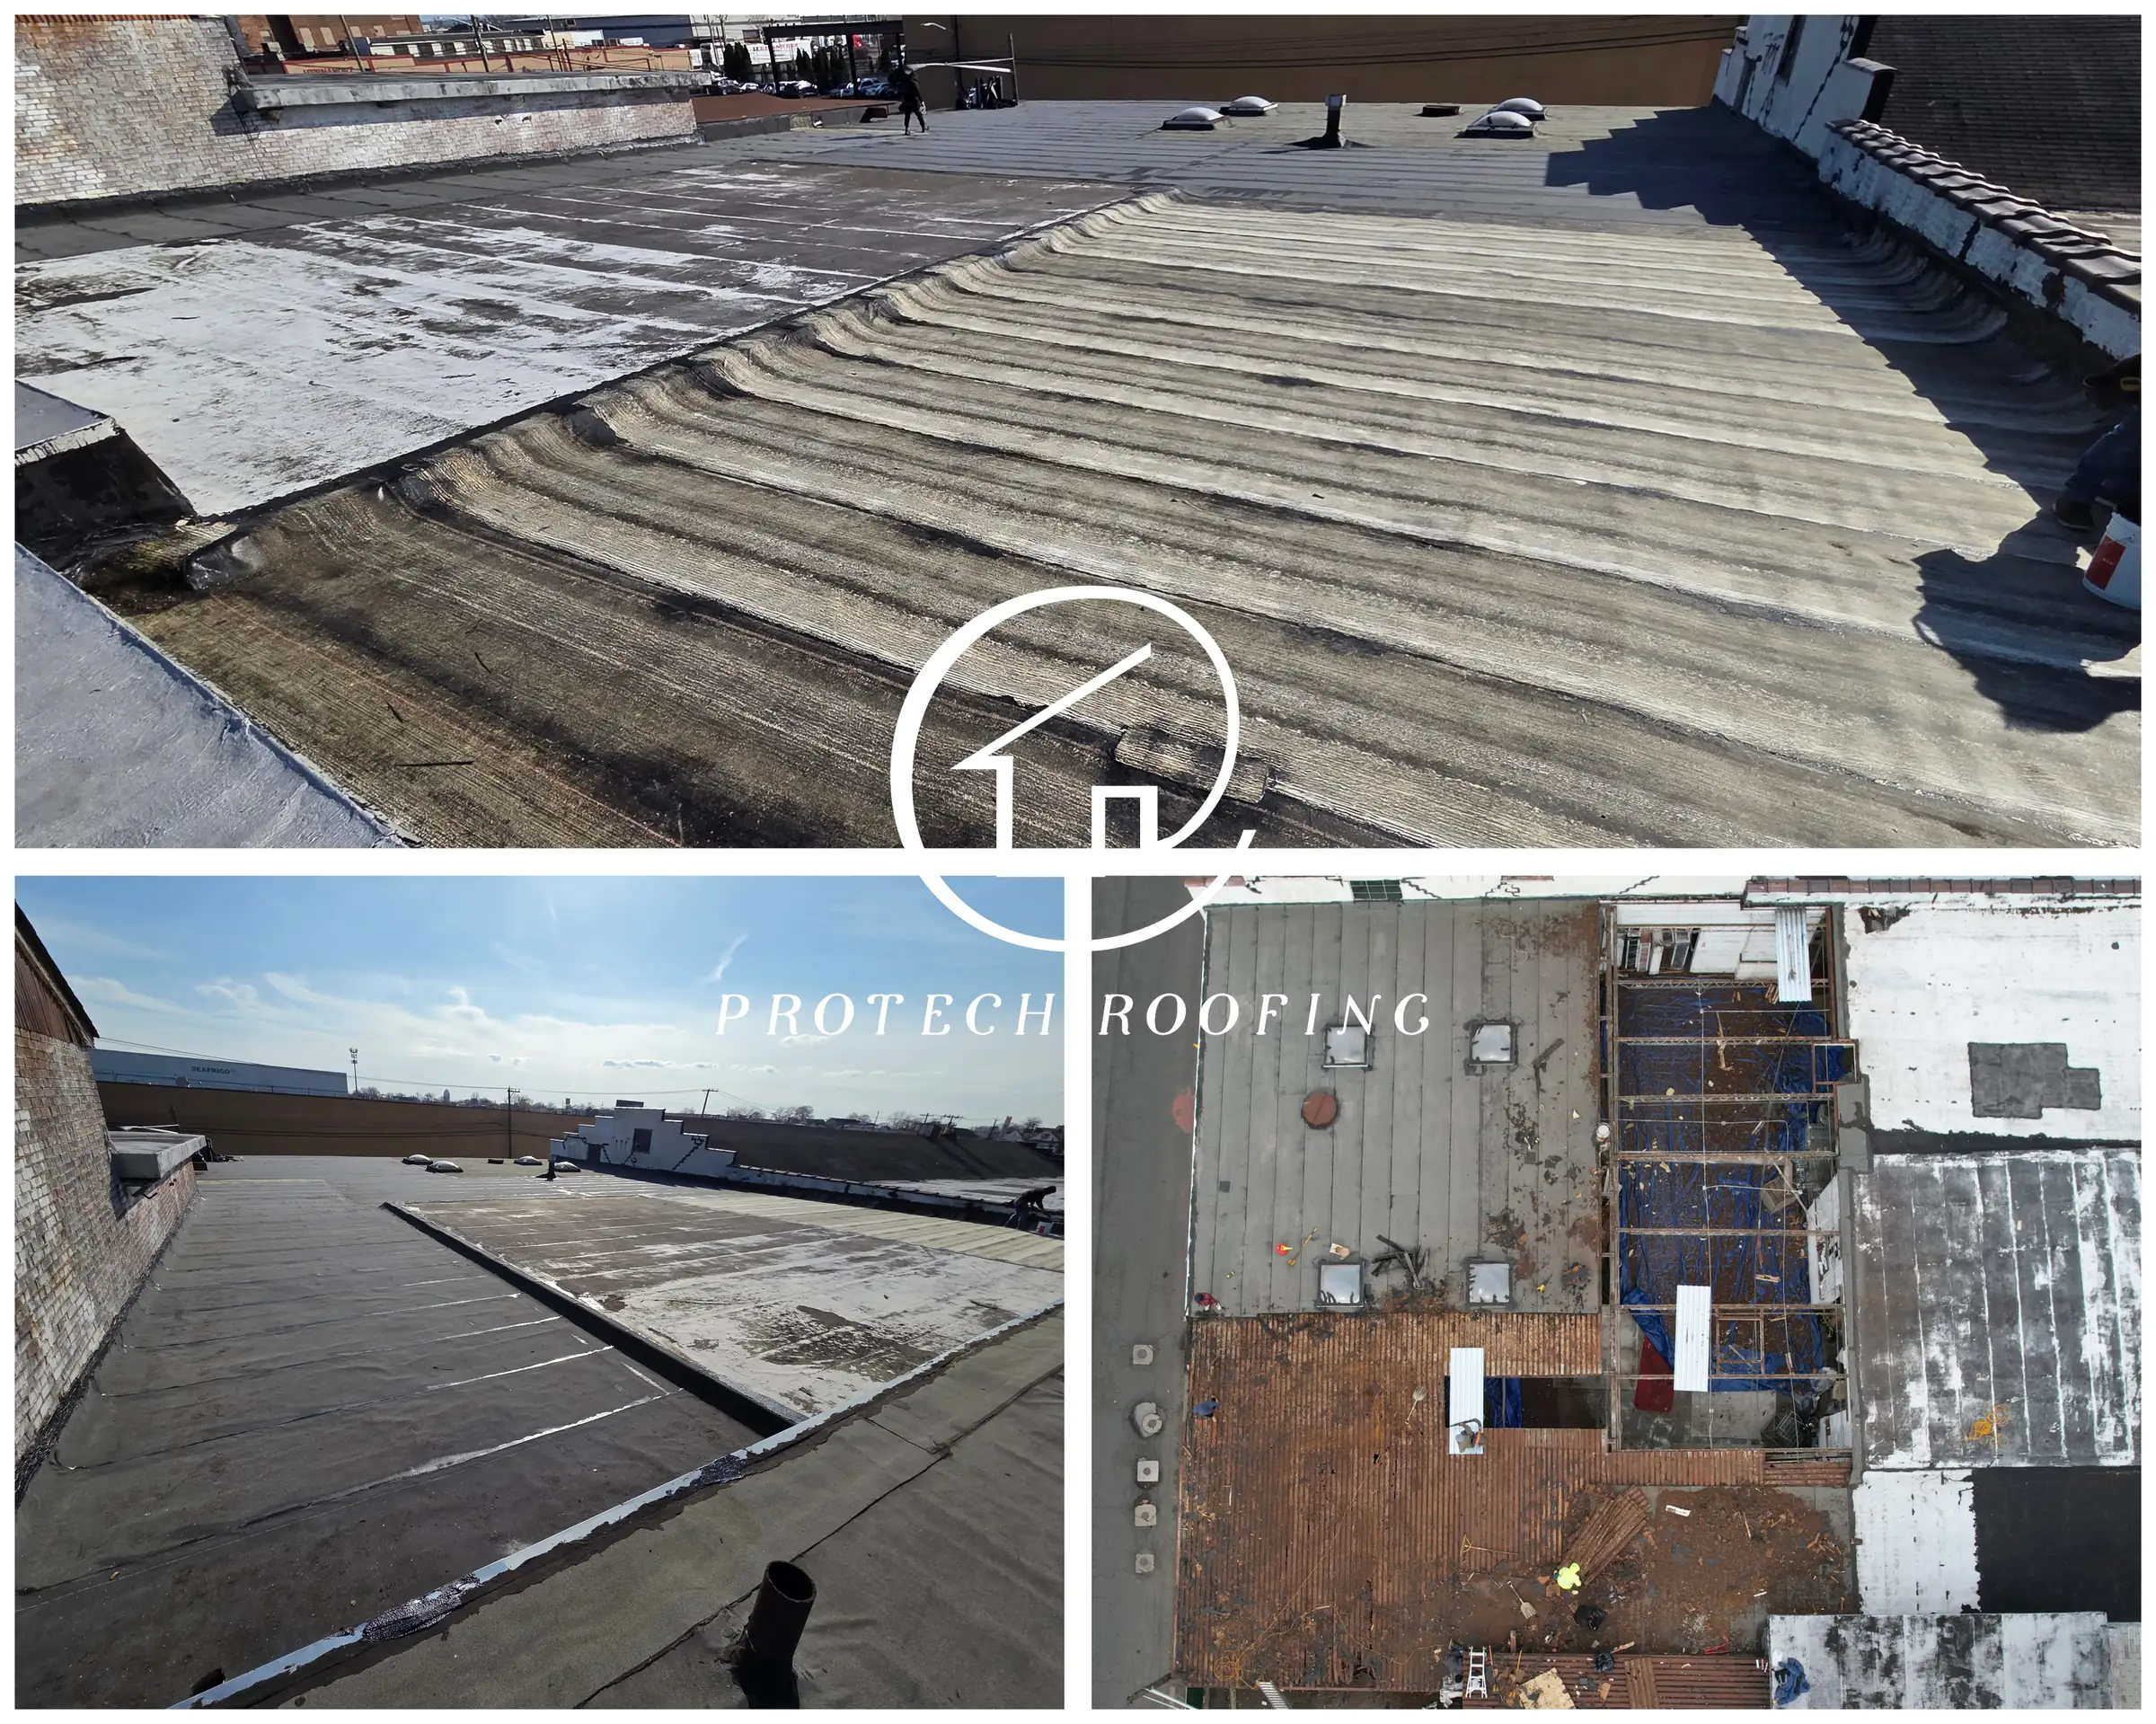
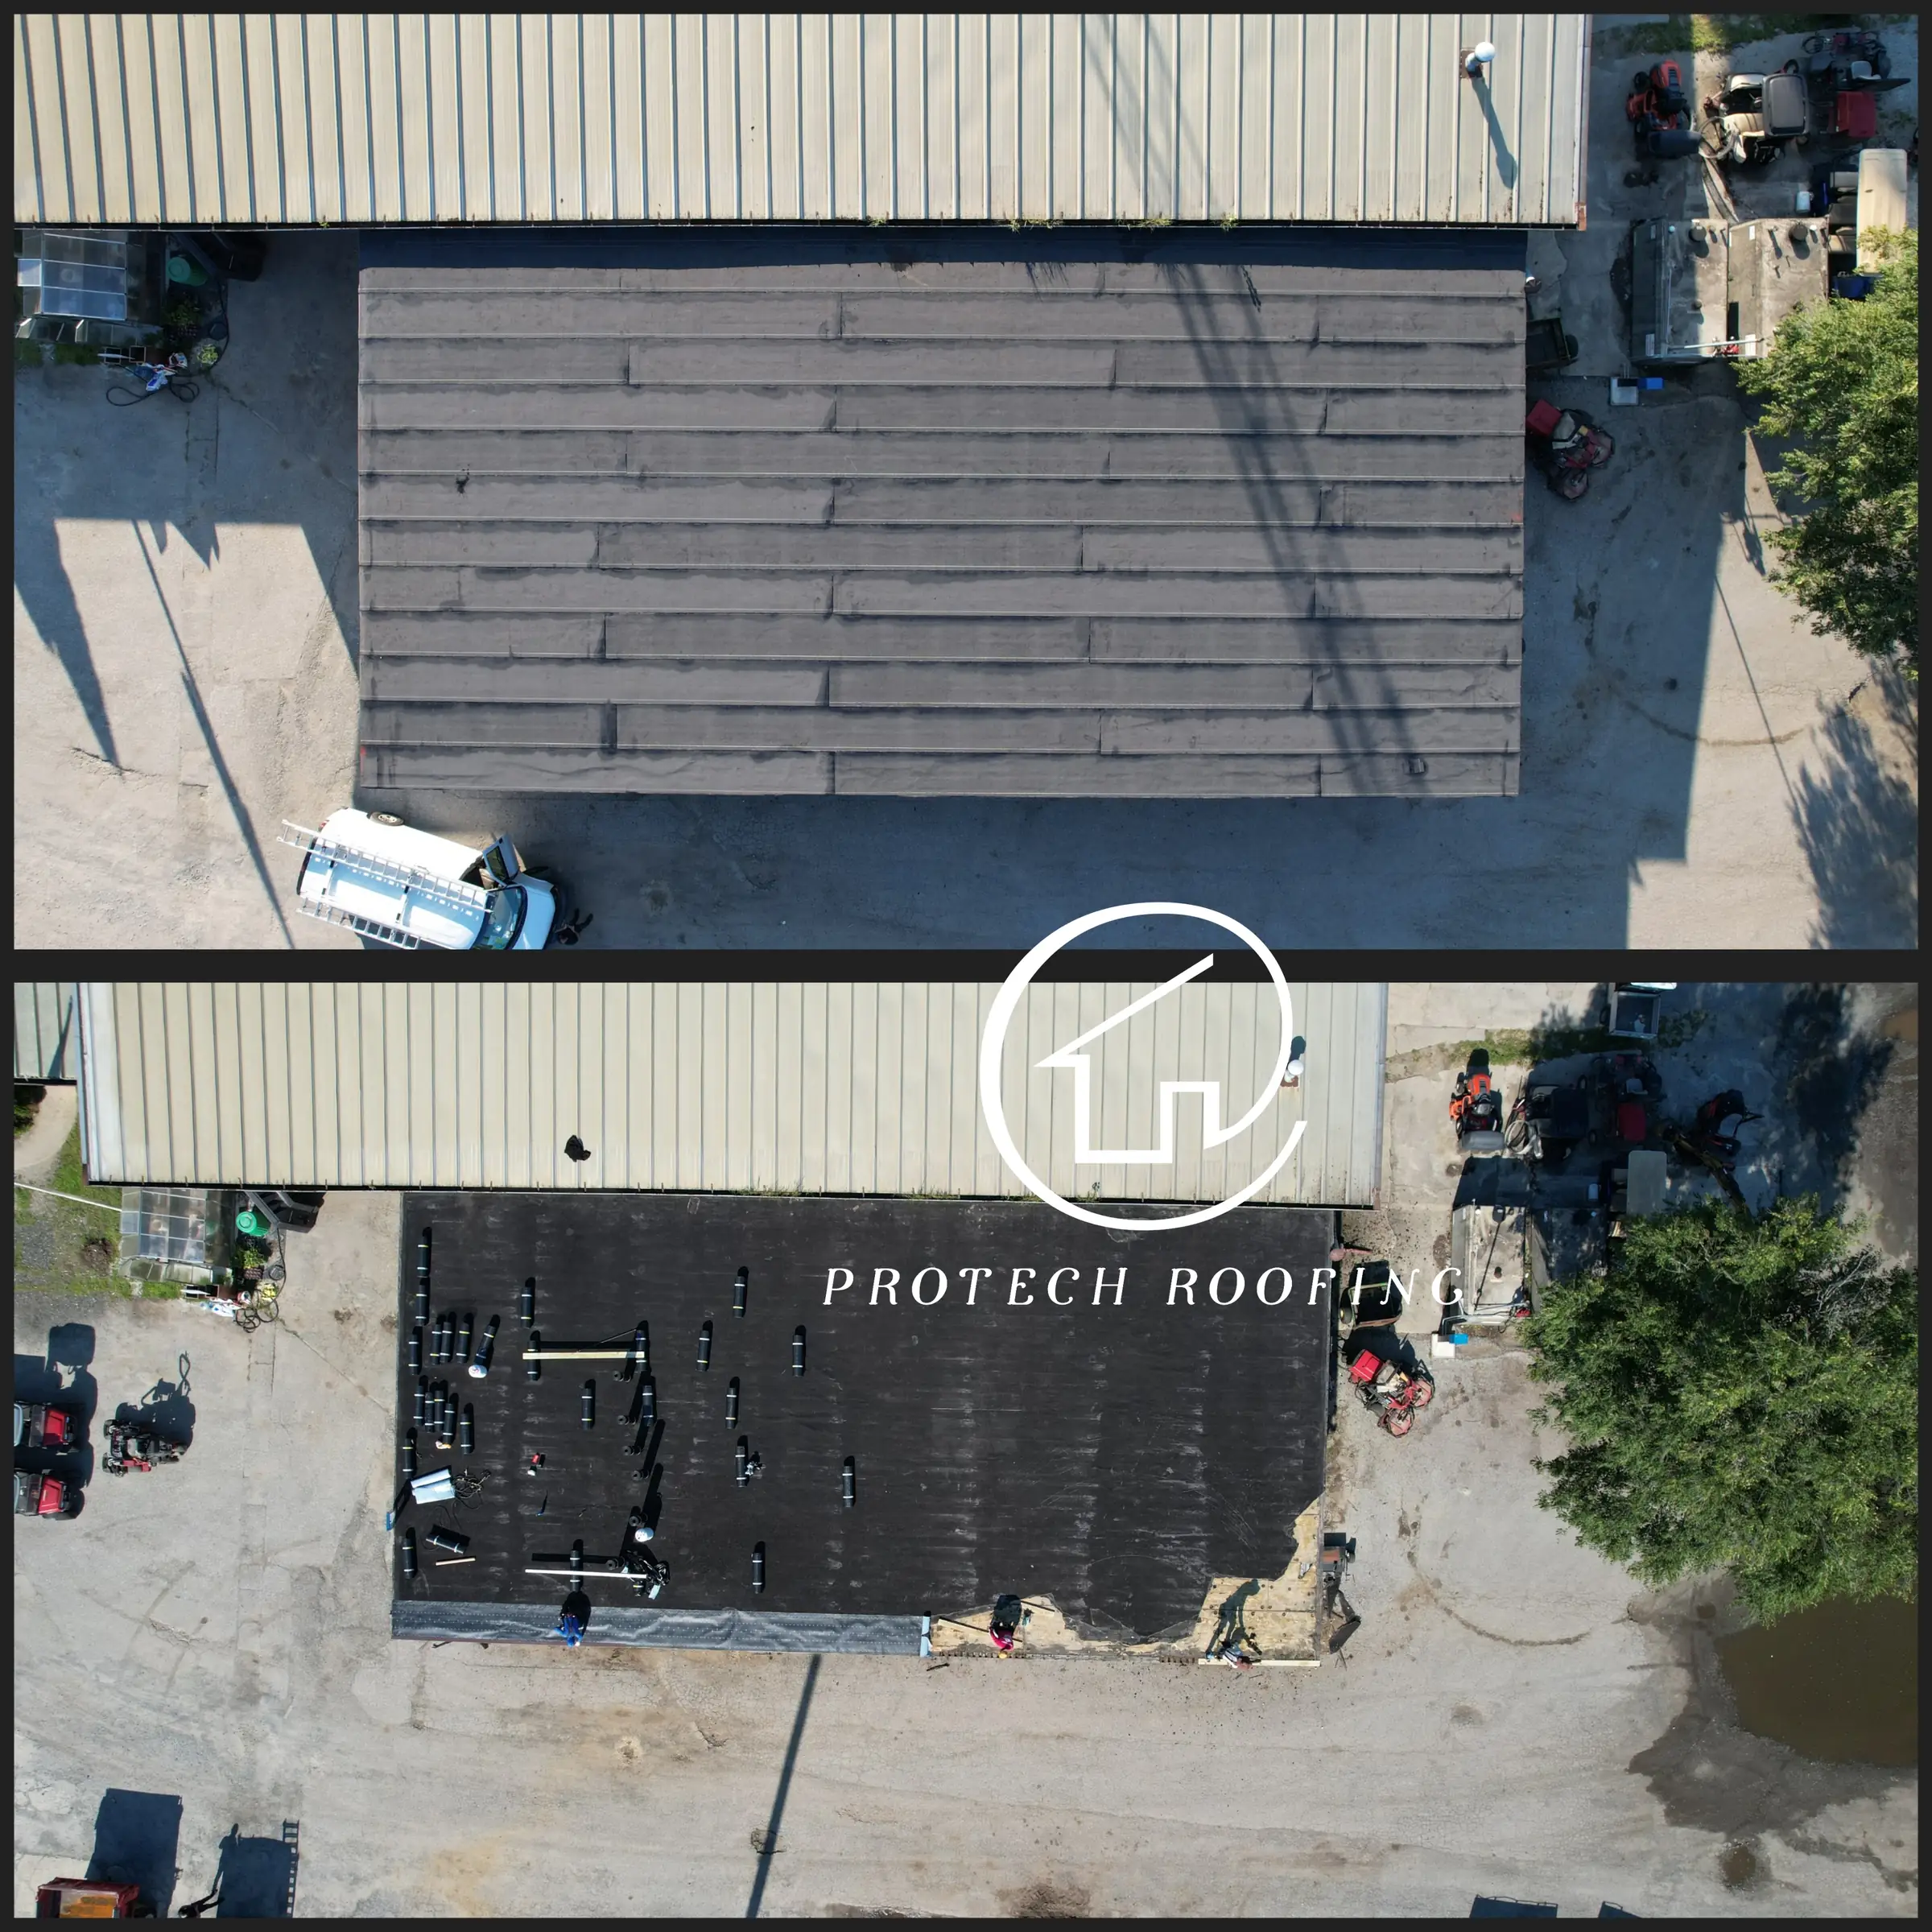
An old flat roof at the end of its life, and the tear-off that exposed rusted steel decking underneath. 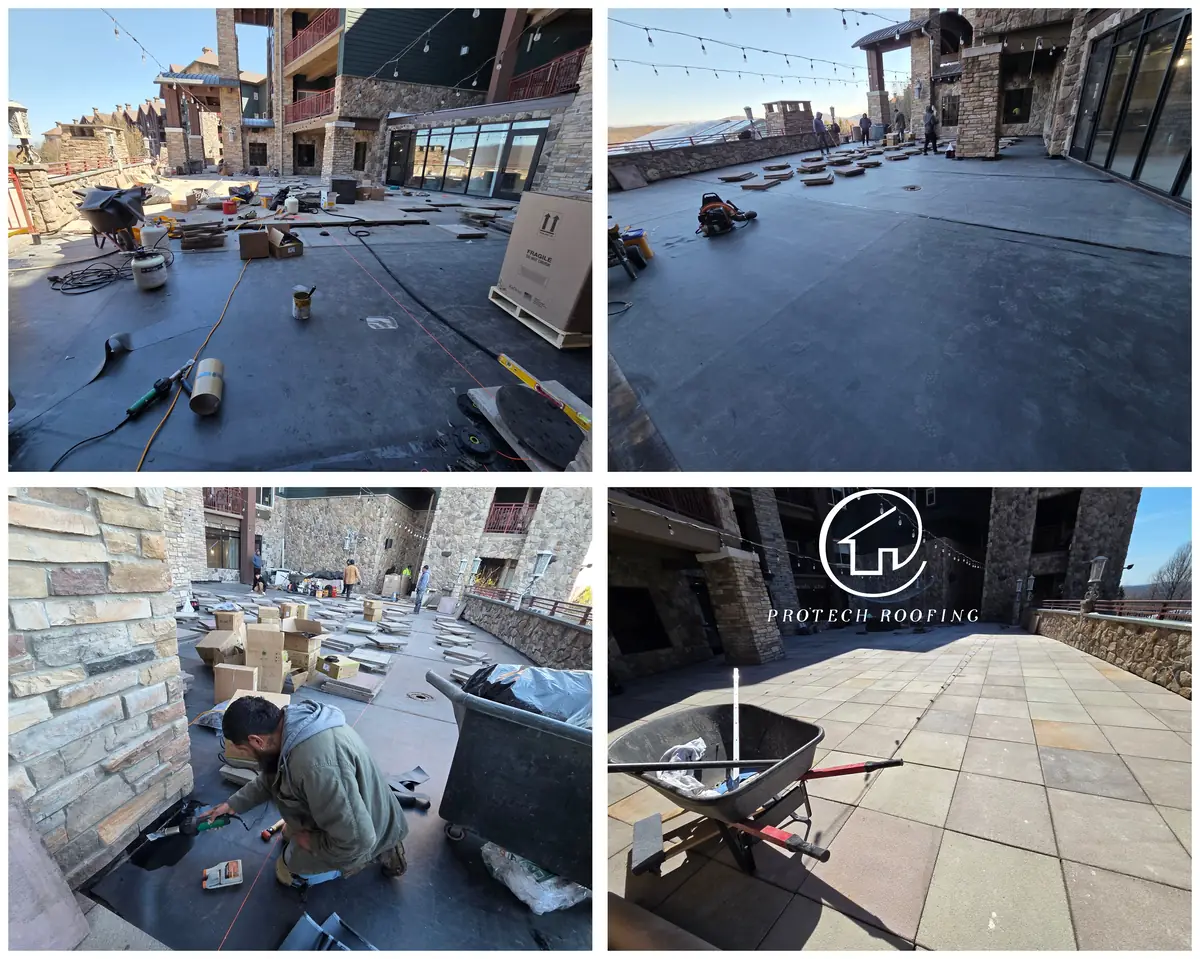 View this photo set full size (opens in a new tab)
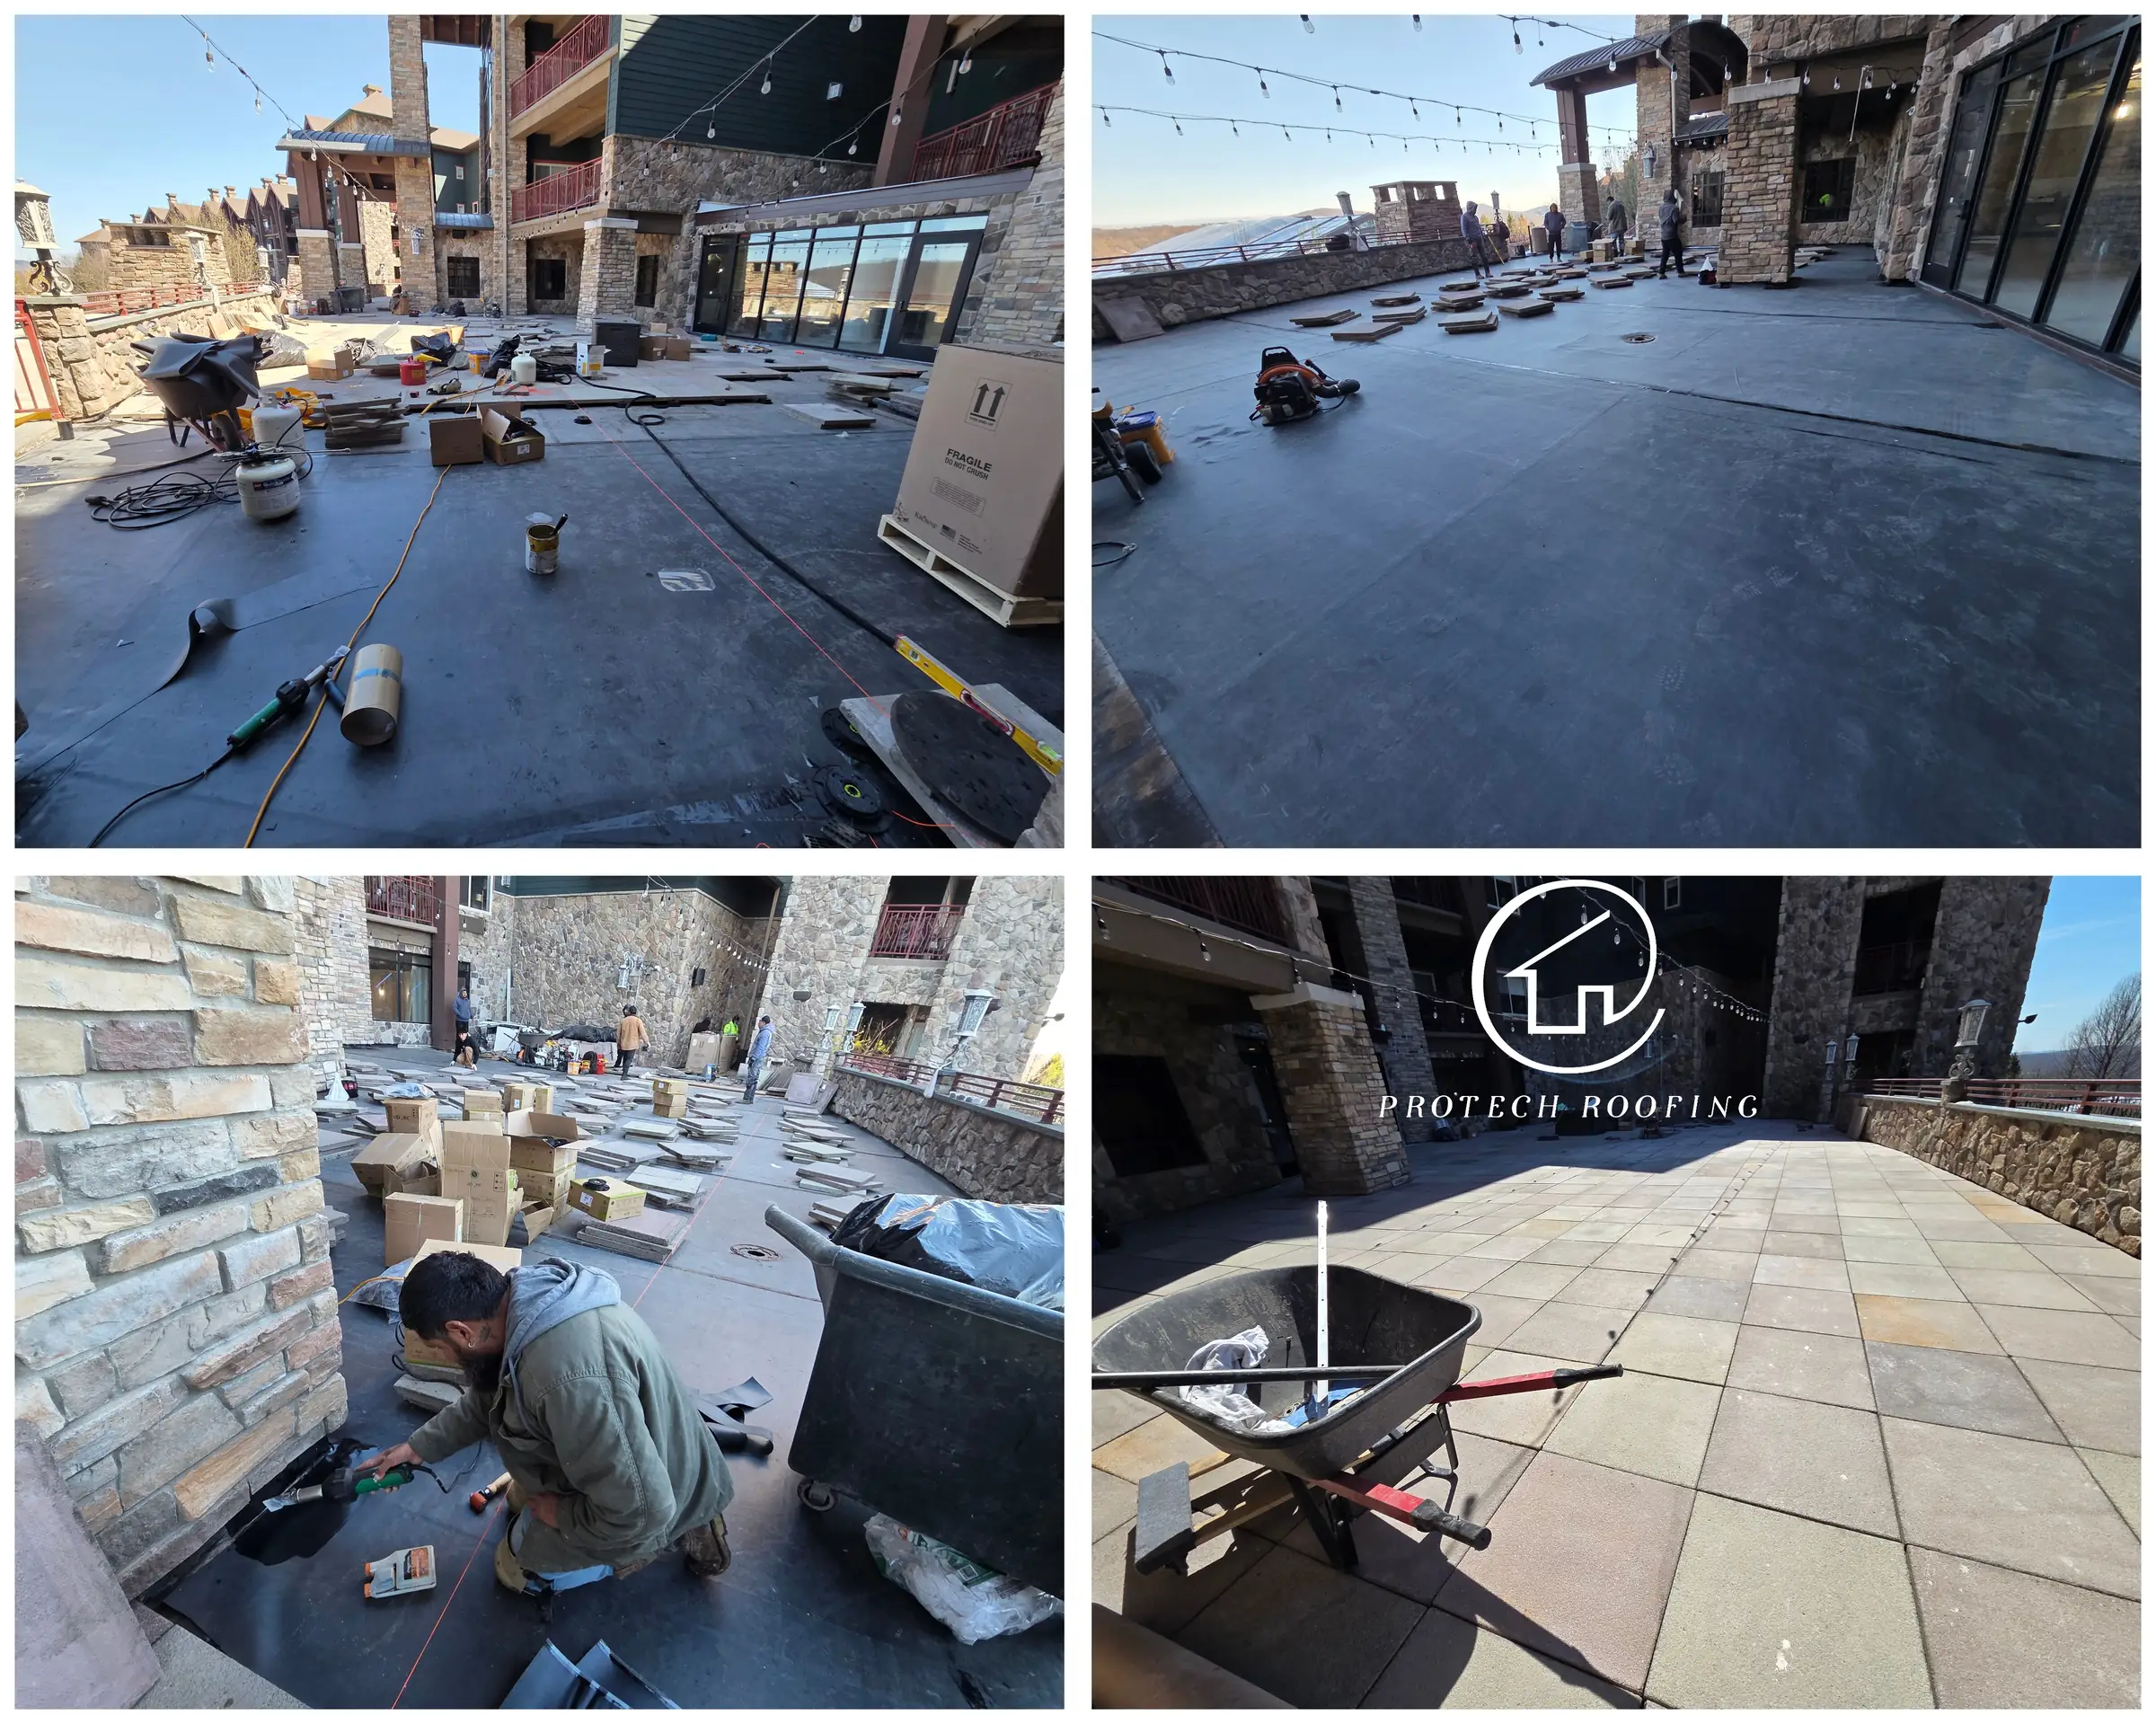
A terrace deck: new EPDM waterproofing membrane, details sealed at the walls, then pavers set over the top. 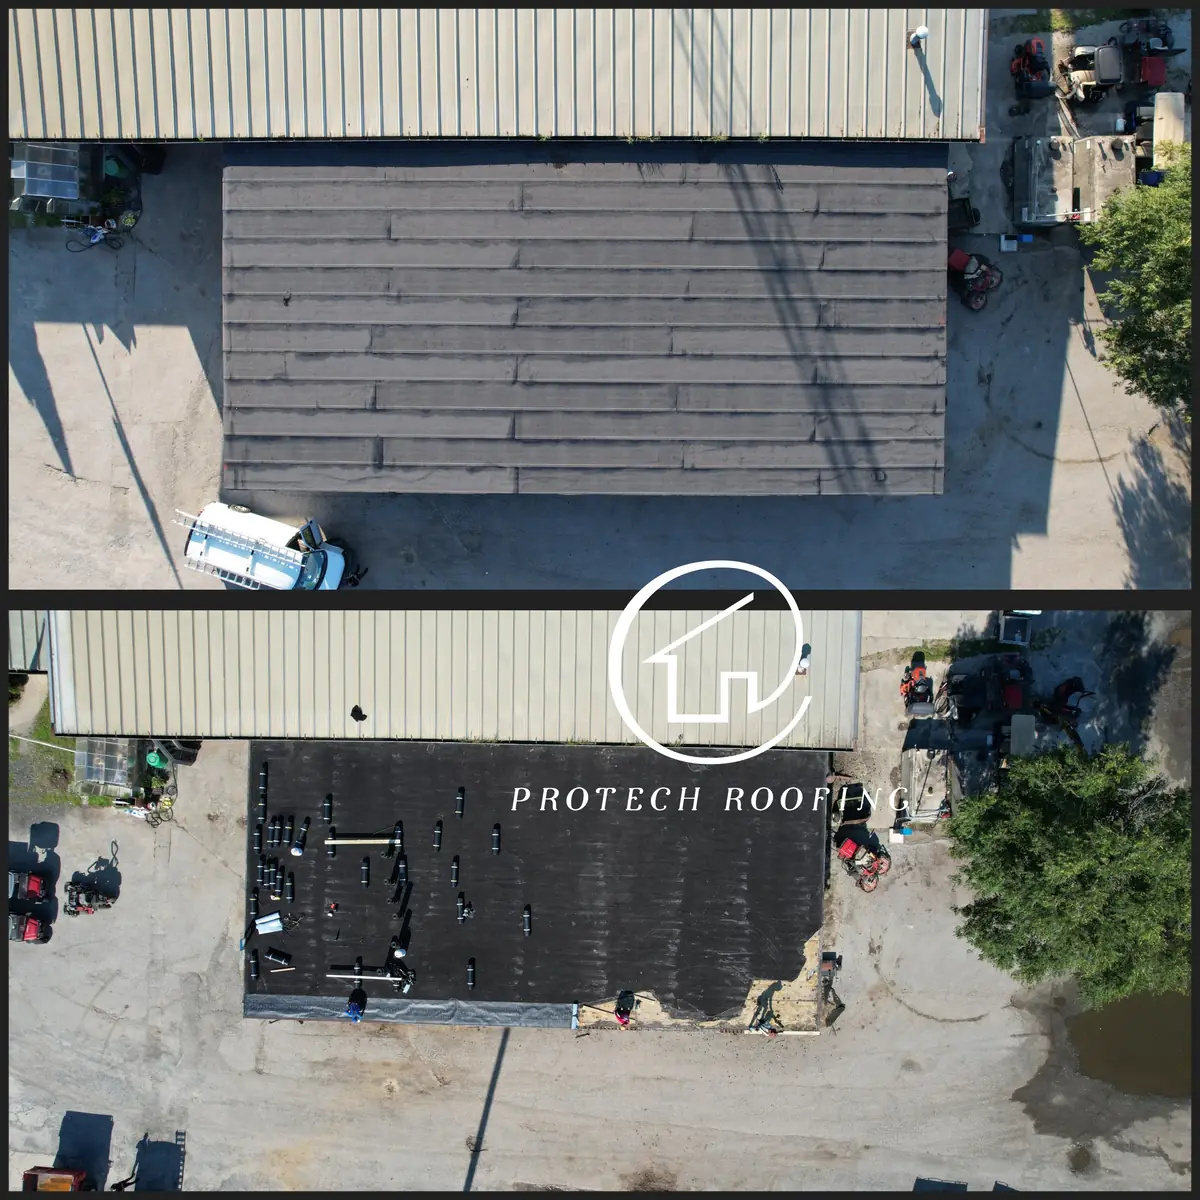 View this photo set full size (opens in a new tab)
Top: the worn old flat roof. Bottom: the old roof is off and new modified bitumen membrane is going down roll by roll. 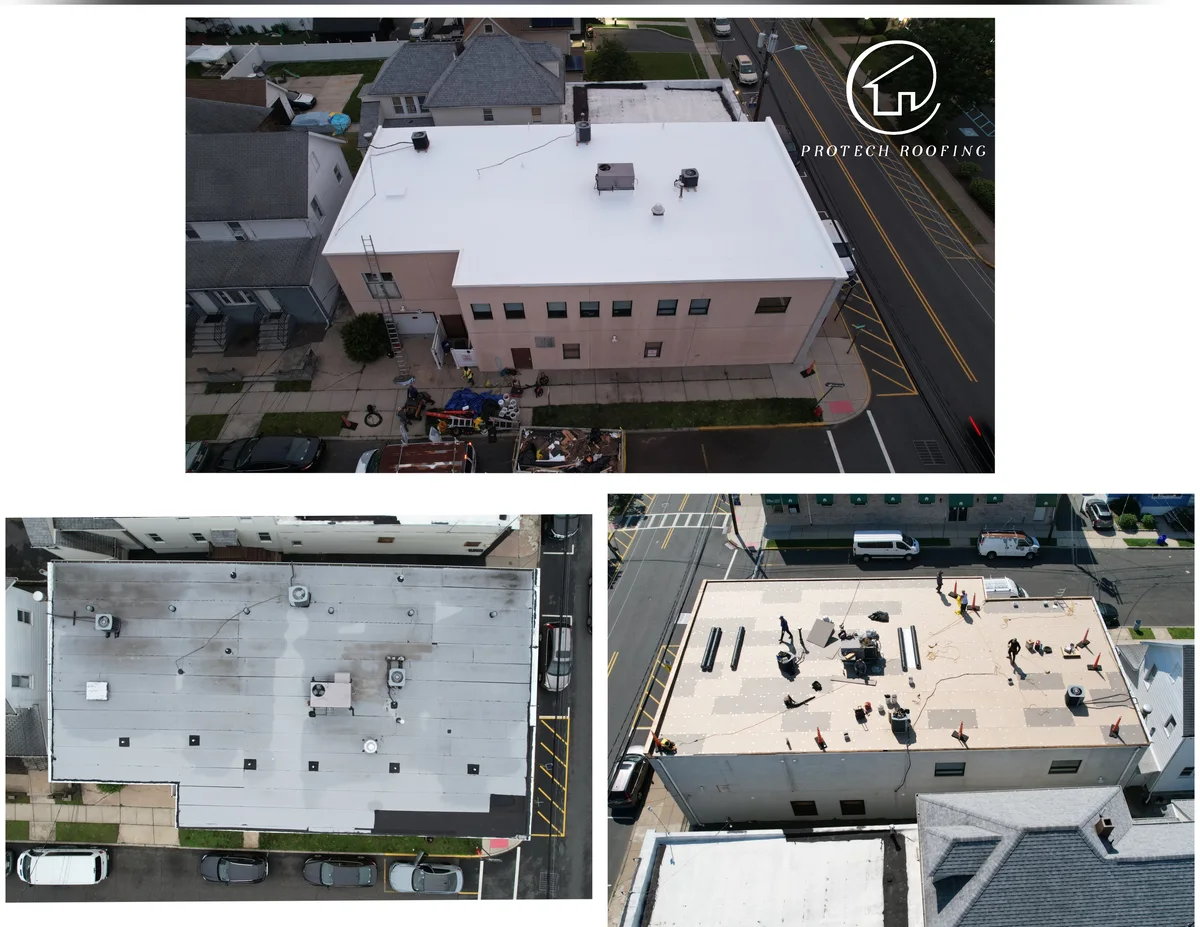 View this photo set full size (opens in a new tab)
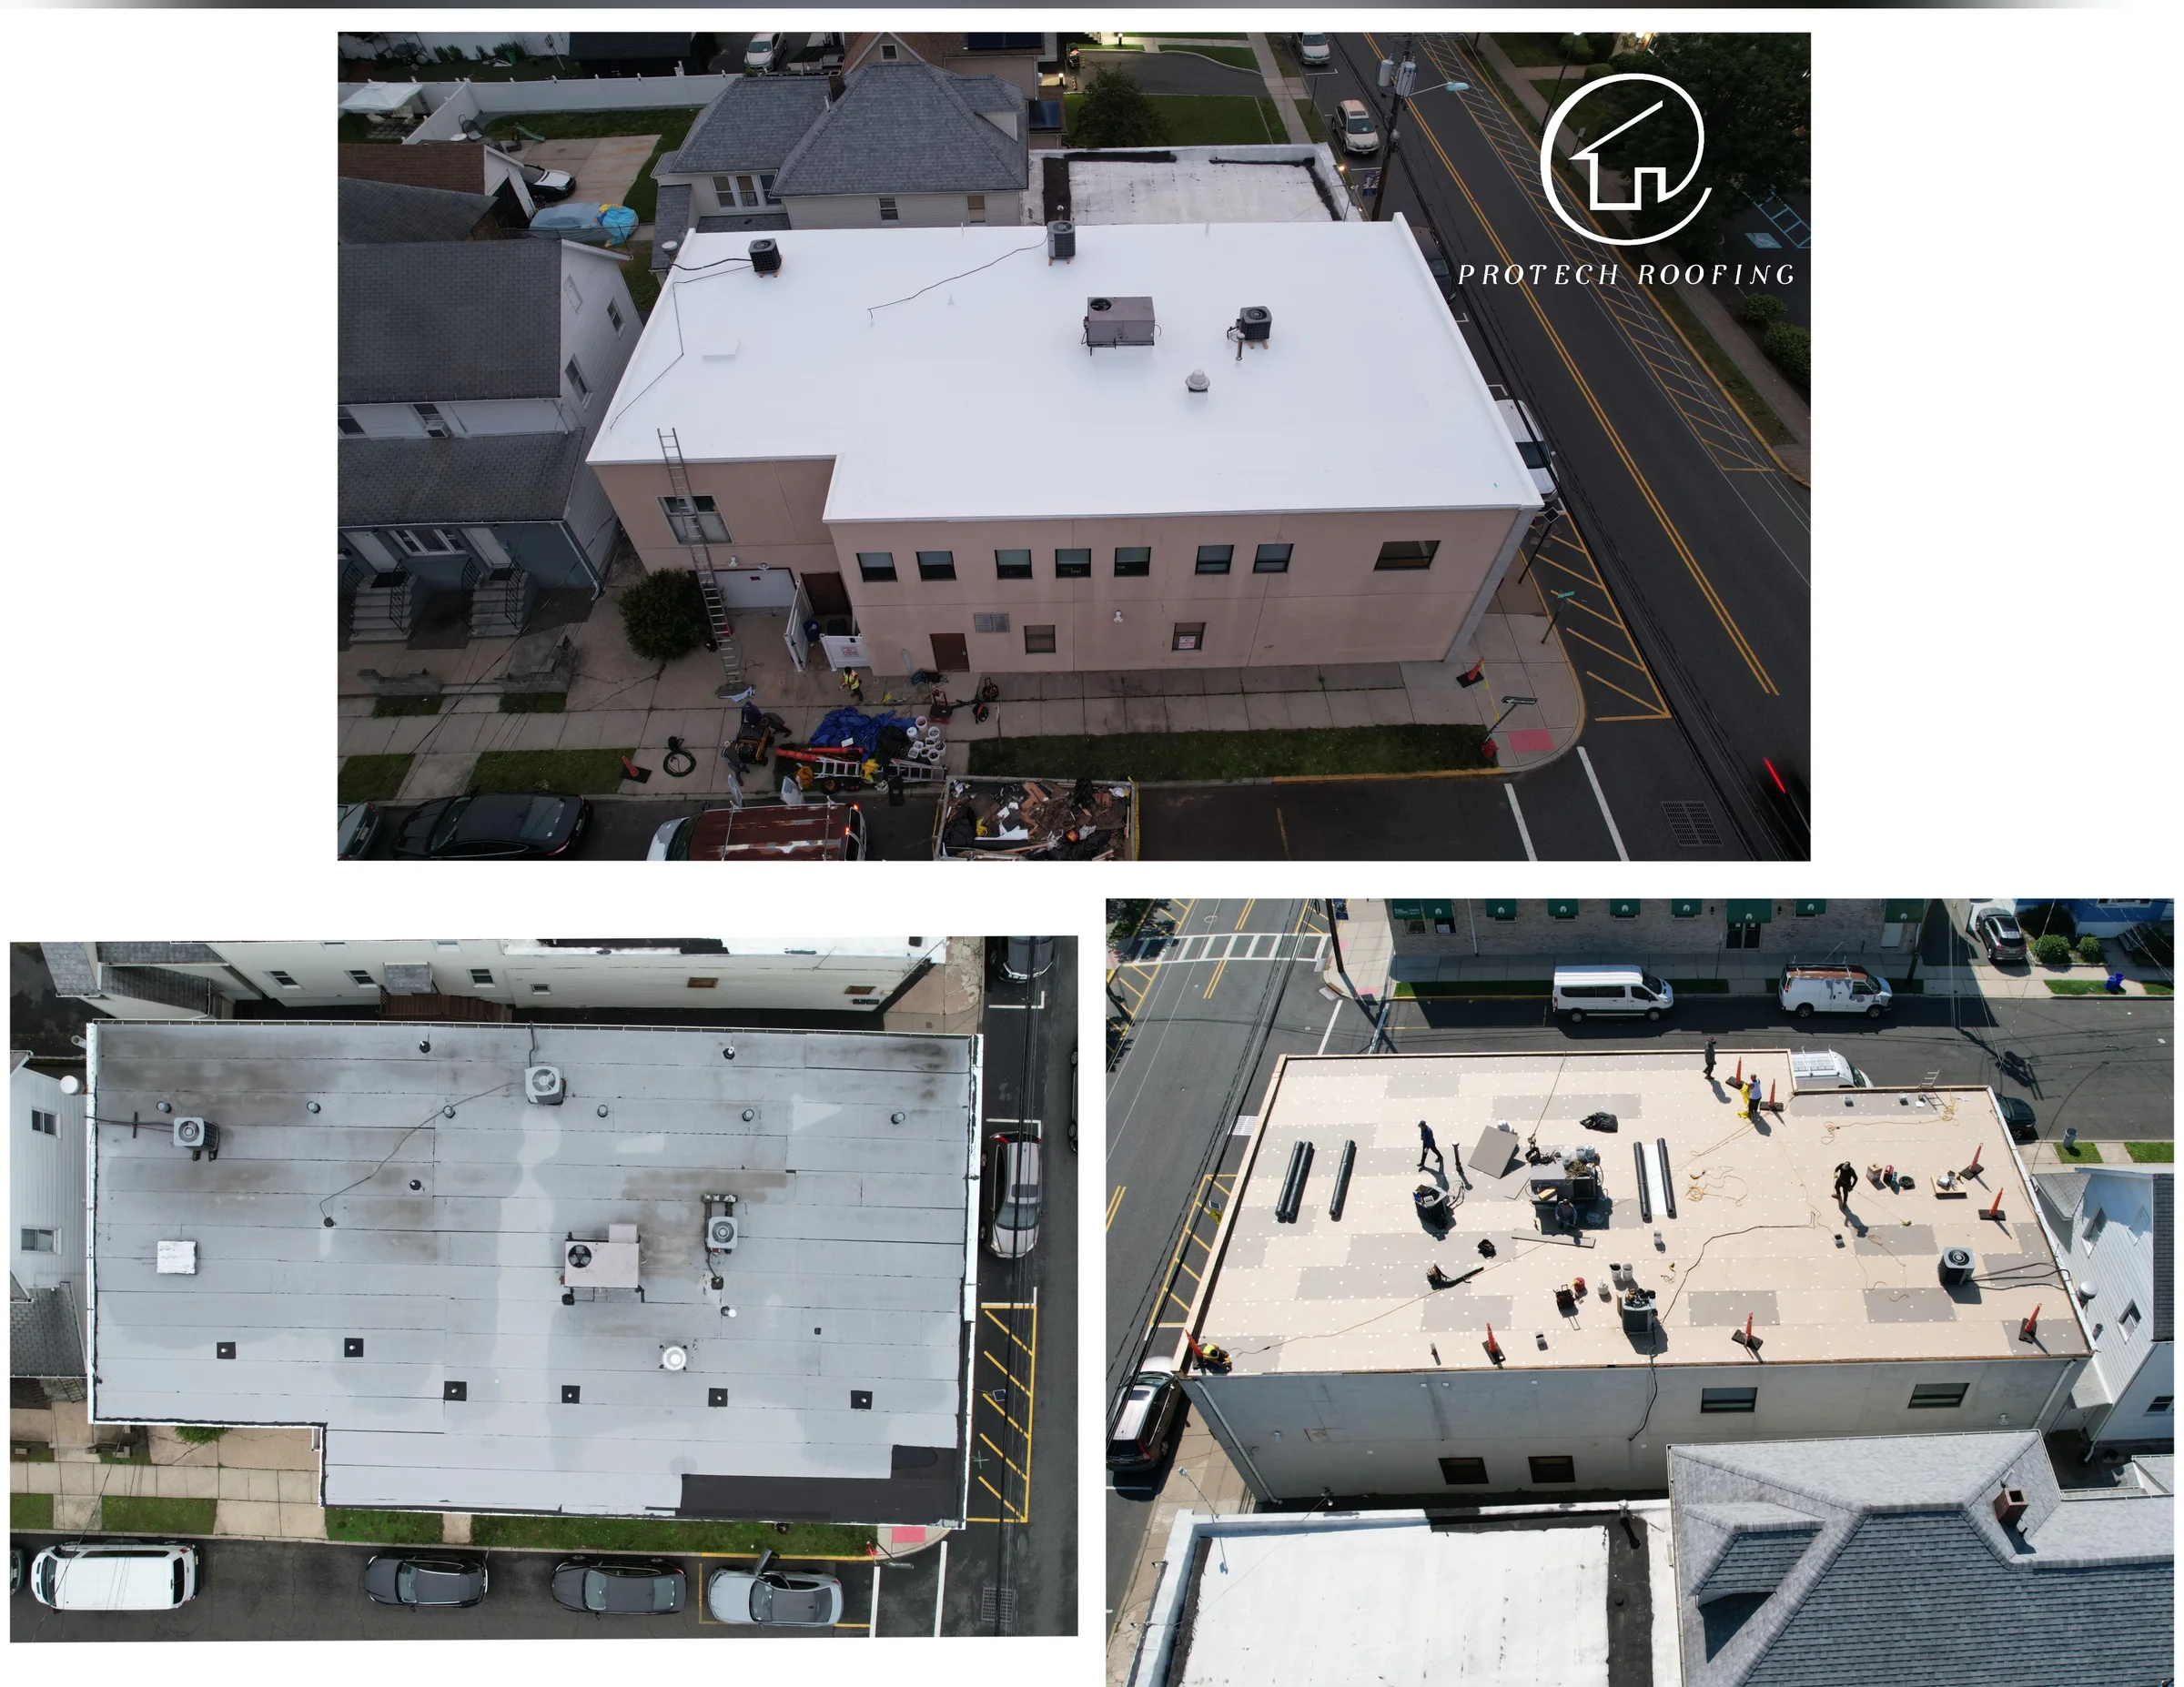
Top: the finished TPO roof with the rooftop units and edges flashed in. Bottom left: the old roof, stained where water ponded. Bottom right: new cover board fastened over the deck before the membrane goes on.
More from our commercial jobs

Installing TPO membrane on an elementary school. 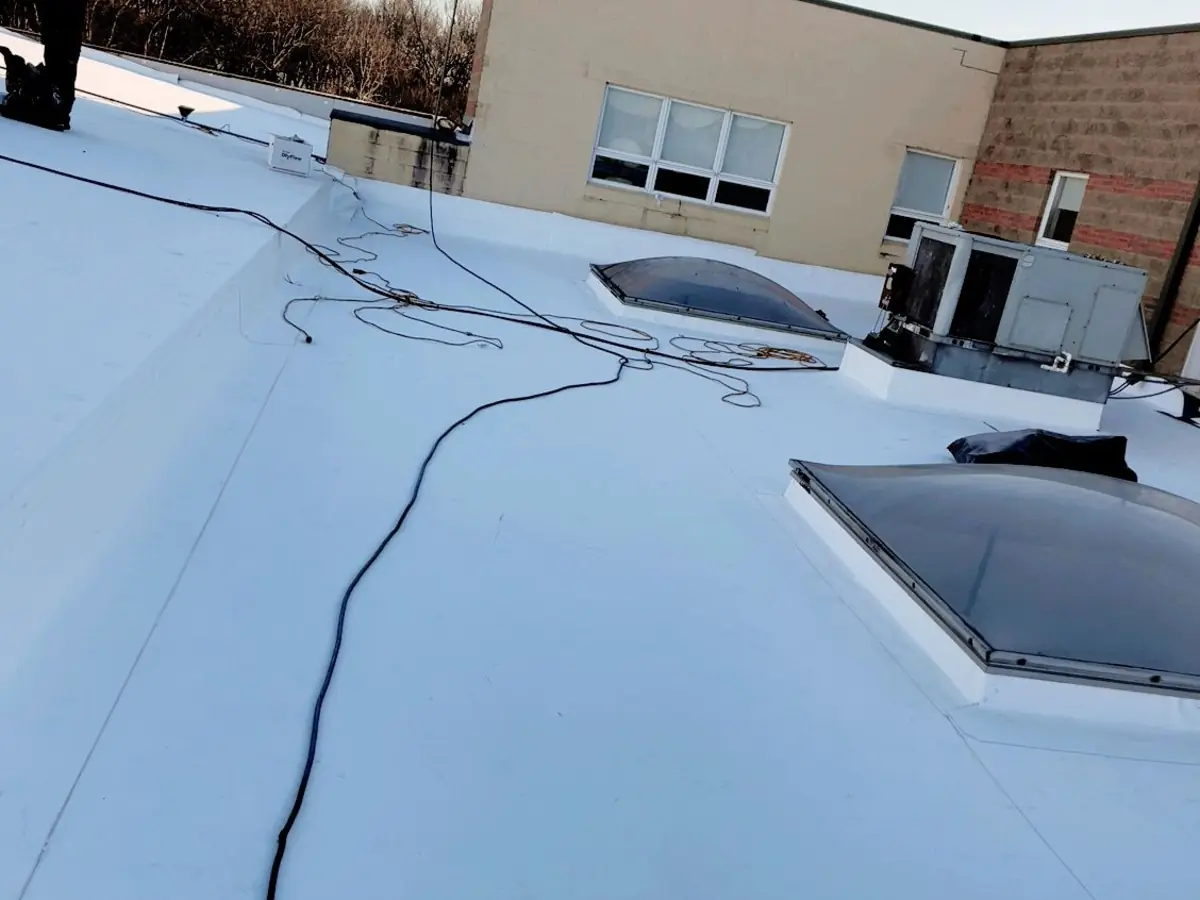
New TPO membrane around two dome skylights and a rooftop HVAC unit, with the parapet wrapped in the same membrane. 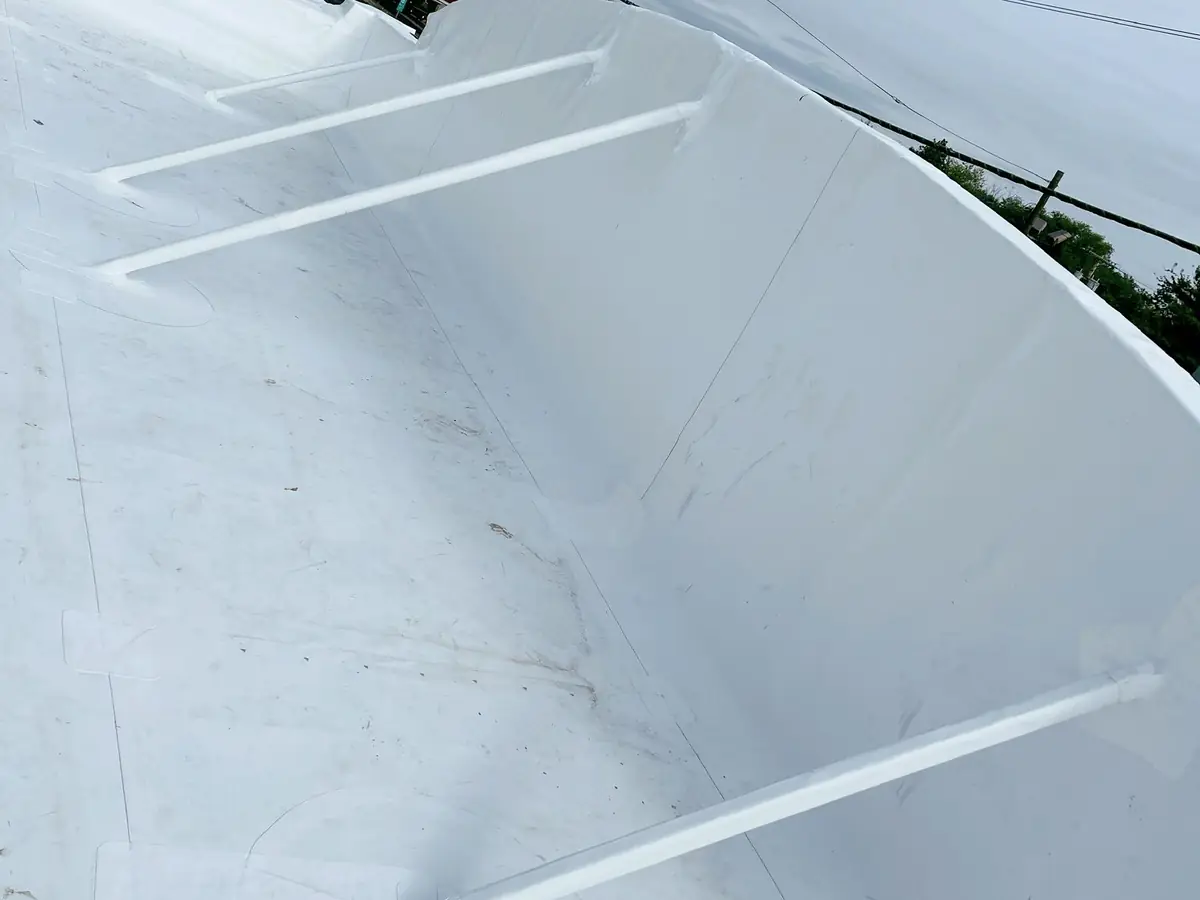
TPO membrane carried up a curved edge wall, with every support bar across it wrapped in the same material, so there is no exposed metal to rust.
Want your roof to be the next one here?
Start with a free inspection and a written estimate.
Free estimate
Tell us about your roof
Send a few details and we will call you back to set a time to look at your roof. You get a written estimate with the scope, materials and price spelled out.
Prefer to talk? Call (201) 881-2431.
- Registered & insured NJ HIC Reg. #13VH12667100
- Family-owned in North Jersey
- Free written estimates, no obligation